I like that this chocolate Swiss roll has all the flavor of a fancy bûche de Noël without all the extra steps. The cake is soft, slightly chocolatey, and perfectly balanced by the light, nutty filling. I can make it ahead of time, it slices beautifully, and it’s always a hit at any gathering. Whether I dust it with cocoa powder or top it with a little whipped cream, it’s a dessert that feels both nostalgic and special.
Ingredients
(Note: All ingredient amounts are listed in the recipe card below.)
Cake: cooking spray ¼ cup all-purpose flour ¼ cup cocoa powder, plus more for dusting ¼ teaspoon salt ⅛ teaspoon baking soda 3 large eggs ¼ cup white sugar ½ teaspoon vanilla extract 2 ½ tablespoons melted butter
Filling: ¾ cup heavy cream 2 teaspoons powdered sugar ½ teaspoon vanilla extract ⅛ cup chocolate-hazelnut spread (such as Nutella)
Directions
Prepare the pan: I preheat the oven to 325°F (165°C). I spray a jelly roll or rimmed baking sheet with cooking spray and line it with parchment paper to prevent sticking.
Make the cake batter: In a medium bowl, I sift together the flour, cocoa powder, salt, and baking soda. In a separate large bowl, I beat the eggs and sugar with an electric mixer on high for about 5 minutes until the mixture becomes thick, pale, and tripled in volume. I mix in the vanilla extract, then add the dry ingredients in thirds, alternating with the melted butter. I mix gently just until combined.
Bake the cake: I pour the batter evenly into the prepared pan, making sure it’s less than ¼ inch thick. I bake for 8–9 minutes, or until a toothpick inserted in the center comes out clean. I let it cool completely in the pan.
Roll the cake: Once cooled, I flip the cake upside-down onto a new sheet of parchment paper and gently peel off the original parchment. Using the clean parchment as a guide, I roll the cake from one end into a tight spiral. I refrigerate it for 2 hours to set its shape.
Make the filling: While the cake chills, I whip the cream, powdered sugar, and vanilla together in a bowl until medium peaks form. I gently fold in the chocolate-hazelnut spread until fully combined and smooth.
Assemble the roll: I carefully unroll the chilled cake, spread the filling evenly across the surface, then re-roll it gently. I dust the top with cocoa powder before serving.
Serve: I slice the roll using a serrated or bread knife for clean cuts. If I have leftover filling, I spoon a little extra onto each slice when serving.
I sometimes flavor the filling with espresso powder or orange zest for a twist. When I want something richer, I replace the whipped cream with a light chocolate ganache. For a festive version, I brush the cake with raspberry jam before adding the filling, or top the finished roll with powdered sugar and fresh berries. I also love using hazelnut or almond liqueur for an adult touch.
Storage/Reheating
I keep the Swiss roll covered and refrigerated for up to 3 days. It tastes best when slightly chilled. I don’t reheat it—this dessert is meant to be enjoyed cold or at room temperature. If I need to store it longer, I freeze it (without the cocoa dusting) for up to a month, wrapped tightly in plastic and foil. I thaw it overnight in the refrigerator before serving.
FAQs
Why did my cake crack when rolling?
If the cake cools too long before rolling, it can crack. I roll it gently while still slightly pliable, then chill it to set the shape.
Can I make the cake in advance?
Yes, I can bake the cake a day ahead, keep it rolled in parchment, and fill it the next day.
What’s the best way to cut the roll?
I use a sharp serrated knife and wipe it clean between slices to keep the edges neat.
Can I use a different filling?
Absolutely. Whipped cream, buttercream, jam, or even peanut butter mousse all work beautifully.
Can I make it gluten-free?
Yes, I can replace the all-purpose flour with a 1:1 gluten-free blend.
How do I make it extra chocolatey?
I add a tablespoon of melted dark chocolate to the filling or drizzle chocolate ganache on top.
Can I skip the Nutella?
Yes, I can use plain whipped cream or mix in melted chocolate instead.
How do I prevent the cake from sticking?
I always use parchment paper and spray it lightly before spreading the batter.
Can I use Dutch-processed cocoa?
Yes, it works fine—just note that it gives a darker, richer flavor.
Can I double the recipe?
Yes, I can easily double it and bake it on two pans for a larger batch or to make two rolls.
Conclusion
I love how this chocolate Swiss roll turns a few simple ingredients into something that feels elegant and decadent. The light cocoa sponge paired with the creamy chocolate-hazelnut filling makes every bite a treat. It’s perfect for celebrations, afternoon coffee, or anytime I want to impress with minimal effort.
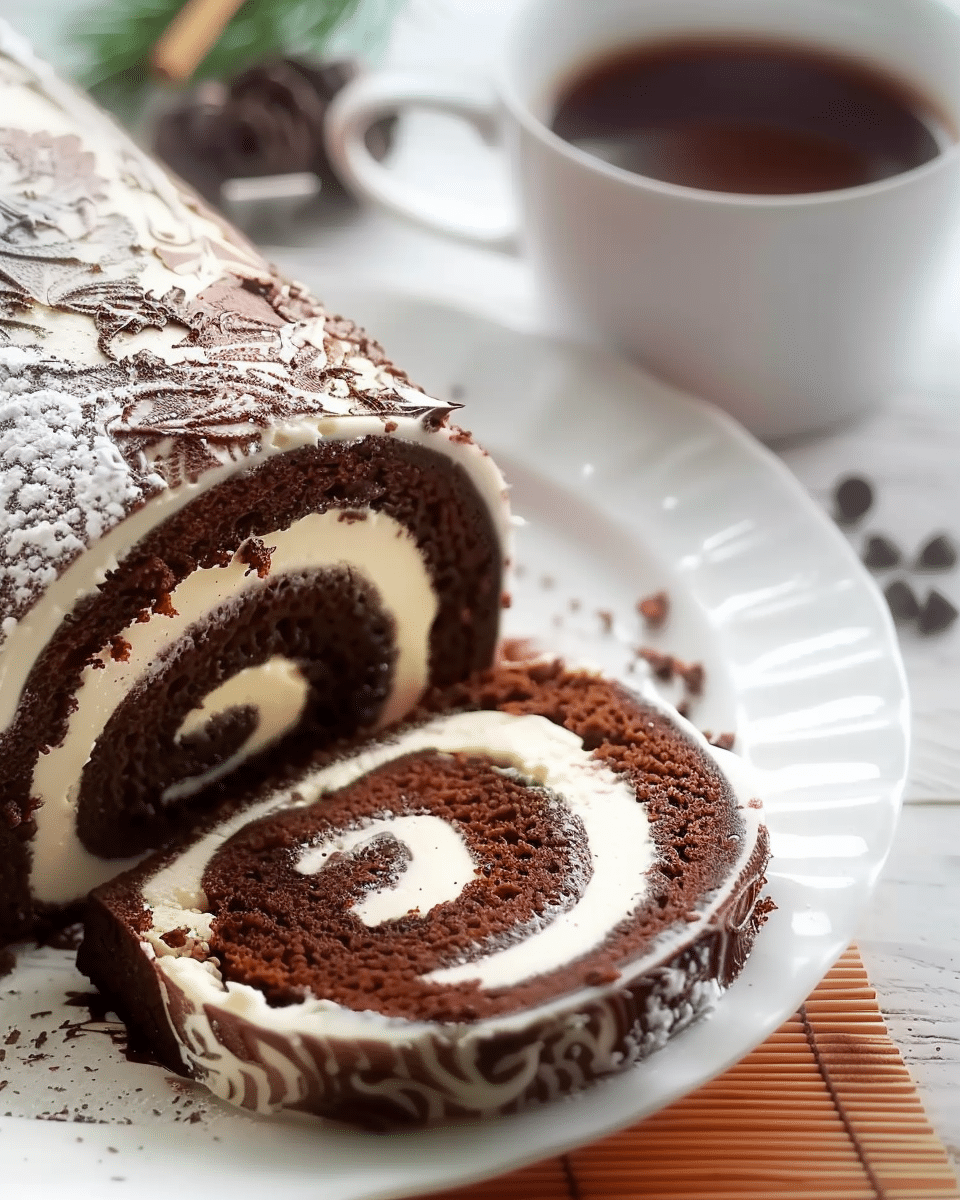
This Chocolate Swiss Roll features a light, airy cocoa sponge wrapped around a smooth chocolate-hazelnut whipped cream filling. Elegant yet simple to make, it’s a classic dessert that looks impressive and tastes indulgent without being heavy.
Author:Amy
Prep Time:30 minutes
Cook Time:10 minutes
Total Time:2 hours 40 minutes
Yield:6 servings
Category:Dessert
Method:Baked and Rolled
Cuisine:European
Diet:Vegetarian
Ingredients
Cooking spray
¼ cup all-purpose flour
¼ cup cocoa powder, plus more for dusting
¼ tsp salt
⅛ tsp baking soda
3 large eggs
¼ cup white sugar
½ tsp vanilla extract
2 ½ tbsp melted butter
Filling:
¾ cup heavy cream
2 tsp powdered sugar
½ tsp vanilla extract
⅛ cup chocolate-hazelnut spread (such as Nutella)
Instructions
Preheat and prepare pan: Preheat oven to 325°F (165°C). Spray a jelly roll or rimmed baking sheet with cooking spray and line with parchment paper.
Make the batter: In a bowl, sift together flour, cocoa powder, salt, and baking soda. In another bowl, beat eggs and sugar on high speed for 5 minutes until thick and pale. Mix in vanilla, then gently fold in dry ingredients in thirds, alternating with melted butter.
Bake the cake: Spread batter evenly in prepared pan (less than ¼ inch thick). Bake 8–9 minutes or until a toothpick inserted comes out clean. Let cool completely in the pan.
Roll the cake: Flip the cooled cake onto a new parchment sheet, peel off the original, and roll the cake gently using the parchment as a guide. Refrigerate for 2 hours to set the shape.
Make the filling: Whip heavy cream, powdered sugar, and vanilla until medium peaks form. Fold in chocolate-hazelnut spread until smooth.
Assemble: Unroll the cake carefully, spread the filling evenly, and re-roll. Dust the top with cocoa powder.
Serve: Slice with a serrated knife, wiping between cuts for clean slices. Serve slightly chilled or at room temperature.
Notes
Roll the cake while still slightly pliable to prevent cracking.
Use parchment paper and a light coat of spray to avoid sticking.
For added flavor, mix orange zest or espresso powder into the filling.
Dust with powdered sugar or top with berries for a festive presentation.
Best served chilled; can be frozen for up to one month.


