I love this recipe because it’s effortless, rich, and packed with textures — crunchy, creamy, chewy, and smooth all at once. The Oreo base gives it a perfect crunch, while the peanut butter ice-cream adds a salty-sweet creaminess that pairs beautifully with the cherries and marshmallows. The drizzle of caramel and chunks of Picnic bars make it irresistible. It’s a no-cook, make-ahead dessert that’s ideal for celebrations or when I want to impress without turning on the oven.
Ingredients
(Note: All ingredient amounts are listed in the recipe card below.)
2 x 137g packets Oreo cookies 80g butter, melted, cooled 3 x 500ml tubs peanut butter ice-cream 1 cup mini white marshmallows 1 cup frozen pitted cherries, quartered 2 tbsp desiccated coconut, toasted, cooled 2 x 46g Picnic bars, sliced diagonally 1/2 cup salted caramel topping
Directions
I grease a 6.5cm-deep, 10.5cm x 20cm (base) and 13cm x 23cm (top) loaf pan, then line the base and sides with baking paper, extending it about 5cm above the edges for easy removal later.
I place the Oreo cookies in a food processor and process them until fine crumbs form. I add the melted butter and process again until fully combined. I press one-third of this mixture into the base of the prepared pan and freeze it for 10 minutes until firm.
Meanwhile, I let the peanut butter ice-cream sit out for about 10 minutes to soften slightly — it should be soft enough to stir but not melted. I fold in the marshmallows, cherries, and half the toasted coconut until evenly mixed.
I spoon half the ice-cream mixture into the pan and smooth the top with a spatula. I sprinkle half the remaining cookie crumbs over it and press gently to compact. Then, I layer the rest of the ice-cream mixture on top and finish with the remaining cookie crumbs. I cover the pan with plastic wrap and freeze for at least 6 hours or until completely firm.
When ready to serve, I remove the cake from the freezer and let it stand for about 5 minutes. I carefully lift it out using the baking paper and place it on a serving plate. I top it with sliced Picnic bars and drizzle generously with salted caramel topping. Then I slice and serve immediately.
Servings and Timing
This recipe serves 8 people. It takes about 20 minutes to prepare, plus at least 6 hours of freezing time. It’s a great make-ahead dessert for birthdays, holidays, or warm summer days.
Variations
I sometimes swap the peanut butter ice-cream for chocolate or vanilla for a different flavor twist. For a nut-free version, I use caramel or cookie dough ice-cream instead. I also like to mix in crushed pretzels or peanut brittle for extra crunch. If I want a richer topping, I drizzle melted chocolate or add a dollop of whipped cream before serving.
Storage/Reheating
I keep the ice-cream cake tightly wrapped in plastic wrap or in an airtight container in the freezer for up to 2 weeks. It’s best served straight from the freezer after softening slightly at room temperature for about 5 minutes. I never refreeze leftovers once they’ve fully melted to preserve the texture.
FAQs
Can I use a different type of ice-cream?
Yes, I can use chocolate, caramel, or vanilla ice-cream — they all work beautifully with the rocky road mix-ins.
Can I make this nut-free?
Yes, I replace the peanut butter ice-cream and Picnic bars with nut-free alternatives.
How can I make the base without a food processor?
I place the Oreos in a zip-lock bag and crush them with a rolling pin until fine, then mix in the butter by hand.
Can I use fresh cherries instead of frozen?
Yes, fresh pitted cherries work great — they just add a bit more juiciness.
How do I make the slice easier to cut?
I dip a sharp knife in hot water, wipe it dry, and slice quickly for clean cuts.
Can I prepare it ahead of time?
Absolutely, I usually make it the night before serving so it’s fully set and ready to go.
Can I use a round cake tin instead of a loaf pan?
Yes, any shape pan works as long as it’s deep enough to hold the layers.
What can I use instead of Picnic bars?
I like to use Snickers, Mars Bars, or even chopped peanut butter cups for similar flavor.
Can I use homemade ice-cream?
Yes, if I have homemade peanut butter or vanilla ice-cream, it works wonderfully here.
How long should I let it thaw before serving?
I find that 5 minutes at room temperature is just enough to slice cleanly while keeping the texture firm.
Conclusion
I love how this peanut butter rocky road ice-cream cake combines creamy, crunchy, and chewy layers into one irresistible dessert. With Oreos, cherries, marshmallows, and a caramel drizzle, it’s everything I crave in a decadent frozen treat. It’s effortless, indulgent, and guaranteed to impress — the perfect dessert to celebrate any occasion or to treat myself to something truly special.
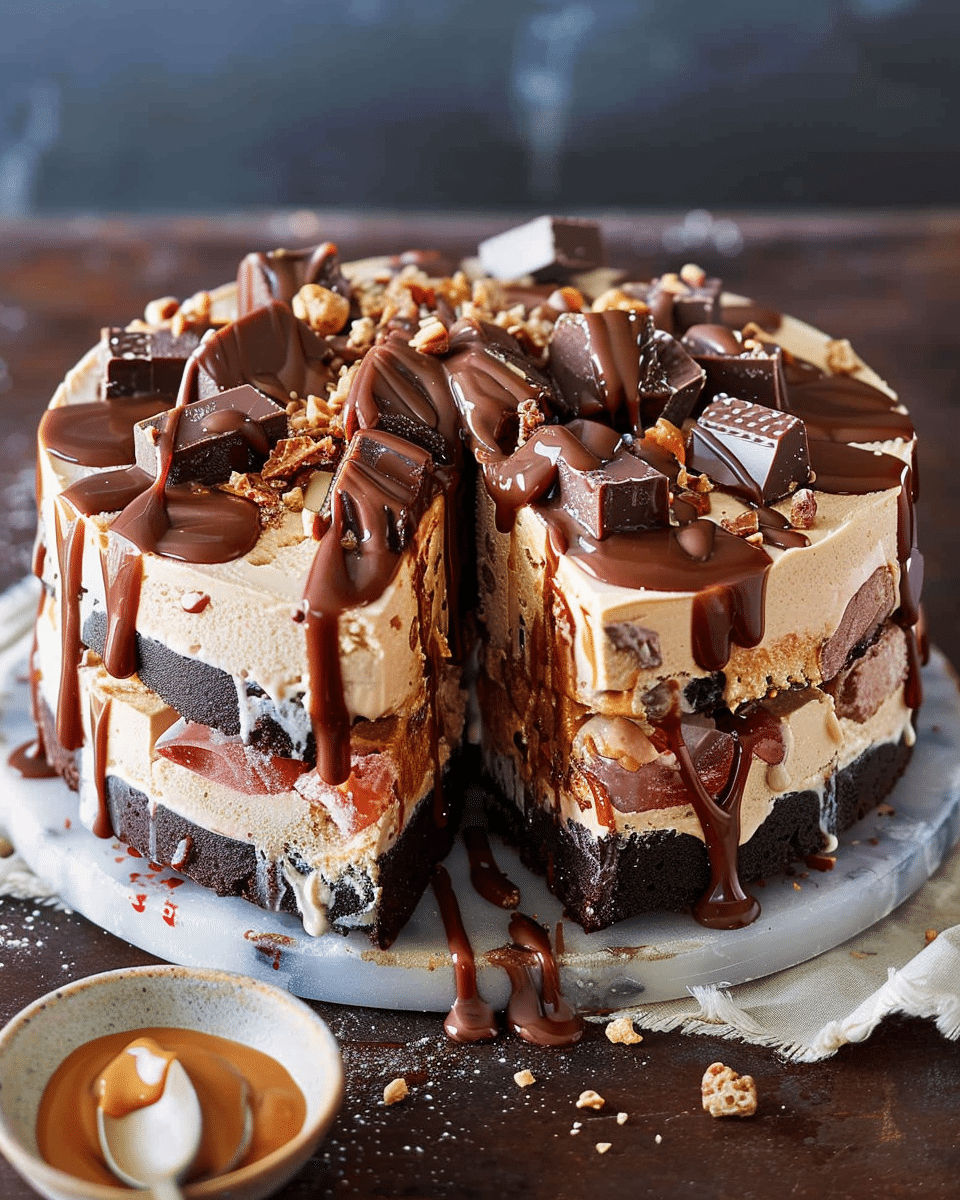
A decadent no-bake peanut butter rocky road ice-cream cake made with an Oreo cookie base, creamy peanut butter ice-cream, marshmallows, cherries, and Picnic bar chunks, finished with a drizzle of salted caramel. A rich, make-ahead dessert perfect for celebrations or hot days.
Author:Amy
Prep Time:20 minutes
Cook Time:0 minutes
Total Time:6 hours 20 minutes (including freezing)
Yield:8 servings
Category:Dessert
Method:No-Bake
Cuisine:Australian
Diet:Vegetarian
Ingredients
2 x 137g packets Oreo cookies
80g butter, melted and cooled
3 x 500ml tubs peanut butter ice-cream
1 cup mini white marshmallows
1 cup frozen pitted cherries, quartered
2 tbsp desiccated coconut, toasted and cooled
2 x 46g Picnic bars, sliced diagonally
1/2 cup salted caramel topping
Instructions
Grease a 6.5cm-deep, 10.5cm x 20cm (base) and 13cm x 23cm (top) loaf pan. Line the base and sides with baking paper, extending 5cm above the edges for easy removal.
Process Oreo cookies in a food processor until fine crumbs form. Add melted butter and process again until combined.
Press one-third of the crumb mixture into the base of the pan and freeze for 10 minutes until firm.
Allow peanut butter ice-cream to soften for 10 minutes until scoopable. Fold in marshmallows, cherries, and half the toasted coconut.
Spoon half of the ice-cream mixture into the pan, smooth the top, and sprinkle with half of the remaining crumbs. Press gently to compact.
Layer the remaining ice-cream mixture on top, then finish with the remaining crumbs. Cover with plastic wrap and freeze for at least 6 hours or until firm.
When ready to serve, remove from the freezer and let stand 5 minutes. Lift out using the baking paper and transfer to a serving plate.
Top with sliced Picnic bars and drizzle generously with salted caramel topping. Slice and serve immediately.
Notes
Swap peanut butter ice-cream for chocolate or vanilla for a flavor twist.
For a nut-free version, use caramel or cookie dough ice-cream and omit Picnic bars.
Add crushed pretzels or peanut brittle for extra crunch.
Make up to a day ahead for best results.
Store in the freezer for up to 2 weeks; thaw 5 minutes before serving.


