One Bowl 30 Minute Butter Cookies are one of my favorite treats to bake when I want something simple, buttery, and delicious without spending too much time in the kitchen. These delicate cookies have a rich vanilla flavor, lightly crisp edges, and a wonderfully tender center that practically melts in my mouth. I love how just a few everyday ingredients can create cookies that taste and look like they came from a professional bakery.
What makes this recipe even better is that I can prepare the dough in one bowl, pipe it into beautiful rosettes, and bake the cookies in about 30 minutes. Whether I’m making a quick afternoon treat, preparing a holiday cookie platter, or putting together homemade gifts, these classic butter cookies are always a wonderful choice.
Why You’ll Love This Recipe
Quick and easy to make: I can prepare and bake these butter cookies in just 30 minutes, making them perfect for days when I want a homemade dessert without a long preparation process.
Only one mixing bowl: I love that the entire dough comes together in a single bowl, which makes cleanup incredibly simple.
Simple pantry ingredients: I only need six basic ingredients for the cookie dough, along with optional granulated sugar for finishing.
Rich buttery flavor: The generous amount of butter gives these cookies their classic taste and delicate texture.
Melt-in-my-mouth consistency: I love how the combination of powdered sugar and corn starch creates cookies that are tender, light, and slightly crumbly.
Beautiful bakery-style appearance: I can pipe the dough into elegant rosettes that look impressive without requiring complicated decorating skills.
Easy to customize: I can add chocolate, citrus zest, almond flavoring, or a simple glaze to create different variations.
Perfect for making ahead: I can freeze the piped cookie dough and bake fresh cookies whenever I need them.
Great for gifting: These cookies are sturdy enough for careful packaging and make lovely additions to homemade cookie boxes.
Ingredients
(Note: All ingredient amounts are listed in the recipe card below.)
200g salted butter, at room temperature
70g powdered sugar / icing sugar, sifted if lumpy
½ tsp vanilla bean paste or vanilla extract
210g all-purpose flour, sifted if lumpy
30g corn starch
20g heavy cream or milk, room temperature.
Granulated sugar for finishing, optional
Directions
Step 1: Prepare the Oven and Baking Sheet
I begin by preheating my oven to 325°F (165°C). While the oven heats, I line a large baking sheet with parchment paper.
I also prepare a sturdy piping bag fitted with a large open star piping tip. I prefer using a large tip, such as an Ateco #827, because the thick butter cookie dough is easier to pipe through a wider opening.
Step 2: Cream the Butter, Sugar, and Vanilla
In a medium mixing bowl, I combine the softened salted butter, powdered sugar, and vanilla bean paste or vanilla extract.
Using an electric hand mixer, I beat the ingredients on medium-high speed until the mixture becomes light, fluffy, and creamy.
I stop occasionally to scrape down the sides of the bowl, making sure everything mixes evenly. I find that properly creaming the butter and sugar helps give these cookies their delicate texture.
Step 3: Incorporate the Flour and Corn Starch
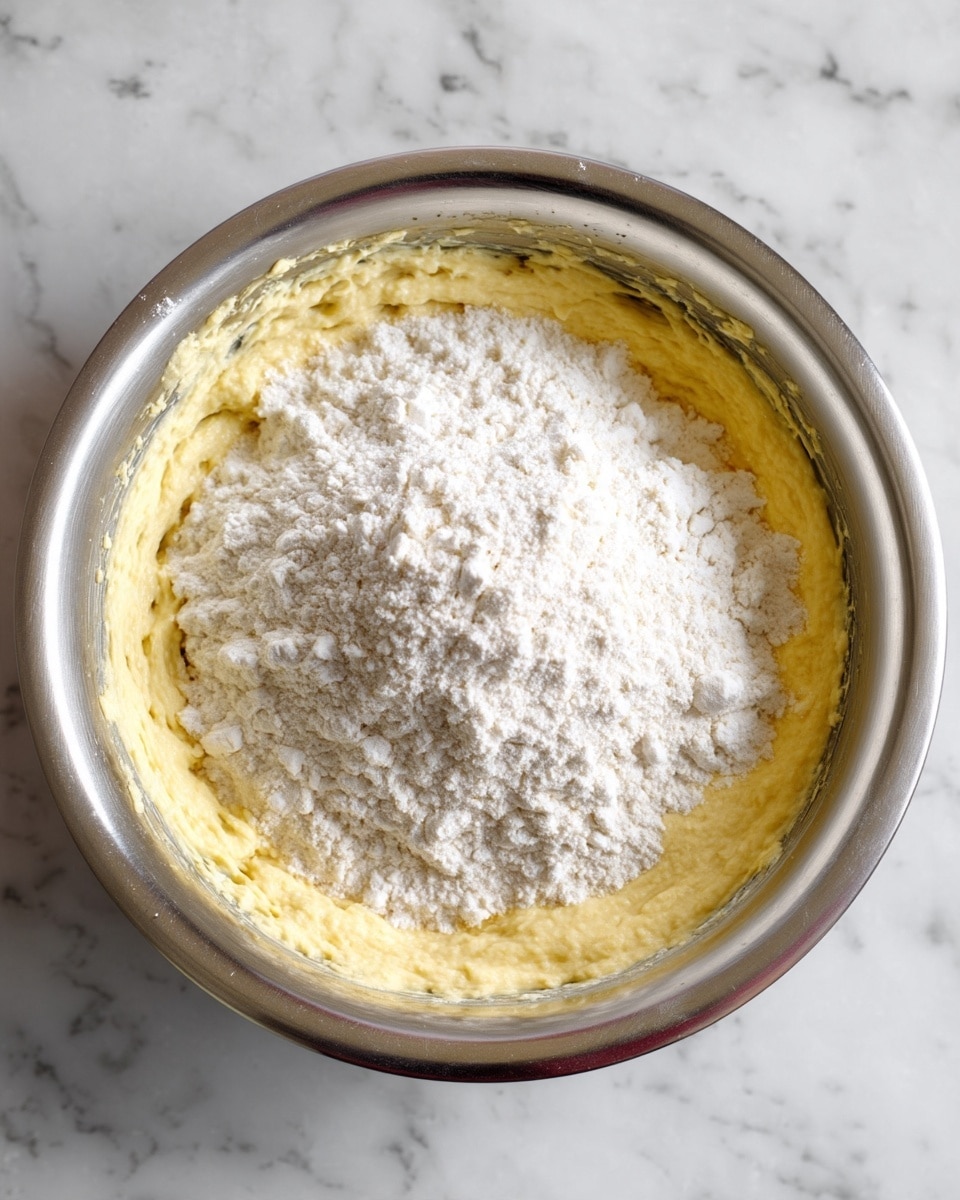
Next, I add the all-purpose flour and corn starch to the butter mixture.
I mix on low speed until the dry ingredients are just incorporated. I avoid overmixing because I want the finished cookies to remain tender and crumbly rather than dense.
Once the flour mixture is combined, I add the room-temperature heavy cream or milk and mix again until the dough becomes smooth and pipeable.
Step 4: Transfer the Dough to a Piping Bag
I place my piping bag inside a tall glass or container and fold the edges over the rim to keep it open.
Using a spatula, I transfer the cookie dough into the bag. I then gently push the dough toward the piping tip with a bench scraper, removing any large air pockets.
If the bag feels too heavy or difficult to handle, I fill it with half the dough and add the remaining dough later.
Step 5: Pipe the Butter Cookies
I secure the corners of the parchment paper with tiny dots of cookie dough if the paper moves around.
Holding the piping bag straight above the baking sheet, I apply steady pressure and pipe the dough into circular rosettes.
I aim for cookies approximately 4.5 cm in diameter, making a circular motion until the dough loops back onto itself.
I arrange the cookies in three rows of five, leaving a little space between each one to allow for slight spreading during baking.
If a cookie doesn’t look the way I want, I simply scrape the dough off the parchment paper, return it to the piping bag, and try again.
Step 6: Add the Optional Sugar Topping
Once all the cookies are piped, I sprinkle them lightly with granulated sugar if I want a little extra sweetness and crunch.
I particularly enjoy this simple finishing touch because it gives the cookies a delicate sparkle without overpowering their buttery flavor.
Step 7: Bake the Cookies
I place the baking sheet in the preheated oven and bake the cookies for 13–14 minutes.
I look for cookies that are set on top and lightly golden brown around the edges.
When I prefer a slightly crispier butter cookie, I extend the baking time by another minute or two, watching carefully to prevent excessive browning.
Step 8: Cool the Cookies
I remove the cookies from the oven and, if I added sugar before baking, sprinkle them with a little more granulated sugar while they’re still hot.
I leave the cookies on the baking sheet for 15–20 minutes so they can firm up before moving them.
Once they’re sturdy enough to handle, I transfer them to a wire rack and allow them to cool completely.
I love enjoying these cookies with a cup of tea or coffee, especially when their delicate buttery texture has fully developed.
Servings and Timing
Servings: 15 cookies
Prep Time: 15 minutes
Cook Time: 15 minutes
Total Time: 30 minutes
Cooling Time: 15–20 minutes (additional)
Category: Cookies
Method: Baking
Cuisine: American
I find that this recipe produces approximately 15 medium-sized butter cookies when I pipe them into rosettes around 4.5 cm wide. If I make smaller cookies, I can get a few extra servings, although I adjust the baking time accordingly.
The preparation and baking take approximately 30 minutes, making this a convenient recipe when I need something sweet in a hurry. I do allow extra time for cooling before storing or decorating the cookies.
Variations
Chocolate-Dipped Butter Cookies
I love dipping half of each cooled butter cookie into melted dark, milk, or white chocolate.
After dipping, I place the cookies on parchment paper and allow the chocolate to set completely. This creates an elegant finish that works beautifully for holiday cookie boxes and special occasions.
Lemon Butter Cookies
When I want a fresh citrus flavor, I add finely grated lemon zest to the butter and sugar mixture.
I sometimes finish the cooled cookies with a simple lemon glaze made from powdered sugar and fresh lemon juice. The bright citrus flavor complements the rich butter beautifully.
Almond Butter Cookies
For a slightly nutty flavor, I replace a small portion of the vanilla extract with almond extract.
I find that almond extract adds a lovely bakery-style aroma without requiring additional ingredients or complicated preparation.
Cinnamon Sugar Butter Cookies
I combine a little ground cinnamon with granulated sugar and sprinkle the mixture over the piped cookies before baking.
This variation gives the cookies a warm, comforting flavor that I particularly enjoy during autumn and winter.
Vanilla Glazed Butter Cookies
I mix powdered sugar with a small amount of milk and vanilla extract to create a smooth glaze.
Once the cookies are completely cool, I drizzle the glaze over the tops and allow it to set before storing them.
Holiday Sprinkle Butter Cookies
For festive occasions, I decorate the piped cookies with colorful sprinkles before baking.
I enjoy using different colors for Christmas, birthdays, and celebrations because the simple butter cookie dough works as a perfect base for decorative toppings.
Squiggle Butter Cookies
Instead of piping traditional rosettes, I use a large basketweave or ribbon piping tip to create decorative squiggles.
I find that larger squiggles may require a slightly longer baking time, while smaller ones usually bake in approximately the same time as the original rosettes.
I also prefer working with freshly mixed dough for larger shapes because it tends to hold its piped design better.
Storage/Reheating
Storing at Room Temperature
I store my butter cookies in an airtight container at room temperature for up to one week.
Before storing them, I make sure they have cooled completely. If I place warm cookies into a sealed container, trapped moisture can soften their texture and make them soggy.
I find that these cookies often taste even better after a day or two because the buttery vanilla flavor becomes more pronounced.
Refrigerating the Cookie Dough
When I want to prepare the dough ahead of time, I cover it tightly and refrigerate it for up to 2 days.
Before piping, I let the dough soften at room temperature until it’s easy to work with again.
I avoid letting the dough become overly warm because very soft butter cookie dough may spread too much during baking.
Freezing Unbaked Butter Cookies
I particularly love freezing the unbaked cookies because it allows me to enjoy freshly baked butter cookies whenever I want.
I pipe the dough onto a parchment-lined baking sheet and place the sheet in the freezer until the cookies are completely solid.
Once frozen, I carefully remove the cookies from the parchment paper and transfer them to an airtight freezer-safe container.
I keep the unbaked cookies frozen for up to 3 months.
When I’m ready to bake, I arrange the frozen cookies on a lined baking sheet, sprinkle them with granulated sugar if desired, and bake them directly from frozen. I allow a little extra baking time if necessary.
Freezing Baked Butter Cookies
I can also freeze fully baked and cooled butter cookies for up to 2–3 months for best quality.
I place them in an airtight freezer-safe container, separating layers with parchment paper to prevent breakage.
When I want to serve them, I let them thaw at room temperature until completely defrosted.
Reheating Butter Cookies
I usually serve butter cookies at room temperature because they don’t need reheating.
However, if they have softened slightly during storage, I can refresh them in a 300°F (150°C) oven for approximately 3–5 minutes.
I allow them to cool completely afterward so they regain some of their delicate crispness.
FAQs
1. Why are my butter cookies spreading too much during baking?
I find that excessive spreading usually happens when the butter is too warm or the dough becomes overly soft before baking.
I always start with softened butter rather than melted butter, and I make sure my oven is fully preheated.
If the piped cookies feel too soft, I refrigerate them for 10–15 minutes before placing them in the oven. This helps the rosettes maintain their decorative shape.
2. Can I make these butter cookies without a piping bag?
Yes, I can make these cookies without a piping bag.
When I don’t have one available, I scoop small portions of dough onto the prepared baking sheet and gently flatten them with a fork or the bottom of a glass.
The cookies won’t have the traditional piped rosette appearance, but I still get the same delicious buttery flavor.
I keep the portions evenly sized to help them bake consistently.
3. Can I substitute unsalted butter for salted butter?
Yes, I can use unsalted butter instead of salted butter.
When I make this substitution, I add ¼ teaspoon of salt along with the flour.
I find that this small addition balances the sweetness and brings out the rich buttery flavor.
4. Why is my butter cookie dough too stiff to pipe?
When my dough feels too stiff, I usually check whether the butter was properly softened before mixing.
Cold butter can make the dough difficult to push through the piping tip.
I prefer using a large open star tip and working with smaller amounts of dough in the piping bag.
If the dough is slightly firm, I gently warm the piping bag between my hands until it becomes easier to pipe.
5. What is the purpose of corn starch in butter cookies?
I use corn starch because it helps create the delicate, melt-in-my-mouth texture that makes these cookies so special.
Corn starch reduces the overall protein content of the flour mixture, which helps limit gluten development and produces a more tender cookie.
I find that it also contributes to the slightly crumbly texture that I love in traditional butter cookies.
6. Can I use milk instead of heavy cream?
Yes, I can substitute room-temperature milk for heavy cream.
I prefer using full-fat milk because it provides a little richness and helps create a smooth, pipeable dough.
I can also make the cookies without cream or milk, but I find that the dough becomes slightly more difficult to pipe.
7. How do I know when the butter cookies are done baking?
I look for cookies that are set on top with lightly golden edges.
I avoid waiting until the entire cookie becomes deeply golden because that can make the texture drier than I prefer.
If I want a crispier cookie, I leave the cookies in the oven for another minute or two.
I also remember that they continue to firm up while cooling on the baking sheet.
8. Can I freeze the butter cookie dough before baking?
Yes, and this is one of my favorite ways to prepare these cookies ahead of time.
I pipe the dough into rosettes on a parchment-lined baking sheet and freeze them until solid.
Then I transfer the frozen cookies to an airtight container and store them in the freezer for up to 3 months.
When I’m ready to bake, I place the frozen cookies directly into the oven and add a little extra baking time if needed.
9. Can I decorate these butter cookies with chocolate or icing?
Absolutely. I love decorating these cookies because their delicate buttery flavor pairs beautifully with different toppings.
I can dip half of each cooled cookie into melted chocolate, drizzle them with vanilla icing, or add a simple powdered sugar glaze.
I always let the cookies cool completely before decorating so the toppings set properly.
For special occasions, I sometimes finish them with sprinkles or finely chopped nuts.
10. How can I keep my butter cookies crisp and fresh for longer?
I make sure the cookies are properly baked and completely cooled before storing them.
I place them in an airtight container and keep them in a cool, dry location away from moisture and direct sunlight.
I avoid refrigerating baked cookies unnecessarily because condensation can affect their texture.
When I’m making these cookies for gifts or longer storage, I bake them until the edges are slightly more golden to help them stay sturdy and maintain their delicate crispness.
Conclusion
One Bowl 30 Minute Butter Cookies are one of those timeless recipes I enjoy making again and again. I love how a handful of simple ingredients can turn into beautiful, buttery cookies with delicate crisp edges and a soft, melt-in-my-mouth texture.
These One Bowl 30 Minute Butter Cookies are rich, buttery, and delicately crisp around the edges with tender, melt-in-your-mouth centers. Made with six simple ingredients in one mixing bowl, these classic vanilla butter cookies are piped into beautiful bakery-style rosettes and baked to golden perfection. Perfect for afternoon treats, holidays, and homemade gifts.
Author:Amy
Ingredients
200g salted butter, at room temperature
70g powdered sugar / icing sugar, sifted if lumpy
½ tsp vanilla bean paste or vanilla extract
210g all-purpose flour, sifted if lumpy
30g corn starch
20g heavy cream or milk, room temperature
Granulated sugar for finishing, optional
Instructions
Preheat the oven to 325°F (165°C). Line a large baking sheet with parchment paper and prepare a sturdy piping bag fitted with a large open star tip, such as Ateco #827.
In a medium mixing bowl, combine the softened salted butter, powdered sugar, and vanilla bean paste or vanilla extract. Beat with an electric hand mixer on medium-high speed until light, fluffy, and creamy, scraping down the sides of the bowl as needed.
Add the all-purpose flour and corn starch. Mix on low speed until just incorporated, avoiding overmixing. Add the room-temperature heavy cream or milk and mix until the dough is smooth and pipeable.
Place the piping bag inside a tall glass and fold the edges over the rim. Transfer the cookie dough into the bag using a spatula, then gently push the dough toward the piping tip with a bench scraper to remove air pockets. Fill the bag in batches if necessary.
Secure the parchment paper with small dots of cookie dough if needed. Hold the piping bag vertically above the baking sheet and pipe circular rosettes approximately 4.5 cm in diameter. Arrange the cookies in three rows of five, leaving space between them for slight spreading.
Sprinkle the piped cookies lightly with granulated sugar if desired for extra sweetness and a delicate crunchy finish.
Bake in the preheated oven for 13–14 minutes, or until the cookies are set on top and lightly golden around the edges. For slightly crispier cookies, bake for an additional 1–2 minutes, watching carefully to prevent overbrowning.
Remove the cookies from the oven and sprinkle with additional granulated sugar while still hot, if desired. Allow them to cool on the baking sheet for 15–20 minutes before transferring to a wire rack to cool completely. Serve with tea or coffee and enjoy.
Notes
Butter temperature: Use softened butter at room temperature for easy mixing and piping. The butter should be soft but not melted.
Choosing a piping tip: A large open star piping tip, such as Ateco #827, works best for creating beautiful rosettes and makes the thick dough easier to pipe.
Perfect dough consistency: The dough should be smooth and soft enough to pipe while still holding its shape. If it feels too stiff, add a tiny splash of room-temperature milk or cream.
Avoid overmixing: Once the flour and corn starch are added, mix only until combined to keep the cookies light, tender, and delicate.
Cookie size: Pipe rosettes approximately 4.5 cm in diameter for even baking. Try to keep all cookies similar in size.
Optional sugar topping: Sprinkle granulated sugar over the cookies before baking for a delicate crunch. Add a little more while the cookies are still hot if desired.
Baking tips: Bake until the edges are lightly golden. For crispier cookies, extend the baking time by 1–2 minutes while watching carefully.
Cooling: Allow the cookies to rest on the baking sheet for 15–20 minutes before transferring them to a wire rack. They are delicate while hot and become firmer as they cool.
Flavor variations: Add lemon zest, orange zest, almond extract, or dip the cooled cookies halfway into melted chocolate for a delicious variation.
Make ahead: Pipe the cookie dough onto a parchment-lined tray and freeze until firm. Transfer the frozen cookies to an airtight freezer-safe container and bake directly from frozen, adding a few extra minutes if necessary.
Storage: Store completely cooled cookies in an airtight container at room temperature for up to 5–7 days. Keep them in a cool, dry place to maintain their delicate texture.
Serving suggestion: Enjoy these buttery cookies with coffee, tea, or hot chocolate, or package them in decorative boxes for homemade gifts.