I love this recipe because it transforms a simple chocolate cake into a luxurious dessert centerpiece. The glaze has a deep, pure chocolate flavor, a silky texture, and a mirror-like shine that lasts for days. It doesn’t use condensed milk, which makes the finish thinner, smoother, and more elegant. Once I learned the technique, it became my favorite way to finish special-occasion cakes — it’s surprisingly achievable at home!
Ingredients
(Note: All ingredient amounts are listed in the recipe card below.)
1 x 20cm / 8″ chocolate cake (2 layers) 2 batches dark chocolate ganache
Gelatine for glaze: 2 1/2 tbsp water (cold tap water) 4 tsp gelatine powder
Mirror glaze: 2/3 cup water 2/3 cup pure cream (regular whipping cream) 1 cup cocoa powder, unsweetened, sifted 1 cup + 2 tbsp white sugar (caster or superfine)
Decorating (optional): Gold dust or gold leaf
Directions
Prepare the Cake and Ganache
I start by refrigerating the cake layers for at least an hour so they’re easier to handle. Then I trim the cake to make it level and frost it smoothly with the chocolate ganache. It’s important that the frosting is completely smooth, because any bumps or dents will show through the mirror glaze. Once frosted, I refrigerate the cake again for at least 1 hour before glazing.
Make the Mirror Glaze
Bloom the gelatine: I place the cold water in a small bowl, sprinkle the gelatine over it, and mix gently so all the powder is moistened. I leave it for about 5 minutes, until it becomes a firm, rubbery mass.
Mix cocoa and water: In a medium saucepan, I combine the cocoa powder and water, stirring until it forms a smooth paste.
Add cream and sugar: I add a splash of cream to loosen the cocoa paste, then pour in the rest of the cream and sugar. I stir gently (never whisk) until combined — avoiding vigorous mixing helps prevent bubbles.
Heat and dissolve: I place the saucepan over medium-high heat and bring it just to the boil. As soon as it starts boiling, I remove it from the heat and add the bloomed gelatine. I stir gently until the gelatine completely dissolves, leaving me with a glossy, lump-free glaze.
Cool and Strain the Glaze
I pour the glaze through a fine mesh strainer into a shallow bowl, keeping the distance short to avoid creating bubbles. Then I twist the bowl gently between my hands to bring any remaining bubbles to the surface and remove them if needed.
I press cling wrap directly onto the surface of the glaze to prevent a skin from forming and let it cool at room temperature for about 2 hours — until it reaches 30°C (86°F). Just before using, I strain it a second time into a jug, again pouring gently to keep it perfectly smooth.
Glaze the Cake
I place the chilled cake on a wire rack set over a tray to catch the excess glaze. Starting from the center, I pour the glaze in a steady, thick stream, moving outward in a spiral motion until the entire cake is covered and the glaze drapes evenly down the sides.
If I spot any gaps, I quickly pour a little extra glaze over those areas before it sets. The glaze sets within about 10 minutes, so I transfer the cake carefully to a serving platter before it firms up.
For any small imperfections, I smooth them over gently with a warmed palette knife.
Slice and Serve
To slice the cake cleanly, I dip a sharp knife into warm water, wipe it dry, and cut in one smooth motion. I repeat this for each slice to keep the edges neat and glossy.
Servings and Timing
This recipe makes enough to glaze one 20cm (8-inch) two-layer cake and serves about 12 people. It takes roughly 6 hours total — 1 hour of prep, 5 hours of cooling and resting time. It’s best made the same day you plan to serve the cake, but it can also be refrigerated once set.
Variations
I sometimes add a touch of espresso powder to the glaze for a mocha flavor or a teaspoon of vanilla for extra depth. For a striking look, I divide the glaze and tint portions with food coloring to create marbled effects. A white chocolate version also works beautifully by swapping cocoa powder for melted white chocolate and adjusting the sugar to taste.
Storage/Reheating
Once glazed, I keep the cake in a cool room (below 22°C) or refrigerate it if the room is warm. The mirror glaze acts as a seal, so I don’t cover the cake — it stays shiny and fresh for up to 4 days. The glaze itself can be stored in the fridge for up to a week or frozen for up to 2 months. When reheating, I warm it gently in 15–30 second bursts in the microwave, stirring between each until smooth again.
FAQs
Why does the glaze need to be 30°C (86°F)?
At this temperature, the glaze spreads thinly and smoothly without melting the ganache underneath.
Can I use condensed milk in the glaze?
I prefer not to — this version gives a thinner, shinier, and longer-lasting finish.
How do I prevent bubbles in the glaze?
I stir gently, strain carefully, and avoid pouring from a height.
Can I use any cake for this glaze?
Yes, but I prefer a dense, level cake like chocolate or mud cake for best results.
How long does the glaze stay shiny?
It stays glossy for several days when stored properly.
Can I refrigerate the glazed cake?
Yes, and it won’t lose its shine — just bring it to room temperature before serving.
What if my glaze sets before I pour it?
I reheat it gently until it reaches the correct temperature again.
Can I make this glaze in advance?
Yes, I often make it a day ahead and store it in the fridge, then reheat and strain before using.
How do I fix lumps or bubbles after pouring?
I use a warm palette knife to gently smooth any imperfections.
What decorations go well with mirror glaze?
Gold leaf, edible glitter, or chocolate curls add an elegant finishing touch.
Conclusion
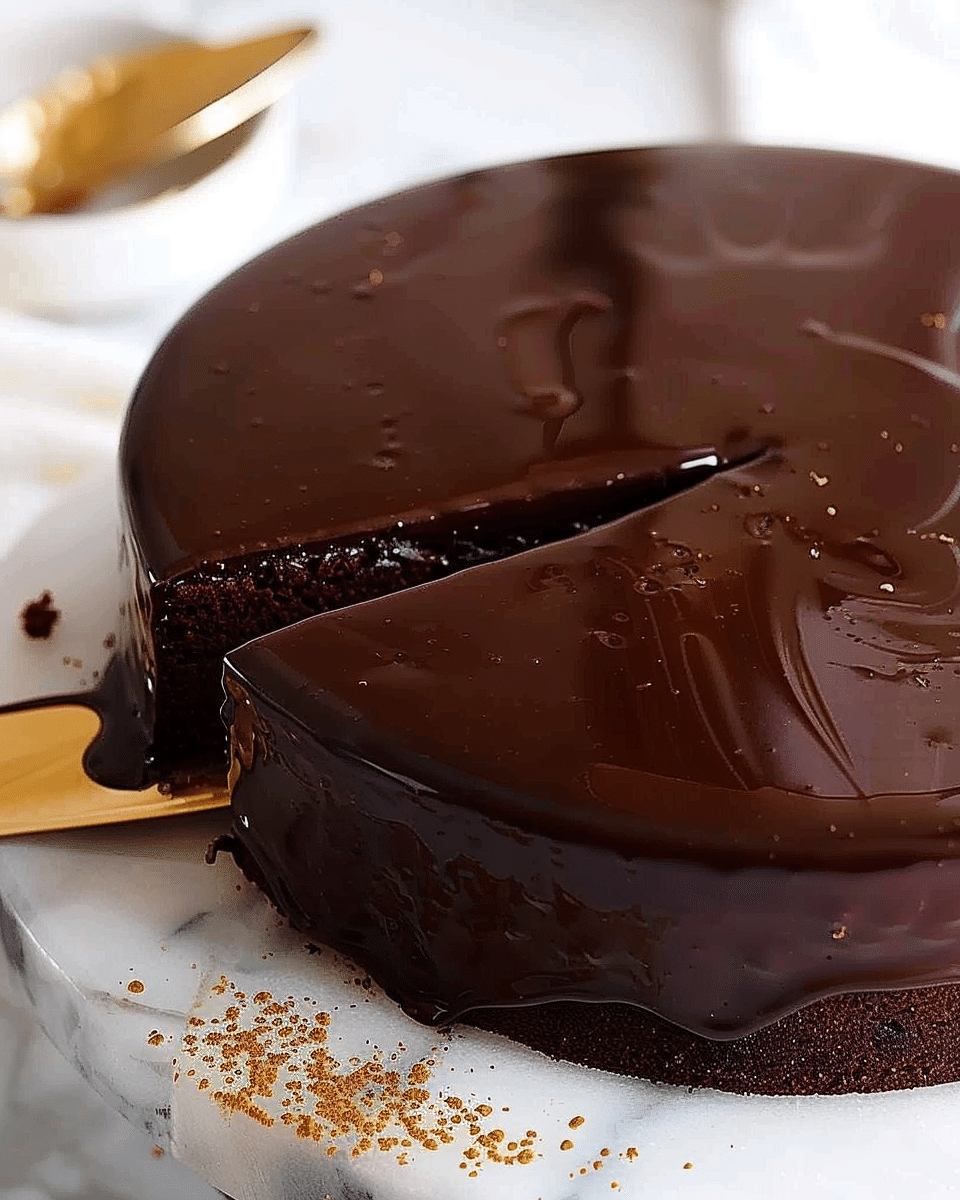
This Chocolate Mirror Glaze is the ultimate finishing touch for any special dessert. I love how its sleek, reflective surface makes even a simple cake look stunning. With its smooth texture, deep chocolate flavor, and long-lasting shine, it’s a foolproof recipe that turns any homemade cake into a bakery masterpiece.
A rich, glossy Chocolate Mirror Glaze that gives cakes a flawless, reflective finish and a deep, luxurious chocolate flavor. Smooth, elegant, and easier to make than it looks — perfect for turning any homemade cake into a showstopper.
Author:Amy
Prep Time:1 hour
Cook Time:20 minutes
Total Time:6 hours (including cooling time)
Yield:Covers one 20cm (8-inch) two-layer cake (serves 12)
Category:Dessert
Method:Stovetop / Pour Over
Cuisine:French
Diet:Vegetarian
Ingredients
1 x 20cm (8-inch) chocolate cake (2 layers)
2 batches Dark chocolate ganache
Gelatine for glaze:
2 1/2 tbsp Cold water
4 tsp Gelatine powder
Mirror glaze:
2/3 cup Water
2/3 cup Pure cream (whipping cream)
1 cup Unsweetened cocoa powder, sifted
1 cup + 2 tbsp White sugar (caster or superfine)
Optional decoration:
Gold dust or gold leaf
Instructions
Refrigerate the cake layers for at least 1 hour. Trim and frost with chocolate ganache until smooth, then refrigerate again for at least 1 hour before glazing.
Bloom the gelatine by sprinkling it over cold water and letting it sit for 5 minutes until firm and spongy.
In a saucepan, mix cocoa powder and water into a smooth paste. Add a splash of cream to loosen, then add remaining cream and sugar. Stir gently until combined.
Place the saucepan over medium-high heat and bring just to the boil. Remove from heat and stir in the bloomed gelatine until fully dissolved and smooth.
Strain the glaze through a fine mesh sieve into a shallow bowl to remove bubbles and lumps. Cover with cling wrap touching the surface and cool for about 2 hours until it reaches 30°C (86°F).
Strain again into a jug before using. Place the chilled cake on a wire rack set over a tray. Pour the glaze steadily from the center outward until the cake is fully coated.
Allow excess glaze to drip off for about 10 minutes before transferring to a serving platter. Smooth any imperfections with a warm palette knife.
Decorate with gold leaf or dust if desired, then slice with a warm knife for clean edges.
Notes
Ensure the cake is perfectly smooth before glazing — any bumps will show through.
The glaze should be exactly 30°C (86°F) before pouring for the best finish.
Stir gently to prevent bubbles, and always strain before use.
Add espresso powder for mocha flavor or food coloring for a marbled effect.
Store leftover glaze in the fridge for 1 week or freeze up to 2 months.


