I love this recipe because it is easy to make ahead and perfect for days when I do not want to turn on the oven. I get a smooth, minty filling with plenty of richness from the cream cheese and whipped cream, while the Oreo crust gives me the perfect chocolate crunch. I also like that the flavor feels nostalgic and refreshing at the same time, and the green color makes the pie look extra festive on the table.
Ingredients
(Note: All ingredient amounts are listed in the recipe card below.)
For the Crust
24 Oreo cookies 4–5 tablespoons unsalted butter, melted
For the Filling
2 ounces semi-sweet dark chocolate bar, finely chopped 1 3/4 cups (413ml) heavy whipping cream, divided 1 (7-ounce) container marshmallow cream 8 ounces (226g) full-fat cream cheese, at room temperature 1 teaspoon (5ml) vanilla extract 1/2 teaspoon peppermint extract 1–3 drops green food coloring
For the Topping
1 cup (236ml) heavy whipping cream 3 tablespoons (24g) powdered sugar 2–3 Oreos, crushed whipped cream for garnish
Directions
I start by making the crust. I grind the Oreo cookies into fine crumbs in a food processor or blender, then I stir them with the melted butter until the crumbs are evenly coated and easy to press together. I press the mixture tightly into a 9-inch pie plate and chill it in the fridge or freezer for about 15 minutes so it can firm up.
Next, I make the chocolate layer. I heat 1/4 cup of the heavy whipping cream just until it reaches a simmer, then I pour it over the finely chopped chocolate. I let it sit for 1 minute before whisking until smooth and glossy. I spread that chocolate mixture into the chilled crust and return it to the fridge for 15 to 20 minutes until it is semi-firm.
For the filling, I whip the heavy cream in a chilled bowl until stiff peaks form. In another bowl, I beat together the cream cheese, marshmallow cream, vanilla extract, peppermint extract, and green food coloring until the mixture is smooth. I gently fold in the whipped cream with a silicone spatula until everything is just combined. Then I spread the filling evenly over the prepared crust and refrigerate the pie for 4 to 6 hours so it can fully set.
To finish, I prepare the topping by whipping the heavy cream until soft peaks form, then I slowly add the powdered sugar and continue beating until stiff peaks form. I garnish the chilled pie with the whipped cream and crushed Oreos right before serving.
Servings and Timing
I get 1 9-inch pie from this recipe, which gives me about 8 slices. The prep time is 30 minutes, the chilling time is 3 hours, and the total time is 3 hours 30 minutes.
Variations
I like to switch up this pie in a few simple ways depending on the occasion. Sometimes I add a little extra peppermint extract for a stronger mint flavor, but I do it carefully so the filling does not become overpowering. I also like using chocolate sandwich cookies with different fillings for a subtle twist in the crust.
When I want a more dramatic presentation, I add chocolate curls, mini chocolate chips, or a drizzle of melted chocolate over the whipped topping. For a softer green color, I use just 1 drop of food coloring, and when I want a brighter pie for a party, I add a bit more. I also enjoy making it in a deep-dish pie plate for a fuller look, as long as I keep the layers evenly distributed.
Storage/Reheating
I store this pie covered in the refrigerator, where it stays fresh for up to 4 days. I like to keep the whipped topping looking its best by adding any final garnish just before serving. Because this is a chilled no-bake dessert, I do not reheat it. If I want a firmer texture, I let it chill longer before slicing. I can also freeze it for up to 1 month, then thaw it in the refrigerator before serving.
FAQs
Can I make Grasshopper Pie ahead of time?
Yes, I actually prefer making it ahead because the filling needs time to set properly. I usually prepare it several hours in advance or even the day before serving.
Can I freeze this pie?
Yes, I can freeze it. I wrap it well and freeze it for up to 1 month, then thaw it in the refrigerator until it is ready to serve.
Can I use store-bought whipped topping instead of homemade whipped cream?
Yes, I can use store-bought whipped topping for convenience, but I like the flavor and texture of freshly whipped cream better in this pie.
What does Grasshopper Pie taste like?
To me, it tastes like a creamy mint mousse with a chocolate cookie base. It reminds me of mint chocolate desserts with a lighter, fluffier texture.
Can I use a different cookie for the crust?
Yes, I can swap the Oreo cookies for another chocolate sandwich cookie if I want a similar crust. I just make sure the crumbs still hold together with the melted butter.
How do I know when the filling is set?
I know the filling is ready when the pie feels firm and holds its shape when sliced. I always give it enough chilling time so it slices cleanly.
Can I make this without food coloring?
Yes, I can leave out the green food coloring entirely. The pie will still taste the same, but it will not have the classic green look.
Why is my filling too soft?
When my filling turns out too soft, it is usually because the whipped cream was not beaten to stiff peaks or the pie did not chill long enough. I make sure both steps are done properly for the best texture.
Can I add more chocolate to the recipe?
Yes, I can add extra chocolate as a garnish or drizzle some melted chocolate over the top. I like doing that when I want a richer chocolate-mint finish.
Is peppermint extract enough for flavor?
Yes, I find that peppermint extract gives plenty of mint flavor. I adjust it slightly depending on how strong I want the taste to be.
Conclusion
I love serving this Grasshopper Pie when I want something cool, creamy, and simple that still looks special. The minty marshmallow filling, chocolate layer, and Oreo crust come together beautifully, and I appreciate that I can make it ahead with very little stress. It is the kind of dessert I keep coming back to whenever I want an easy no-bake pie that feels classic and fun.
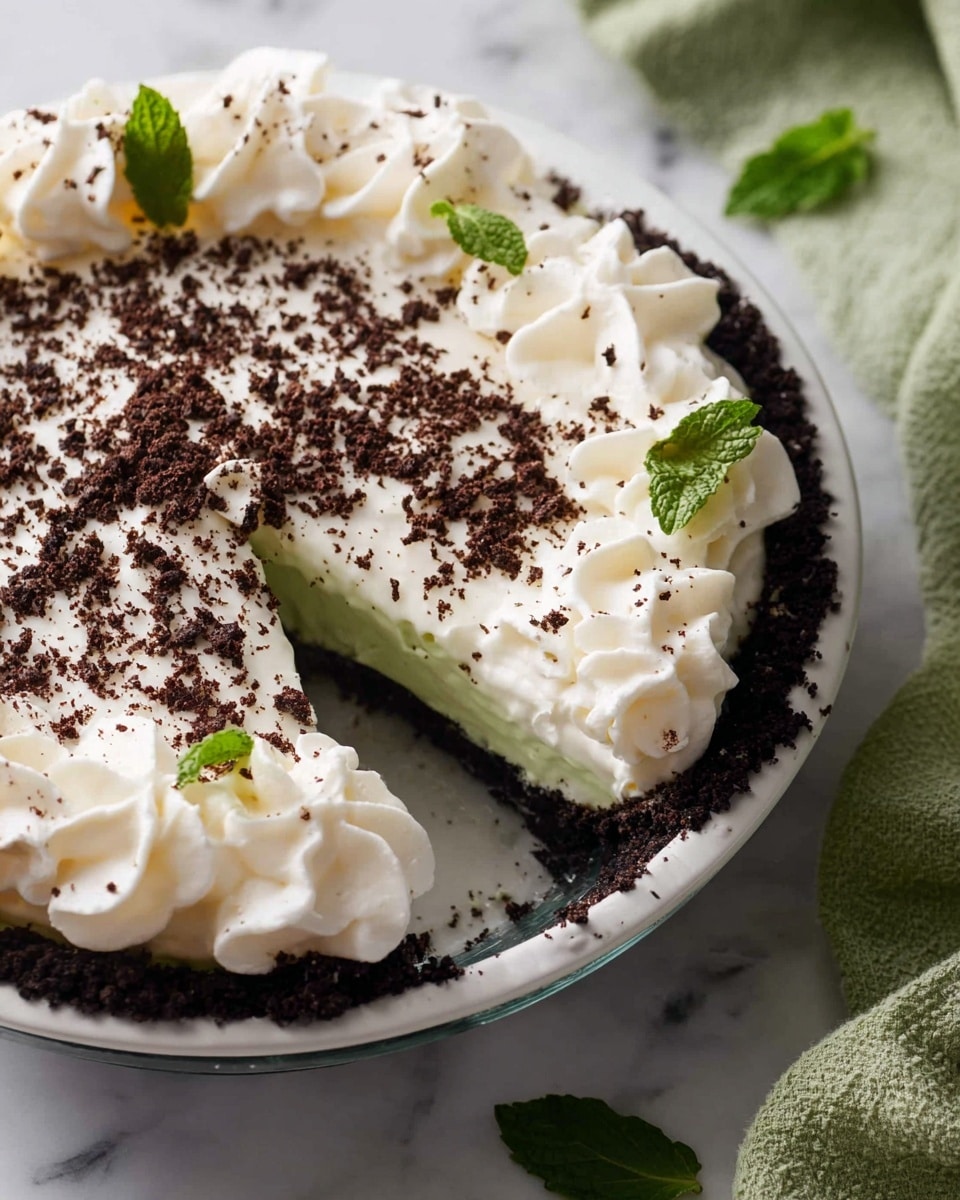
A cool, creamy no-bake Grasshopper Pie with a fluffy mint filling layered over a rich chocolate base and Oreo crust. This nostalgic dessert is refreshing, festive, and easy to prepare ahead.
Author:Amy
Prep Time:30 minutes
Cook Time:0 minutes
Total Time:3 hours 30 minutes
Yield:8 servings
Category:Dessert
Method:No-Bake
Cuisine:American
Diet:Vegetarian
Ingredients
24 Oreo cookies
4–5 tablespoons unsalted butter, melted
2 ounces semi-sweet dark chocolate bar, finely chopped
1 3/4 cups heavy whipping cream, divided
1 (7-ounce) container marshmallow cream
8 ounces full-fat cream cheese, at room temperature
1 teaspoon vanilla extract
1/2 teaspoon peppermint extract
1–3 drops green food coloring
1 cup heavy whipping cream (for topping)
3 tablespoons powdered sugar
2–3 Oreos, crushed (for garnish)
Instructions
Crush the Oreo cookies into fine crumbs and mix with melted butter until evenly coated. Press firmly into a 9-inch pie plate and chill for 15 minutes.
Heat 1/4 cup of heavy cream until just simmering, then pour over chopped chocolate. Let sit for 1 minute, then whisk until smooth. Spread into the chilled crust and refrigerate for 15–20 minutes.
Whip remaining heavy cream until stiff peaks form.
In another bowl, beat cream cheese, marshmallow cream, vanilla extract, peppermint extract, and food coloring until smooth.
Gently fold whipped cream into the mixture until combined. Spread filling over the crust and refrigerate for 4–6 hours until set.
For topping, whip heavy cream to soft peaks, add powdered sugar, and continue beating to stiff peaks.
Garnish pie with whipped cream and crushed Oreos before serving.
Notes
Adjust peppermint extract carefully to avoid overpowering flavor.
Can be made a day ahead for best texture.
Store covered in refrigerator up to 4 days.
Freeze for up to 1 month and thaw in refrigerator before serving.
Skip food coloring if preferred; flavor remains the same.


