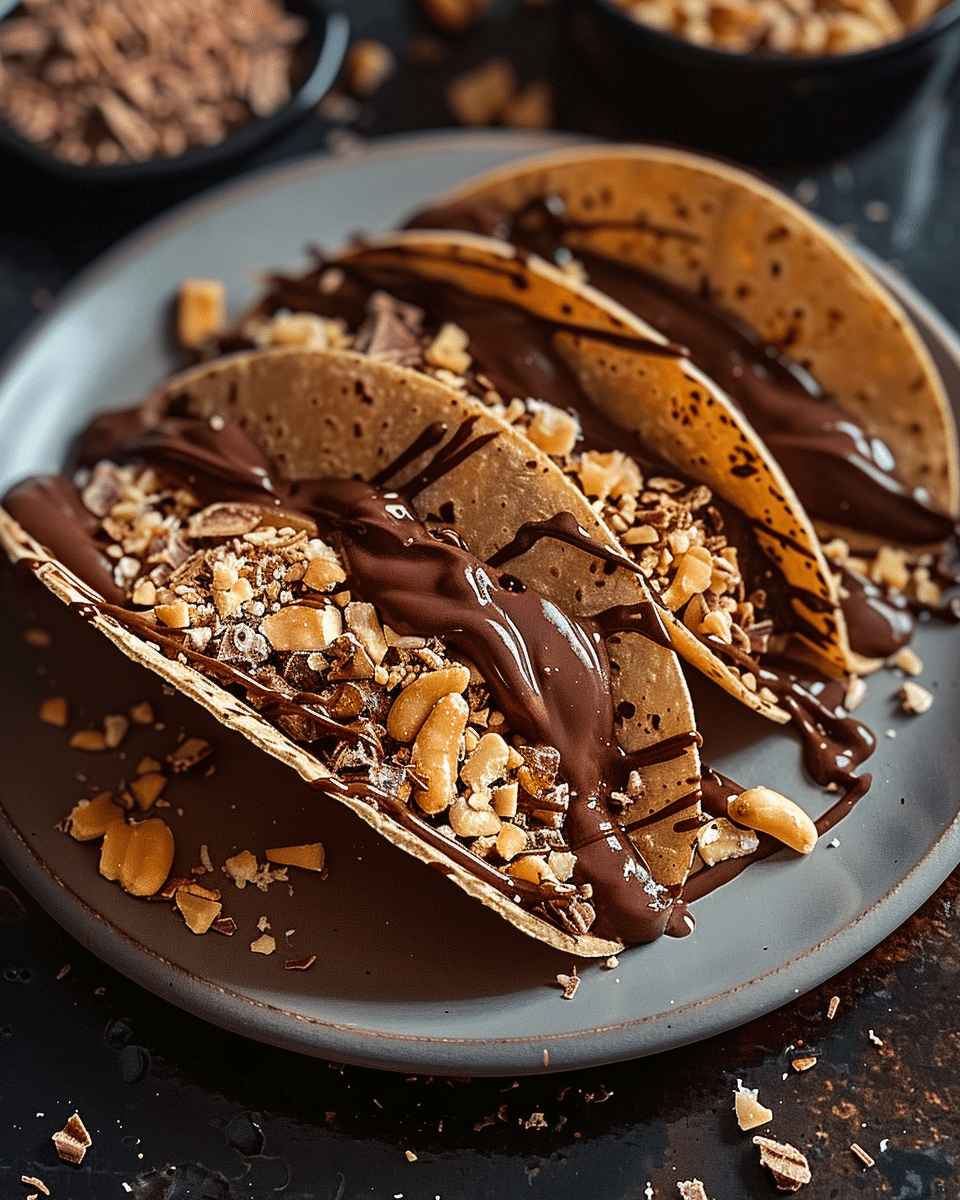
Why You’ll Love This Recipe
There are so many reasons why Homemade Choco Tacos will become your go-to dessert:
- Customizable Flavors: You can make your own ice cream, choose your chocolate, and pick your toppings, giving you full control over the flavors.
- Fresh & Delicious: Freshly made waffle cones have a superior crispness compared to store-bought cones, making these tacos extra special.
- Fun to Make: It’s a great project to do with kids or friends. Assembling choco tacos can be a fun, hands-on experience.
- Impressive Presentation: These choco tacos are as beautiful as they are delicious, adding a playful and elegant touch to any event.
- High-Quality Ingredients: You have the power to choose premium ingredients, ensuring your dessert tastes as amazing as it looks.
Ingredients
For the Waffle Cones (Taco Shells):
- 1 cup all-purpose flour
- ½ cup granulated sugar
- ¼ teaspoon salt
- ½ cup unsalted butter, melted
- 2 large egg whites
- 1 teaspoon vanilla extract
- 2-3 tablespoons milk (as needed for consistency)
For the Ice Cream:
- 2 cups heavy cream
- 1 cup whole milk
- ¾ cup granulated sugar
- ¼ teaspoon salt
- 1 teaspoon vanilla extract
- (Optional: Additional flavorings like cocoa powder, fruit purees, extracts, etc.)
For the Chocolate Coating:
- 12 oz high-quality chocolate (dark, milk, or white), chopped
- 2 tablespoons coconut oil (or vegetable shortening)
For the Toppings:
- ½ cup roasted peanuts, chopped (or other nuts like almonds, pecans, etc.)
- Sprinkles
- Mini chocolate chips
- Shredded coconut
(Tip: You’ll find the full list of ingredients and measurements in the recipe card below.)
Step-by-Step Instructions
1. Make the Waffle Cones (Taco Shells):
- Combine Dry Ingredients: In a large bowl, whisk together the flour, sugar, and salt.
- Add Wet Ingredients: In a separate bowl, whisk together the melted butter, egg whites, and vanilla extract.
- Combine Wet and Dry: Pour the wet ingredients into the dry ingredients and mix until just combined. Add milk, one tablespoon at a time, until the batter is smooth and pourable but not too runny.
2. Cook the Waffle Cones:
- Preheat a waffle cone maker according to the manufacturer’s instructions. If you don’t have one, use a non-stick skillet heated over medium heat.
- Shape the Cones: Pour about 2-3 tablespoons of batter onto the waffle cone maker or skillet. Cook until golden brown (about 1-2 minutes per side if using a skillet).
- Form the Tacos: Immediately remove the waffle from the maker or skillet and quickly shape it into a taco shell. Use a taco mold or gently fold it over a heat-resistant spatula to create the taco shape. Hold in place until slightly cooled and set.
- Cool Completely: Place the shaped taco shells on a wire rack to cool completely.
3. Make the Ice Cream:
- Combine Ingredients: In a medium saucepan, combine the heavy cream, whole milk, sugar, and salt. Stir over medium heat until the sugar dissolves, but do not let it boil.
- Chill the Base: Remove from heat, add the vanilla extract, and refrigerate the mixture for at least 4 hours (overnight is ideal).
- Churn the Ice Cream: Pour the chilled ice cream base into an ice cream maker and churn according to the manufacturer’s instructions (about 20-25 minutes).
- Harden the Ice Cream: Transfer the ice cream to an airtight container and freeze for at least 2 hours to firm up.
4. Assemble the Choco Tacos:
- Fill the Taco Shells: Remove the hardened ice cream from the freezer and let it soften slightly. Scoop the ice cream into the cooled taco shells, filling them generously.
- Freeze Again: Return the filled taco shells to the freezer for at least 30 minutes to ensure the ice cream firms up.
5. Make the Chocolate Coating:
- Melt the Chocolate: In a double boiler or microwave-safe bowl, combine the chopped chocolate and coconut oil (or vegetable shortening).
- Melt Smoothly: Stir frequently until the chocolate is fully melted and smooth.
6. Dip and Decorate:
- Dip the Tacos: Remove the filled taco shells from the freezer and dip the ice cream-filled portion into the melted chocolate, ensuring it’s fully coated.
- Add Toppings: Immediately sprinkle the chocolate-covered ice cream with your choice of chopped peanuts, sprinkles, mini chocolate chips, or shredded coconut before the chocolate sets.
- Harden the Chocolate: Place the dipped and decorated Choco Tacos on a parchment-lined baking sheet and return them to the freezer for at least 15-20 minutes to allow the chocolate to harden.
7. Serve and Enjoy:
- Remove the Homemade Choco Tacos from the freezer and serve immediately. Enjoy the crispy waffle cone, creamy ice cream, and indulgent chocolate coating with the delightful crunch of your favorite toppings!
How to Serve Homemade Choco Tacos
Homemade Choco Tacos are perfect for a variety of serving styles:
- Individual Presentation: Serve each Choco Taco on a small plate or in a paper cone for a nostalgic, carnival-style look.
- Chilled Plates: Chill the serving plates or trays in the freezer for a few minutes before serving to keep the Choco Tacos from melting too quickly.
- Topping Bar: Set up a topping bar with various nuts, sprinkles, chocolate chips, and other fun goodies, letting guests customize their own Choco Tacos.
- Dessert Buffet: Include these in a dessert buffet, offering a variety of sweet treats for guests to enjoy.
- Party Favors: Wrap individual Choco Tacos in cellophane bags tied with ribbons for fun, edible party favors.
Additional Tips for Homemade Choco Tacos
- Practice Makes Perfect: Making the waffle cones can be tricky at first. Don’t worry if your first ones aren’t perfect—keep practicing, and you’ll get the hang of it!
- Work Quickly: Once cooked, waffle cones need to be shaped immediately before they cool and become brittle. Have your taco mold or spatula ready.
- Cool Completely: Make sure the taco shells are completely cooled before filling them with ice cream to prevent the ice cream from melting.
- Prevent Soggy Cones: Brush the inside of the taco shell with melted chocolate before filling it with ice cream to help prevent sogginess.
Recipe Variations for Homemade Choco Tacos
- Chocolate Lover’s Choco Taco: Use chocolate ice cream, dark chocolate coating, and top with mini chocolate chips and chocolate shavings.
- Mint Chocolate Chip Choco Taco: Use mint chocolate chip ice cream, dark chocolate coating, and top with crushed peppermint candies.
- Salted Caramel Choco Taco: Use salted caramel ice cream, milk chocolate coating, and top with sea salt and caramel drizzle.
- Tropical Choco Taco: Use mango or pineapple ice cream, white chocolate coating, and top with shredded coconut and chopped macadamia nuts.
Freezing and Storage for Homemade Choco Tacos
- Freezing: Store your completed Choco Tacos in an airtight container or wrap them individually in plastic wrap or foil. They can be kept in the freezer for up to 2-3 weeks.
- Storage: Always store the filled taco shells in the freezer immediately after dipping in chocolate to maintain the structure and prevent the ice cream from melting.
FAQ Section for Homemade Choco Tacos
Can I use store-bought waffle cones?
Yes, you can substitute store-bought waffle cones, but homemade ones will have a fresher, crisper texture and superior taste.
Can I make the waffle cones ahead of time?
Yes, you can prepare the waffle cones a day or two in advance and store them in an airtight container at room temperature.
How do I prevent the waffle cones from becoming soggy?
To prevent sogginess, you can brush the inside of the cones with a thin layer of melted chocolate before filling them with ice cream.
Can I make this recipe dairy-free or vegan?
Yes, you can substitute dairy-free milk, cream, and butter, and use vegan chocolate for the coating.
Conclusion for Homemade Choco Tacos
Making Homemade Choco Tacos is a fun and rewarding experience that results in a mouthwatering dessert. With crispy, freshly made waffle cone shells, creamy homemade ice cream, rich chocolate coating, and delicious toppings, these choco tacos are bound to become a new favorite. Whether you’re making them for a special occasion or just as a fun family activity, these homemade treats will never disappoint. Enjoy the process and the indulgent result!
Homemade Choco Tacos: An Incredible Tropical Treat
Homemade Choco Tacos are a delightful and customizable treat that combines crispy waffle cones, creamy ice cream, rich chocolate coating, and a variety of toppings. A fun and engaging dessert perfect for any occasion.
- Prep Time: 45 minutes
- Cook Time: 15 minutes
- Total Time: 2-3 hours (including freezing and cooling time)
- Yield: 12 choco tacos
- Category: Dessert
- Method: No-Bake
- Cuisine: American
- Diet: Vegetarian
Ingredients
For the Waffle Cones (Taco Shells):
1 cup all-purpose flour
½ cup granulated sugar
¼ teaspoon salt
½ cup unsalted butter, melted
2 large egg whites
1 teaspoon vanilla extract
2–3 tablespoons milk (as needed for consistency)
For the Ice Cream:
2 cups heavy cream
1 cup whole milk
¾ cup granulated sugar
¼ teaspoon salt
1 teaspoon vanilla extract
(Optional: Additional flavorings like cocoa powder, fruit purees, extracts, etc.)
For the Chocolate Coating:
12 oz high-quality chocolate (dark, milk, or white), chopped
2 tablespoons coconut oil (or vegetable shortening)
For the Toppings:
½ cup roasted peanuts, chopped (or other nuts like almonds, pecans, etc.)
Sprinkles
Mini chocolate chips
Shredded coconut
Instructions
- Make the Waffle Cones (Taco Shells):
- In a large bowl, whisk together the flour, sugar, and salt.
- In a separate bowl, whisk together the melted butter, egg whites, and vanilla extract.
- Pour the wet ingredients into the dry ingredients and mix until just combined. Add milk, one tablespoon at a time, until the batter is smooth and pourable but not too runny.
- Cook the Waffle Cones:
- Preheat a waffle cone maker according to the manufacturer’s instructions or use a non-stick skillet over medium heat.
- Pour about 2-3 tablespoons of batter onto the waffle cone maker or skillet. Cook until golden brown (about 1-2 minutes per side if using a skillet).
- Immediately remove the waffle from the maker or skillet and quickly fold it into a taco shape using a taco mold or a heat-resistant spatula. Hold it in place until it cools slightly.
- Place the taco shells on a wire rack to cool completely.
- Make the Ice Cream:
- In a medium saucepan, combine the heavy cream, whole milk, sugar, and salt. Stir over medium heat until the sugar dissolves but the mixture doesn’t boil.
- Remove from heat, add the vanilla extract (and any optional flavorings like cocoa powder or fruit puree), and refrigerate for at least 4 hours (overnight is ideal).
- Pour the chilled base into an ice cream maker and churn according to the manufacturer’s instructions (about 20-25 minutes).
- Transfer the ice cream to an airtight container and freeze for at least 2 hours to firm up.
- Assemble the Choco Tacos:
- Scoop the softened ice cream into the cooled taco shells, filling them generously.
- Return the filled taco shells to the freezer for at least 30 minutes to ensure the ice cream firms up before coating.
- Make the Chocolate Coating:
- In a double boiler or microwave-safe bowl, combine the chopped chocolate and coconut oil (or vegetable shortening). Stir until the chocolate is fully melted and smooth.
- Dip and Decorate:
- Remove the filled taco shells from the freezer. Hold each taco by the top edge and dip the ice cream-filled portion into the melted chocolate, ensuring it’s fully coated.
- Sprinkle with your choice of chopped peanuts, mini chocolate chips, shredded coconut, or sprinkles before the chocolate sets.
- Place the dipped Choco Tacos on a parchment-lined baking sheet and return to the freezer for at least 15-20 minutes to allow the chocolate to harden completely.
- Serve and Enjoy:
- Remove from the freezer and serve immediately. Enjoy the perfect blend of crispy, creamy, and chocolatey goodness!
Notes
Practice makes perfect—shaping waffle cones can take some time, so don’t worry if your first few aren’t perfect.
Work quickly when shaping the taco shells to prevent them from cooling and becoming brittle.
Brush the inside of the taco shell with melted chocolate to prevent the ice cream from melting through the cone.
Nutrition
- Serving Size: 1 choco taco
- Calories: 290
- Sugar: 22g
- Sodium: 35mg
- Fat: 18g
- Saturated Fat: 9g
- Unsaturated Fat: 7g
- Trans Fat: 0g
- Carbohydrates: 28g
- Fiber: 2g
- Protein: 4g
- Cholesterol: 35mg


