I love how easy these bars are to prepare with simple pantry ingredients. The layered texture makes every bite rich and satisfying, while the peanut butter adds extra creaminess that pairs perfectly with chocolate and marshmallows. I also enjoy that the recipe can be made ahead because the bars slice beautifully once cooled. The toasted marshmallow topping gives that classic s’mores flavor without needing a campfire, and the bars stay soft and delicious for days.
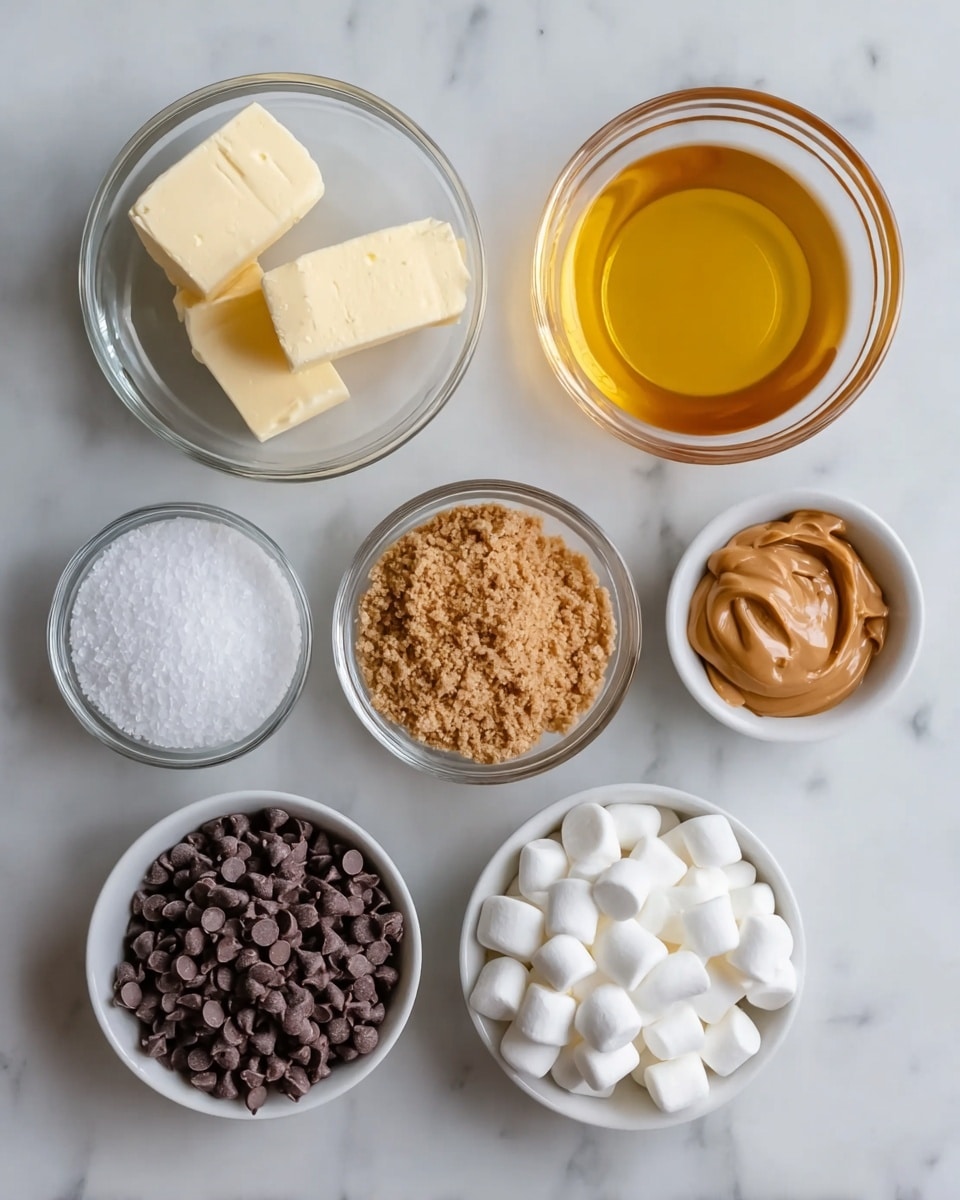
Ingredients
(Note: All ingredient amounts are listed in the recipe card below.)
FOR THE CRUST
2 cups graham cracker crumbs 1/2 cup unsalted butter, melted 1/4 cup granulated sugar
FOR THE PEANUT BUTTER LAYER
1 cup creamy peanut butter 1/2 cup powdered sugar 1/2 teaspoon vanilla extract
I preheat the oven to 350°F (175°C) and line an 8×8-inch baking pan with parchment paper, leaving extra parchment hanging over the sides for easy removal later.
I combine the graham cracker crumbs, melted butter, and granulated sugar in a bowl until the mixture looks like wet sand.
I firmly press the crust mixture into the bottom of the prepared pan to create an even layer.
I bake the crust for 8 to 10 minutes until lightly set, then let it cool slightly.
I mix the peanut butter, powdered sugar, and vanilla extract together until the mixture becomes smooth and thick.
I spread the peanut butter mixture evenly over the crust, pressing gently so the crust stays intact.
I melt the chocolate chips and butter together in the microwave using short intervals, stirring often until smooth.
I pour the melted chocolate over the peanut butter layer and spread it evenly.
I sprinkle the mini marshmallows evenly over the chocolate layer.
I return the pan to the oven and bake for 5 to 7 minutes until the marshmallows are puffed and lightly golden.
I sometimes place the bars under the broiler for 1 to 2 minutes when I want deeper golden marshmallows, watching carefully so they do not burn.
I let the bars cool completely at room temperature, then chill them if needed so the layers fully set.
I lift the bars out using the parchment paper and slice them into 12 squares before serving.
Servings and Timing
This recipe makes 12 bars, which I find perfect for sharing at gatherings or packing into dessert trays.
I sometimes use semi-sweet chocolate chips instead of milk chocolate when I want a less sweet flavor. Crunchy peanut butter also works well if I want extra texture in the filling. For a richer dessert, I occasionally add chopped peanut butter cups between the peanut butter and chocolate layers. I also like sprinkling crushed graham crackers on top after baking for extra crunch and presentation.
Storage/Reheating
I store these bars in an airtight container at room temperature for up to 3 days. For longer storage, I keep them refrigerated where they stay fresh for about a week. I like chilling the bars before slicing because it creates cleaner edges and firmer layers. If I want the marshmallows softer again, I let the bars sit at room temperature for a few minutes before serving.
FAQs
Can I make these bars ahead of time?
I often make them a day ahead because the layers set even better after chilling overnight.
How do I get clean slices?
I chill the bars for about 30 minutes before cutting and use a sharp knife wiped clean between slices.
Can I use crunchy peanut butter?
I can absolutely use crunchy peanut butter if I want extra texture in the bars.
What type of chocolate works best?
I usually use milk chocolate chips, but semi-sweet chocolate creates a less sweet and more balanced flavor.
Can I freeze these bars?
I freeze them in an airtight container for up to 2 months and thaw them in the refrigerator before serving.
Do I need parchment paper?
I always use parchment paper because it makes removing and slicing the bars much easier.
Can I use large marshmallows instead of mini marshmallows?
I can use large marshmallows cut into smaller pieces, though mini marshmallows spread more evenly.
Why is my chocolate layer hard to spread?
I make sure the chocolate is fully melted and smooth before pouring it over the peanut butter layer.
Can I double the recipe?
I double the ingredients and bake the bars in a 9×13-inch pan when serving a larger crowd.
How should I store leftovers?
I keep leftovers in an airtight container at room temperature or in the refrigerator depending on how firm I want the layers to stay.
Conclusion
I love how these peanut butter s’mores bars combine everything comforting about classic s’mores with the creamy richness of peanut butter. The buttery graham cracker crust, smooth chocolate, and toasted marshmallow topping create a dessert that feels both nostalgic and indulgent. Whether I make them for parties, holidays, or casual weekend baking, these bars always disappear quickly and leave everyone asking for another piece.
These peanut butter s’mores bars combine a buttery graham cracker crust with creamy peanut butter, melted chocolate, and toasted marshmallows for a rich and nostalgic dessert. Every bite is soft, gooey, crunchy, and packed with classic s’mores flavor enhanced by peanut butter richness.
Author:Amy
Prep Time:20 minutes
Cook Time:15 minutes
Total Time:1 hour 35 minutes
Yield:12 bars
Category:Dessert
Method:Baking
Cuisine:American
Diet:Vegetarian
Ingredients
2 cups graham cracker crumbs
1/2 cup unsalted butter, melted
1/4 cup granulated sugar
1 cup creamy peanut butter
1/2 cup powdered sugar
1/2 teaspoon vanilla extract
1 1/2 cups milk chocolate chips
1 tablespoon butter
2 to 3 cups mini marshmallows
Instructions
Preheat the oven to 350°F (175°C) and line an 8×8-inch baking pan with parchment paper, leaving overhang on the sides for easy removal.
Combine the graham cracker crumbs, melted butter, and granulated sugar in a bowl until the mixture resembles wet sand.
Firmly press the crust mixture into the bottom of the prepared pan in an even layer.
Bake the crust for 8 to 10 minutes until lightly set, then allow it to cool slightly.
Mix the peanut butter, powdered sugar, and vanilla extract together until smooth and thick.
Spread the peanut butter mixture evenly over the cooled crust.
Melt the chocolate chips and butter together in the microwave in short intervals, stirring until smooth.
Pour the melted chocolate over the peanut butter layer and spread evenly.
Sprinkle the mini marshmallows evenly across the chocolate layer.
Return the pan to the oven and bake for 5 to 7 minutes until the marshmallows are puffed and lightly golden.
For darker toasted marshmallows, broil for 1 to 2 minutes while watching carefully to prevent burning.
Allow the bars to cool completely at room temperature, then chill if needed until fully set.
Lift the bars from the pan using the parchment paper and slice into 12 squares before serving.
Notes
Use semi-sweet chocolate chips for a less sweet flavor.
Crunchy peanut butter adds extra texture to the filling.
Add chopped peanut butter cups between the layers for a richer dessert.
Sprinkle crushed graham crackers on top after baking for added crunch.
Chill the bars before slicing for cleaner cuts.
Store in an airtight container at room temperature for up to 3 days or refrigerate for up to 1 week.
Freeze for up to 2 months and thaw in the refrigerator before serving.


