Rich white chocolate flavor: I love how the melted white chocolate gives this cake a smooth, creamy sweetness that pairs beautifully with vanilla.
Dense and moist texture: Unlike light sponge cakes, this mud cake has a rich, tender crumb that makes every slice satisfying.
Simple ingredients: I can prepare this cake with basic baking ingredients and good-quality white chocolate.
Easy single-layer preparation: I don’t need to stack layers or prepare complicated fillings to create an impressive dessert.
Perfect for decorating: I enjoy finishing this cake with ganache, buttercream, powdered sugar, or fresh fruit.
Great for special occasions: I can serve it for birthdays, anniversaries, holidays, or casual family gatherings.
Delicious when made ahead: I find that the cake’s flavors develop beautifully after resting, making it convenient for preparing in advance.
Ingredients
(Note: All ingredient amounts are listed in the recipe card below.)
10.5 ounces white chocolate
1 cup butter – 2 sticks
1 cup half and half – or whole milk
¾ cup + 1 tbsp granulated sugar
2 tsp vanilla extract
2 eggs
1 ¾ cups all-purpose flour – sifted
1 tsp baking soda
¼ tsp table salt
Directions
Step 1: Preheat the Oven
I begin by preheating my oven to 325°F (163°C). I line my baking pan or baking dish with parchment paper, making sure to leave enough overhang to lift the finished cake out easily. I set the prepared pan aside while I work on the batter.
Step 2: Melt the White Chocolate Mixture
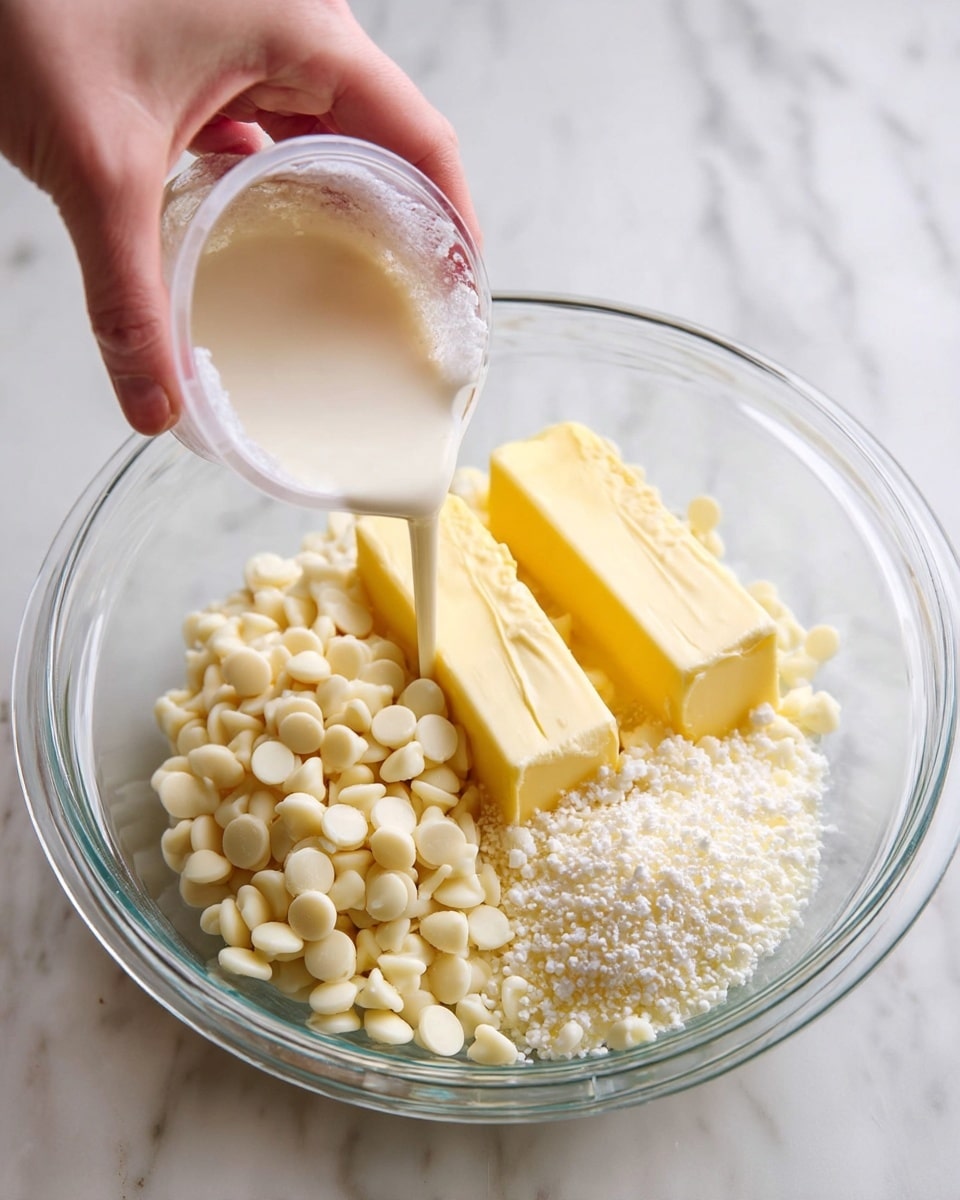
I combine the white chocolate, butter, half and half, and granulated sugar in a heatproof bowl over a saucepan of simmering water. I make sure the bottom of the bowl doesn’t touch the water.
I heat the mixture gently, stirring occasionally until the white chocolate and butter melt completely and the ingredients are smoothly combined. I avoid boiling the water vigorously because white chocolate can scorch or become grainy when exposed to excessive heat.
Step 3: Cool the Mixture
Once everything has melted, I remove the bowl from the heat and allow the mixture to cool for approximately 15–20 minutes, until it reaches room temperature.
I consider this step especially important because adding eggs to a hot chocolate mixture could cause them to cook prematurely. I occasionally stir the mixture to help it cool evenly.
Step 4: Add the Eggs and Vanilla
After the chocolate mixture has cooled, I whisk in the eggs and vanilla extract until everything is well incorporated.
I make sure the batter looks smooth and uniform before adding the dry ingredients. The vanilla complements the creamy white chocolate flavor and adds a lovely aroma.
Step 5: Combine the Dry Ingredients
In a separate small bowl, I combine the sifted all-purpose flour, baking soda, and table salt.
I stir the ingredients together to distribute the baking soda and salt evenly. I like sifting the flour because it helps reduce lumps and makes the dry ingredients easier to incorporate.
Step 6: Mix the Cake Batter
I gradually fold the dry ingredients into the wet mixture, adding approximately half a cup at a time.
After each addition, I gently fold until the flour is mostly incorporated before adding more. Once all the dry ingredients have been added, I briefly whisk the batter to remove any remaining lumps.
I avoid excessive mixing because I want the finished cake to remain tender rather than become tough.
Step 7: Bake the Cake
I pour the batter into my prepared baking pan and spread it evenly.
I bake the cake for approximately 50–65 minutes, checking for doneness by inserting a toothpick into the center. When the toothpick comes out clean, I know the cake is ready.
If I notice the top browning too quickly toward the end of baking, I loosely cover it with aluminum foil and continue baking until the center is fully cooked.
Step 8: Cool and Decorate
I remove the cake from the oven and place the pan on a wire rack. I allow the cake to cool completely to room temperature before attempting to remove it.
Once cooled, I use the parchment paper to carefully lift the cake from the pan.
I can leave it plain to appreciate its buttery white chocolate flavor or decorate it with my favorite frosting, ganache, or fresh fruit before slicing and serving.
Servings and Timing
Servings
16 slices
Prep Time
40 minutes
Cook Time
1 hour (approximately)
Total Time
1 hour 40 minutes
Oven Temperature
325°F (163°C)
I find that this cake is ideal for serving a group because its dense, rich texture makes smaller slices wonderfully satisfying. I usually cut it into 16 portions, although I can make the slices larger or smaller depending on the occasion.
I also allow additional time for the cake to cool completely before decorating, since cooling time can extend beyond the stated preparation and baking time.
Variations
White Chocolate Raspberry Cake
I love adding fresh raspberries to this cake for a fruity contrast to the rich white chocolate. I can gently fold a small handful into the batter or arrange fresh raspberries on top after baking. Their tart flavor balances the sweetness beautifully.
White Chocolate Lemon Cake
When I want a brighter flavor, I add a little finely grated lemon zest to the batter. I enjoy how the citrus aroma complements the white chocolate without overpowering it. A light lemon glaze also makes a delicious finishing touch.
White Chocolate Ganache Cake
For an especially indulgent dessert, I cover the cooled cake with a smooth white chocolate ganache. I make the ganache with melted white chocolate and warm heavy cream, then allow it to thicken slightly before spreading it over the cake.
White Chocolate Strawberry Cake
I sometimes decorate this cake with fresh sliced strawberries and a little whipped cream. I find that the combination creates a beautiful dessert for spring celebrations, birthdays, or afternoon gatherings.
White Chocolate Coconut Cake
For a tropical variation, I add a little shredded coconut to the batter or sprinkle toasted coconut over the finished cake. I love the gentle coconut flavor and the extra texture it provides.
White Chocolate Almond Cake
I enjoy adding a small amount of almond extract alongside the vanilla when I want a subtle nutty flavor. I can also decorate the cake with toasted sliced almonds for a delicate crunch.
White Chocolate Birthday Cake
When preparing this recipe for a birthday, I decorate the cooled cake with vanilla buttercream, white chocolate curls, and colorful sprinkles. I love how easily this simple single-layer cake transforms into a festive centerpiece.
Storage/Reheating
Room Temperature Storage
I store the completely cooled cake in an airtight container at room temperature for up to 2 days, provided it doesn’t have a perishable frosting or filling.
I make sure the cake is protected from air exposure because this helps maintain its moist, tender texture.
Refrigerator Storage
For longer storage, I place the cake in an airtight container in the refrigerator for up to 5 days.
I prefer allowing refrigerated slices to sit at room temperature for about 20–30 minutes before serving. This softens the butter and chocolate in the cake, helping restore its rich, tender texture.
Freezer Storage
I can freeze this white chocolate cake for up to 3 months.
I wrap the completely cooled cake tightly in plastic wrap and then add a layer of aluminum foil or place it in a freezer-safe container. I can freeze the entire cake or individual slices.
When I’m ready to serve it, I thaw the cake overnight in the refrigerator and then bring it to room temperature.
Reheating
Although I usually enjoy this cake at room temperature, I sometimes warm an individual slice for a softer, more comforting dessert.
I place a slice on a microwave-safe plate and heat it for approximately 10–15 seconds at a time until just slightly warm.
I avoid overheating because the white chocolate and butter can make the cake overly soft or greasy when heated too much.
FAQs
1. What is the difference between white chocolate cake and white chocolate mud cake?
I consider this recipe a white chocolate mud cake because it has a dense, rich, moist texture rather than the light, airy structure of a traditional sponge cake. The melted white chocolate and butter create a tender, substantial crumb that gives mud cake its signature consistency.
2. Can I use white chocolate chips instead of a white chocolate bar?
I can use white chocolate chips, although I prefer a good-quality white chocolate bar for the smoothest melting results. Some chips contain stabilizers that help them hold their shape, so they may not melt as evenly. I choose white chocolate containing cocoa butter whenever possible.
3. Why does the white chocolate mixture need to cool before adding eggs?
I let the melted chocolate mixture cool because hot liquid can partially cook the eggs as soon as they’re added. Allowing the mixture to reach room temperature helps me create a smooth, evenly combined batter and prevents unwanted bits of cooked egg.
4. How do I know when my white chocolate cake is fully baked?
I insert a toothpick into the center of the cake. If it comes out clean, I know the cake is ready. I also look for a set center and a surface that no longer appears wet. Since this cake is naturally dense and moist, I avoid baking it longer than necessary.
5. Why did my white chocolate cake turn out dry?
I find that overbaking is one of the most common reasons for a dry cake. I begin checking for doneness near the lower end of the baking time and make sure my oven temperature is accurate. I also measure the flour carefully because adding too much can affect the cake’s moisture.
6. Can I make this white chocolate cake ahead of time?
Yes, I often prepare this cake a day before serving. I find that the texture settles nicely as it rests, and the white chocolate flavor remains delicious. I store the cooled cake in an airtight container and decorate it closer to serving time when needed.
7. What frosting goes best with white chocolate cake?
I love pairing this cake with white chocolate ganache, vanilla buttercream, cream cheese frosting, or raspberry frosting. Since the cake itself is quite sweet, I especially enjoy frostings that offer a slightly tangy or less sugary contrast.
8. Can I freeze white chocolate cake after decorating it?
I can freeze the cake after decorating, depending on the frosting. Buttercream and ganache generally freeze well, while fresh fruit and whipped cream are better added after thawing. I prefer freezing the undecorated cake when possible because it gives me more flexibility later.
9. Why did my white chocolate cake sink in the middle?
I know that a cake can sink when the center hasn’t fully baked, the oven door is opened too early, or the batter contains too much leavening. I make sure to measure the baking soda accurately, avoid unnecessary oven-door opening, and check that the center is properly set before removing the cake.
10. Can I turn this recipe into cupcakes or a layered cake?
I can adapt the batter for cupcakes or multiple layers, but I need to adjust the baking time and use suitable pans. Smaller portions generally bake faster than a single large cake. I begin checking them early with a toothpick and avoid overfilling the pans. I also handle the finished cakes carefully because their dense, moist texture makes them more delicate when warm.
Conclusion
White Chocolate Cake is a dessert I love making whenever I want something rich, elegant, and comforting without spending hours preparing complicated layers or decorations. The combination of creamy white chocolate, butter, vanilla, and a tender, dense crumb creates a cake that feels wonderfully indulgent with every bite.
This White Chocolate Cake, also known as White Chocolate Mud Cake, is a rich, buttery, and indulgent dessert with a dense, moist, and tender crumb. Made with creamy melted white chocolate, butter, vanilla, and simple baking ingredients, this easy single-layer cake delivers a wonderfully smooth sweetness and luxurious texture. Perfect for birthdays, holidays, family gatherings, or weekend treats, it can be served plain or decorated with white chocolate ganache, buttercream frosting, powdered sugar, or fresh berries.
Author:Amy
Prep Time:40 minutes
Cook Time:1 hour
Total Time:1 hour 40 minutes
Yield:16 slices
Category:Dessert
Method:Baking
Cuisine:American
Diet:Vegetarian
Ingredients
10.5 ounces white chocolate
1 cup butter (2 sticks)
1 cup half and half or whole milk
¾ cup + 1 tbsp granulated sugar
2 tsp vanilla extract
2 eggs
1 ¾ cups all-purpose flour, sifted
1 tsp baking soda
¼ tsp table salt
Instructions
Step 1: Preheat the Oven and Prepare the Pan. Preheat the oven to 325°F (163°C). Line a baking pan or baking dish with parchment paper, leaving enough overhang along the sides to make removing the finished cake easier. Make sure the parchment paper covers the bottom properly to prevent sticking. Set the prepared pan aside while making the batter.
Step 2: Melt the White Chocolate Mixture. Place the white chocolate, butter, half and half or whole milk, and granulated sugar in a large heatproof bowl. Set the bowl over a saucepan containing gently simmering water, making sure the bottom of the bowl does not touch the water. Heat slowly, stirring occasionally with a spatula until the white chocolate and butter have completely melted and the sugar is incorporated. Continue stirring until the mixture becomes smooth and evenly combined. Avoid high heat because white chocolate can scorch or become grainy.
Step 3: Allow the Chocolate Mixture to Cool. Carefully remove the heatproof bowl from the saucepan and place it on a heat-resistant surface. Allow the melted white chocolate mixture to cool for approximately 15–20 minutes, or until it reaches room temperature. Stir occasionally to encourage even cooling. Do not add the eggs while the mixture is hot, as this could cause them to cook prematurely and create an uneven batter.
Step 4: Incorporate the Eggs and Vanilla. Once the white chocolate mixture has cooled, add the eggs and vanilla extract. Using a whisk, gently mix until the eggs are completely incorporated and the batter becomes smooth and uniform. Scrape the sides and bottom of the bowl to ensure everything is evenly combined. The vanilla complements the creamy sweetness of the white chocolate.
Step 5: Prepare the Dry Ingredients. In a separate small mixing bowl, combine the sifted all-purpose flour, baking soda, and table salt. Stir thoroughly with a whisk or spoon to distribute the baking soda and salt evenly. Sifting the flour helps remove lumps and makes it easier to incorporate into the wet mixture.
Step 6: Combine the Wet and Dry Ingredients. Gradually add the dry ingredients to the white chocolate mixture, approximately half a cup at a time. Use a spatula to gently fold the flour into the batter after each addition, making sure most of the flour disappears before adding more. Continue until all the dry ingredients are incorporated. Briefly whisk the finished batter to eliminate any remaining lumps. Avoid excessive mixing because overworking the flour can make the cake tough. The finished batter should be smooth, thick, and evenly combined.
Step 7: Transfer the Batter and Bake. Pour the prepared cake batter into the parchment-lined baking pan. Use a spatula to spread the batter evenly and smooth the surface. Place the pan in the preheated oven and bake for approximately 50–65 minutes. Begin checking for doneness near the lower end of the baking time by inserting a toothpick into the center. The cake is ready when the toothpick comes out clean and the center appears fully set. If the surface begins browning too quickly before the center is baked, loosely cover the top with aluminum foil and continue baking until done.
Step 8: Cool the Cake Completely. Remove the cake from the oven and carefully place the baking pan on a wire cooling rack. Allow the cake to cool completely to room temperature before attempting to remove it. This cooling period helps the dense, moist crumb settle and become firm enough to handle without breaking. Once cooled, gently lift the cake from the pan using the parchment paper overhang and transfer it to a serving plate or cake stand.
Step 9: Decorate and Serve. Leave the cake plain to enjoy its rich white chocolate and buttery vanilla flavor, or decorate it with your favorite topping. For a simple presentation, dust the surface lightly with powdered sugar. For a more indulgent dessert, spread white chocolate ganache, vanilla buttercream, or cream cheese frosting over the cooled cake. Fresh raspberries, strawberries, or white chocolate curls also make beautiful decorations. Slice the cake into approximately 16 portions and serve at room temperature for the best texture and flavor.
Notes
White chocolate quality: Choose good-quality white chocolate containing cocoa butter for the best flavor and smoothest melting results. White chocolate bars generally melt more evenly than chocolate chips.
Gentle melting: Always melt white chocolate slowly over gently simmering water. Avoid excessive heat because it can scorch, separate, or become grainy.
Milk substitution: Use either half and half or whole milk. Half and half produces a richer mixture, while whole milk provides a slightly lighter alternative.
Cooling before adding eggs: Allow the melted chocolate mixture to cool for approximately 15–20 minutes, or until it reaches room temperature. Adding eggs to a hot mixture may cause them to cook prematurely.
Flour measurement: Measure the flour carefully and sift it before adding it to the batter. Too much flour can make the cake dry or excessively dense.
Avoid overmixing: Fold the dry ingredients into the wet mixture gradually and gently. Stop mixing once the batter is smooth and no visible flour remains.
Baking temperature: Bake at 325°F (163°C) for approximately 50–65 minutes. Begin checking near the lower end of the baking time because ovens and baking pans can vary.
Checking doneness: Insert a toothpick into the center of the cake. It should come out clean, and the center should appear set rather than wet.
Preventing excessive browning: If the top becomes too dark before the center is fully cooked, loosely cover it with aluminum foil during the final part of baking.
Cooling: Allow the cake to cool completely before removing it from the pan or decorating. The cake is delicate while warm and becomes easier to handle as it cools.
White chocolate raspberry variation: Gently fold a small handful of fresh raspberries into the batter or decorate the cooled cake with raspberries for a delicious sweet-tart contrast.
White chocolate lemon variation: Add finely grated lemon zest to the batter for a bright citrus flavor. Finish with a light lemon glaze if desired.
White chocolate ganache variation: Prepare ganache using melted white chocolate and warm heavy cream. Allow it to thicken slightly before spreading it over the completely cooled cake.
White chocolate strawberry variation: Decorate with fresh sliced strawberries and whipped cream for an elegant spring or summer dessert.
White chocolate coconut variation: Add shredded coconut to the batter or sprinkle toasted coconut over the finished cake for a subtle tropical flavor and extra texture.
White chocolate almond variation: Add a small amount of almond extract alongside the vanilla extract. Garnish with toasted sliced almonds for a delicate nutty flavor and pleasant crunch.
Birthday cake variation: Decorate the cooled cake with vanilla buttercream, white chocolate curls, and colorful sprinkles for a festive birthday dessert.
Frosting recommendations: White chocolate ganache, vanilla buttercream, cream cheese frosting, and raspberry frosting pair beautifully with this cake. Slightly tangy frostings help balance the sweetness.
Make-ahead preparation: Bake the cake one day before serving and store it in an airtight container once completely cooled. Decorate closer to serving time if using fresh fruit or whipped cream.
Room-temperature storage: Store the completely cooled cake in an airtight container at room temperature for up to 2 days, provided it does not contain perishable frosting or filling.
Refrigerator storage: Store in an airtight container in the refrigerator for up to 5 days. Allow refrigerated slices to sit at room temperature for approximately 20–30 minutes before serving.
Freezer storage: Wrap the completely cooled cake tightly in plastic wrap and aluminum foil, or place it in a freezer-safe container. Freeze for up to 3 months. Thaw overnight in the refrigerator before serving.
Freezing decorated cake: Buttercream and ganache generally freeze well, while fresh fruit and whipped cream are best added after thawing.
Reheating: Warm individual slices in the microwave for approximately 10–15 seconds at a time until slightly warm. Avoid overheating because the butter and white chocolate may make the cake greasy.
Preventing a sunken center: Make sure the cake is fully baked, measure the baking soda accurately, and avoid opening the oven door unnecessarily during the early stages of baking.
Preventing dryness: Avoid overbaking, measure flour accurately, and begin checking for doneness near the lower end of the recommended baking time.
Cupcake or layered cake adaptation: The batter can be adapted for cupcakes or multiple layers, but baking times must be adjusted. Smaller portions generally bake faster.
Serving suggestions: Serve with fresh raspberries, strawberries, vanilla ice cream, whipped cream, or white chocolate ganache. The cake is naturally rich, so smaller slices are often satisfying.