I love making Pumpkin Crisp because it delivers all the cozy flavors of fall without the extra work of preparing a traditional pie crust. The pumpkin filling is rich, smooth, and perfectly spiced, while the cinnamon streusel bakes into a beautiful golden layer.
One of my favorite things about this recipe is how simple it is to prepare. I only need a few basic ingredients, two mixing bowls, and a baking dish or cast iron skillet. The preparation takes just 15 minutes, making it a convenient dessert for busy afternoons or holiday gatherings.
I also appreciate how versatile this dessert is. I can serve it warm with ice cream, add a dollop of whipped cream, or enjoy it on its own. Whether I’m preparing a Thanksgiving dessert table or simply baking something comforting on a chilly evening, this Pumpkin Crisp always feels like a special treat.
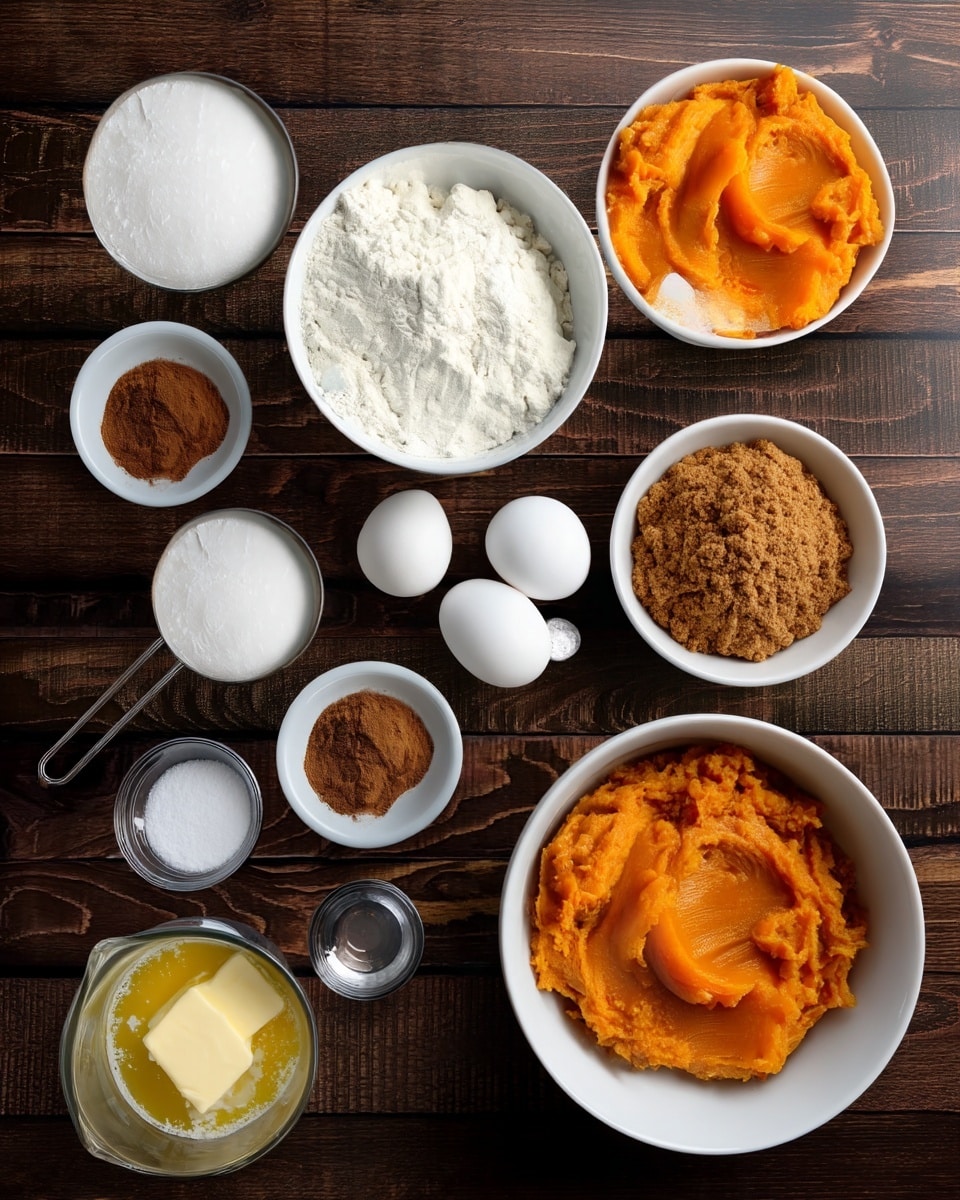
Ingredients
(Note: All ingredient amounts are listed in the recipe card below.)
I start by preheating my oven to 375°F. While the oven heats, I generously butter a 12-inch cast iron skillet or a 9×9-inch baking dish. I make sure to coat the bottom and sides so the pumpkin filling doesn’t stick during baking. Once the dish is prepared, I set it aside.
Step 2: Prepare the Pumpkin Filling
In a large mixing bowl, I combine the pumpkin puree, granulated sugar, eggs, pumpkin pie spice, salt, and vanilla extract. I whisk everything together until the mixture becomes smooth and evenly blended.
Next, I slowly whisk in the heavy cream until the filling is creamy and completely combined. I love how the heavy cream gives the pumpkin layer its rich, custard-like texture.
Once the filling is ready, I pour it into my prepared skillet or baking dish, spreading it into an even layer.
Step 3: Make the Cinnamon Streusel
In a separate medium bowl, I whisk together the all-purpose flour, granulated sugar, cinnamon, and salt.
I add the melted butter in three separate pours, mixing with a fork after each addition. I continue stirring until the mixture forms soft, buttery crumbs.
Sometimes I use my fingers to gently press the mixture together, creating larger streusel clusters. I like having a combination of small crumbs and larger pieces because they create a wonderful texture after baking.
Step 4: Assemble the Pumpkin Crisp
I carefully distribute the cinnamon streusel over the pumpkin filling, making sure to cover the entire surface evenly.
I avoid pressing the topping into the pumpkin mixture because I want it to remain on top and bake into a beautiful, crumbly crust.
Step 5: Bake Until Golden
I place the baking dish in my preheated oven and bake for 40 to 45 minutes, or until the pumpkin filling is set and the streusel topping is golden brown.
I keep an eye on the dessert during the final minutes of baking. If I notice the topping browning too quickly, I loosely cover the dish with aluminum foil to prevent it from becoming too dark.
Step 6: Cool and Serve
Once the Pumpkin Crisp is finished baking, I remove it from the oven and let it cool for about 10 minutes.
This resting time allows the pumpkin custard to firm up slightly, making the dessert easier to scoop.
I love serving it while it’s still warm, topped with vanilla ice cream, cinnamon ice cream, or freshly whipped cream. The combination of warm pumpkin filling, buttery streusel, and cold ice cream is absolutely delicious.
Servings and Timing
I find this recipe perfect for sharing with family or serving at a small holiday gathering.
Servings: 8
Prep Time: 15 minutes
Cook Time: 40 minutes
Total Time: 55 minutes
Oven Temperature: 375°F (190°C)
Cooling Time: 10 minutes before serving
I usually plan for approximately 1 hour and 5 minutes from the beginning of preparation until serving, including the recommended cooling time. If the crisp needs the full 45 minutes in the oven, I allow a few extra minutes.
Variations
Pecan Pumpkin Crisp
When I want extra crunch, I like adding chopped pecans to the cinnamon streusel topping. The nuts become lightly toasted during baking and add a rich, nutty flavor that pairs beautifully with the pumpkin filling.
Maple Pumpkin Crisp
For a deeper autumn flavor, I sometimes replace a small portion of the granulated sugar in the pumpkin filling with pure maple syrup. I love the subtle caramel-like sweetness it brings, although the additional liquid can make the filling slightly softer.
Brown Sugar Streusel
I occasionally replace some of the granulated sugar in the topping with brown sugar. This creates a richer, slightly caramelized streusel with a warm molasses flavor that complements the cinnamon.
Extra-Spiced Pumpkin Crisp
When I’m craving stronger fall spices, I add a little extra cinnamon, nutmeg, or ground ginger to the pumpkin filling. I prefer making small adjustments so the spices enhance the pumpkin without overpowering it.
Gluten-Free Pumpkin Crisp
I can make a gluten-free version by replacing the all-purpose flour in the streusel with a suitable 1:1 gluten-free baking flour blend. I make sure the blend is intended for baking so the topping maintains a pleasant crumbly texture.
Individual Pumpkin Crisps
For a more elegant presentation, I sometimes divide the pumpkin filling and streusel among oven-safe ramekins. I love serving individual portions at dinner parties. Since smaller portions may bake faster, I begin checking them earlier and remove them once the filling is set and the topping is golden.
Storage/Reheating
Refrigerating
I store leftover Pumpkin Crisp in an airtight container in the refrigerator for up to 4 days. If I keep it in the original baking dish, I cover it tightly once it has cooled.
Because the filling contains eggs and heavy cream, I always refrigerate leftovers promptly rather than leaving them at room temperature for extended periods.
Freezing
When I want to save portions for later, I let the Pumpkin Crisp cool completely before transferring it into freezer-safe containers.
I freeze individual portions for up to 2 months for the best flavor and texture. I know the streusel may soften slightly after thawing, but reheating it in the oven helps restore some of its crispness.
Reheating in the Oven
I prefer reheating Pumpkin Crisp in the oven because it helps the topping become warm and slightly crisp again.
I place a portion in an oven-safe dish and warm it at 325°F for approximately 10 to 15 minutes, or until heated through. Larger portions may need additional time.
Reheating in the Microwave
When I’m short on time, I use the microwave. I place a serving in a microwave-safe bowl and heat it in 20- to 30-second intervals until warm.
The topping becomes softer with this method, but the flavor remains delicious.
Making Ahead
I sometimes prepare the pumpkin filling and cinnamon streusel separately a day in advance. I store both mixtures covered in the refrigerator, keeping the streusel separate so it doesn’t absorb moisture from the filling.
When I’m ready to bake, I assemble the dessert and place it in the oven. If the filling is still very cold, I allow a little extra baking time and check that the center is properly set.
FAQs
1. Can I Use Pumpkin Pie Filling Instead of Pumpkin Puree?
I recommend using plain pumpkin puree rather than canned pumpkin pie filling. Pumpkin pie filling already contains sugar and spices, which would change the sweetness and flavor balance of this recipe. I prefer plain puree because it allows me to control the seasoning and achieve the intended creamy texture.
2. How Do I Know When Pumpkin Crisp Is Done Baking?
I look for a golden-brown streusel topping and a pumpkin filling that appears set around the edges. I also gently shake the baking dish to check the center. A slight wobble is normal, but the filling shouldn’t look liquid or slosh around. I let the dessert rest after baking so the custard can continue to firm up.
3. Can I Make Pumpkin Crisp Ahead of Time?
Yes, I often prepare this dessert ahead of time when planning holiday meals. I can bake it a day in advance, refrigerate it after cooling, and reheat it before serving. For the freshest streusel texture, I prefer preparing the filling and topping separately and assembling them just before baking.
4. Why Is My Pumpkin Crisp Topping Not Crunchy?
I find that the topping can become soft if the pumpkin filling releases moisture or if the dessert is stored in the refrigerator. To improve the texture, I make sure the streusel is evenly distributed and baked until golden brown. I also prefer reheating leftovers in the oven rather than the microwave.
5. Can I Use a Different Baking Dish?
I can use either a 12-inch cast iron skillet or a 9×9-inch baking dish for this recipe. I particularly love using a cast iron skillet because it creates a rustic presentation and distributes heat evenly. If I use a dish with different dimensions, I monitor the baking time because the thickness of the filling may change.
6. Can I Make Pumpkin Crisp Without Heavy Cream?
I prefer heavy cream because it creates a rich, smooth pumpkin custard. However, I can experiment with half-and-half as a lighter alternative. I expect the filling to be slightly less rich and potentially softer, but it can still be flavorful. I avoid using very thin milk substitutes when I want the traditional custard texture.
7. Can I Freeze Pumpkin Crisp After Baking?
Yes, I can freeze baked Pumpkin Crisp once it has cooled completely. I divide it into individual portions, wrap them well, and place them in freezer-safe containers. When I’m ready to enjoy a serving, I thaw it in the refrigerator and reheat it in the oven. I find this especially convenient when I have leftovers after a holiday gathering.
8. What Is the Difference Between Pumpkin Crisp and Pumpkin Pie?
I think the biggest difference is the topping and overall texture. Traditional pumpkin pie has a pastry crust beneath its smooth pumpkin custard filling, while Pumpkin Crisp has a buttery cinnamon streusel baked over the filling. I love Pumpkin Crisp because I get the familiar flavor of pumpkin pie with the added sweetness and crunch of a crumb topping.
9. What Should I Serve with Pumpkin Crisp?
I love serving warm Pumpkin Crisp with a scoop of vanilla ice cream because the cold, creamy ice cream melts slightly over the warm dessert. Cinnamon ice cream is another favorite of mine because it enhances the fall spices. I also enjoy adding whipped cream, a drizzle of caramel sauce, or a light sprinkle of cinnamon.
10. Can I Reduce the Sugar in Pumpkin Crisp?
I can reduce the sugar slightly if I prefer a less sweet dessert, although I keep in mind that sugar contributes to both flavor and texture. I usually start by making a small reduction in the streusel topping rather than dramatically changing the pumpkin filling. This allows me to preserve the dessert’s rich, comforting character while adjusting the sweetness to my preference.
Conclusion
Pumpkin Crisp is one of those comforting fall desserts I look forward to making every year. I love the combination of silky pumpkin custard, warm seasonal spices, and a golden cinnamon streusel topping that adds the perfect amount of sweetness and texture.
This Pumpkin Crisp is an easy and comforting fall dessert featuring a rich, creamy pumpkin pie filling topped with a buttery, golden cinnamon streusel. Made with pure pumpkin puree, warm pumpkin pie spice, eggs, heavy cream, and a sweet homemade crumb topping, this delicious dessert combines the smooth texture of traditional pumpkin pie with the irresistible crunch of a classic crisp. Unlike pumpkin pie, it requires no pastry crust, making preparation quick and simple. Baked in a cast iron skillet or baking dish, this homemade Pumpkin Crisp is perfect for Thanksgiving, autumn gatherings, holiday celebrations, and cozy family desserts. Serve it warm with vanilla ice cream, cinnamon ice cream, or freshly whipped cream for a delicious combination of creamy pumpkin custard and sweet, crunchy streusel.
Author:Amy
Prep Time:15 minutes
Cook Time:40 minutes
Total Time:55 minutes
Yield:8 servings
Category:Dessert
Method:Baking
Cuisine:American
Diet:Vegetarian
Ingredients
For the Pumpkin Pie Filling
1 (15-ounce) can pure pumpkin puree (not pumpkin pie filling)
Step 1: Preheat the Oven and Prepare the Baking Dish. Preheat the oven to 375°F (190°C). While the oven heats, generously grease a 12-inch cast iron skillet or a 9×9-inch baking dish with butter. Carefully coat the bottom, sides, and corners to prevent the pumpkin filling from sticking during baking. A cast iron skillet creates a beautiful rustic presentation, while a square baking dish works equally well. Set the prepared dish aside while making the pumpkin custard and cinnamon streusel.
Step 2: Combine the Pumpkin Filling Ingredients. In a large mixing bowl, add the pure pumpkin puree, granulated sugar, eggs, pumpkin pie spice, salt, and vanilla extract. Using a whisk, mix the ingredients until the eggs are completely incorporated and the pumpkin mixture becomes smooth and evenly blended. Scrape down the sides of the bowl as necessary to ensure all the sugar and spices are thoroughly combined. Use plain pumpkin puree rather than pumpkin pie filling because the latter contains added sugar and spices that can change the intended flavor balance.
Step 3: Add the Heavy Cream and Finish the Custard. Slowly pour the heavy cream into the pumpkin mixture while whisking gently. Continue whisking until the filling becomes smooth, creamy, and uniform in consistency. The heavy cream adds richness and helps create the silky, custard-like texture that makes Pumpkin Crisp so delicious. Avoid excessive whisking once the ingredients are fully incorporated. Carefully pour the finished pumpkin filling into the prepared cast iron skillet or baking dish, spreading it into an even layer with a spatula if necessary.
Step 4: Combine the Dry Streusel Ingredients. In a separate medium mixing bowl, combine the all-purpose flour, granulated sugar, ground cinnamon, and salt. Whisk until the dry ingredients are evenly distributed. The cinnamon adds warm autumn flavor, while the sugar helps create a sweet, golden topping that contrasts beautifully with the smooth pumpkin filling. Make sure there are no large lumps of flour or sugar before adding the melted butter.
Step 5: Add the Melted Butter and Form the Streusel Crumbs. Melt the unsalted butter and allow it to cool slightly if very hot. Pour the melted butter into the dry streusel mixture in three separate additions, stirring with a fork after each addition. Continue mixing until the ingredients form soft, buttery crumbs. Use your fingertips to gently press some of the mixture together, creating larger streusel clusters alongside smaller crumbs. This combination of crumb sizes gives the finished Pumpkin Crisp a delicious texture, with golden, crunchy pieces and tender buttery clusters. Avoid mixing the streusel into a completely smooth dough.
Step 6: Assemble the Pumpkin Crisp. Carefully sprinkle the prepared cinnamon streusel over the pumpkin filling, distributing it evenly across the entire surface. Use your fingers to scatter the larger crumb clusters among the smaller pieces so every serving receives a generous amount of topping. Avoid pressing the streusel into the pumpkin custard because the topping should remain on the surface and bake into a golden, crumbly crust. Make sure the topping is distributed as evenly as possible for consistent browning.
Step 7: Bake Until Golden and Set. Place the assembled Pumpkin Crisp on the center rack of the preheated oven. Bake at 375°F (190°C) for approximately 40–45 minutes, or until the cinnamon streusel becomes golden brown and the pumpkin filling is set around the edges. The center may have a slight wobble when the baking dish is gently moved, but it should not appear liquid or slosh. Monitor the dessert during the final minutes of baking because the sugary streusel can brown quickly. If the topping becomes too dark before the filling is set, loosely cover the dish with aluminum foil and continue baking until the custard is ready.
Step 8: Allow the Pumpkin Crisp to Cool Slightly. Carefully remove the baked Pumpkin Crisp from the oven and place the skillet or baking dish on a heat-resistant surface or cooling rack. Allow the dessert to rest for approximately 10 minutes before serving. This short cooling period helps the pumpkin custard firm up slightly, making it easier to scoop into individual portions. The streusel topping will also settle as it cools, developing a pleasant contrast between the buttery crumbs and creamy filling.
Step 9: Serve Warm with Your Favorite Toppings. Spoon the warm Pumpkin Crisp into individual dessert bowls or plates. Serve each portion with a generous scoop of vanilla ice cream or cinnamon ice cream, allowing the cold ice cream to melt gently over the warm pumpkin custard and golden streusel. Freshly whipped cream is another delicious option, and the dessert can also be enjoyed without additional toppings. Serve immediately while pleasantly warm for the best combination of creamy pumpkin filling, comforting spices, and buttery cinnamon crumbs.
Notes
Use pure pumpkin puree: Choose 100% pure pumpkin puree rather than canned pumpkin pie filling. Pumpkin pie filling already contains sweeteners and spices that can alter the recipe’s flavor and sweetness.
Use a 15-ounce can of pumpkin: The recipe requires one 15-ounce can of pure pumpkin puree for the pumpkin custard layer.
Choose the correct baking dish: A 12-inch cast iron skillet or a 9×9-inch baking dish works well for this recipe. Different pan sizes may change the thickness of the filling and the required baking time.
Grease the baking dish thoroughly: Butter the bottom and sides of the skillet or baking dish before adding the pumpkin filling to help prevent sticking.
Cast iron skillet option: A cast iron skillet provides a rustic presentation and distributes heat evenly. It is especially attractive when serving Pumpkin Crisp directly from the pan.
Use room-temperature eggs if possible: Eggs that are not refrigerator-cold can blend more easily into the pumpkin mixture and help create a smooth custard.
Whisk the pumpkin filling thoroughly: Combine the pumpkin puree, sugar, eggs, pumpkin pie spice, salt, and vanilla until smooth before adding the heavy cream.
Add heavy cream gradually: Slowly whisk the heavy cream into the pumpkin mixture to create a rich, creamy, evenly blended filling.
Why heavy cream matters: Heavy cream contributes richness and helps create the silky pumpkin custard texture. Replacing it with a thinner liquid may result in a softer filling.
Half-and-half substitution: Half-and-half can be tried as a lighter alternative to heavy cream, although the finished custard may be less rich and slightly softer.
Use pumpkin pie spice: The recipe calls for 2 teaspoons of pumpkin pie spice to give the filling its warm, classic autumn flavor.
Adjust the spices carefully: Add a small amount of extra cinnamon, nutmeg, or ground ginger if a stronger pumpkin spice flavor is desired. Avoid adding too much at once.
Prepare the streusel separately: Combine the flour, sugar, cinnamon, and salt in a separate bowl before adding melted butter. This helps distribute the ingredients evenly.
Add melted butter in stages: Pour the melted butter into the dry streusel ingredients in three additions, mixing with a fork after each addition until buttery crumbs form.
Create different crumb sizes: Use a fork and your fingertips to form a combination of small streusel crumbs and larger buttery clusters. The varied texture creates a more satisfying topping.
Do not overmix the topping: Stop mixing when the streusel resembles soft, buttery crumbs. Avoid turning the mixture into a completely smooth dough.
Keep the streusel on top: Sprinkle the crumb topping evenly over the pumpkin filling without pressing it into the custard. This helps the streusel bake into a golden surface layer.
Distribute the topping evenly: Cover the entire surface of the pumpkin filling so each portion has a balanced amount of creamy custard and crunchy streusel.
Baking temperature: Bake the Pumpkin Crisp at 375°F (190°C) for approximately 40–45 minutes.
Checking doneness: The dessert is ready when the streusel is golden brown and the pumpkin filling appears set around the edges. The center may wobble slightly but should not be liquid.
Avoid overbaking: Check the dessert near the end of the recommended baking time. Excessive baking can dry out the topping and affect the smooth custard texture.
Preventing excessive browning: If the streusel becomes too dark before the filling is set, loosely cover the baking dish with aluminum foil and continue baking.
Allow the custard to rest: Let the Pumpkin Crisp cool for approximately 10 minutes after baking. This helps the custard firm up and makes the dessert easier to serve.
Serve warm: Pumpkin Crisp is especially delicious while still warm because the creamy filling contrasts beautifully with the golden, buttery streusel.
Vanilla ice cream topping: Serve each warm portion with a scoop of vanilla ice cream for a classic combination of pumpkin spice, creamy sweetness, and buttery crumbs.
Cinnamon ice cream topping: Cinnamon ice cream enhances the warm fall spices and adds a delicious creamy contrast to the dessert.
Whipped cream topping: Add freshly whipped cream for a lighter finishing touch that complements the pumpkin custard.
Pecan pumpkin crisp variation: Add chopped pecans to the cinnamon streusel for extra crunch and a rich, toasted nut flavor.
Maple pumpkin crisp variation: Replace a small portion of the granulated sugar in the pumpkin filling with pure maple syrup for deeper autumn sweetness. Keep in mind that added liquid may slightly soften the filling.
Brown sugar streusel variation: Replace part of the granulated sugar in the topping with brown sugar for a richer, caramel-like flavor and a hint of molasses.
Extra-spiced variation: Add a small pinch of cinnamon, nutmeg, or ground ginger to the pumpkin filling for a more pronounced fall spice flavor.
Gluten-free variation: Replace the all-purpose flour in the streusel with a suitable 1:1 gluten-free baking flour blend. Choose a blend designed for baking to help maintain a crumbly texture.
Individual pumpkin crisps: Divide the pumpkin filling and streusel among oven-safe ramekins to create individual desserts. Begin checking for doneness earlier because smaller portions may bake more quickly.
Adjusting sweetness: Reduce the sugar slightly if a less sweet dessert is preferred. Begin with a modest reduction in the streusel topping to minimize changes to the pumpkin custard texture.
Make-ahead preparation: Prepare the pumpkin filling and cinnamon streusel separately up to one day before baking. Keep both mixtures covered in the refrigerator until ready to assemble.
Keep the topping separate before baking: Store the streusel separately from the pumpkin filling when preparing ahead. This helps prevent the crumbs from absorbing moisture and becoming soggy.
Baking chilled filling: If the pumpkin mixture is very cold when assembled, it may require additional baking time. Check that the center is properly set before removing the dessert from the oven.
Baking ahead: Pumpkin Crisp can be baked a day before serving. Cool completely, refrigerate, and reheat gently before serving.
Refrigerator storage: Store leftover Pumpkin Crisp in an airtight container or tightly covered baking dish in the refrigerator for up to 4 days.
Food safety: Because the filling contains eggs and heavy cream, refrigerate leftovers promptly rather than leaving the dessert at room temperature for extended periods.
Freezer storage: Allow the baked Pumpkin Crisp to cool completely, divide it into portions, and transfer to freezer-safe containers. Freeze for up to 2 months for the best flavor and texture.
Freezing and texture: The cinnamon streusel may soften slightly after freezing and thawing. Oven reheating can help restore some of its original crispness.
Thawing frozen portions: Thaw frozen Pumpkin Crisp in the refrigerator before reheating for the best results.
Oven reheating: Place individual portions in an oven-safe dish and warm at 325°F (165°C) for approximately 10–15 minutes, or until heated through. Larger portions may require additional time.
Microwave reheating: Place a serving in a microwave-safe bowl and heat in 20–30-second intervals until warm. The topping may become softer than when reheated in the oven.
Restoring the topping’s texture: Reheat leftovers in the oven rather than the microwave when a slightly crisp streusel topping is preferred.
Pumpkin Crisp versus pumpkin pie: Traditional pumpkin pie has a pastry crust underneath its custard filling, while Pumpkin Crisp features a buttery cinnamon streusel baked over the pumpkin custard.
Serving suggestions: Serve Pumpkin Crisp warm with vanilla ice cream, cinnamon ice cream, freshly whipped cream, caramel sauce, or a light sprinkle of cinnamon.
Perfect occasions: This easy pumpkin dessert is ideal for Thanksgiving, autumn celebrations, holiday gatherings, family dinners, and cozy fall evenings.