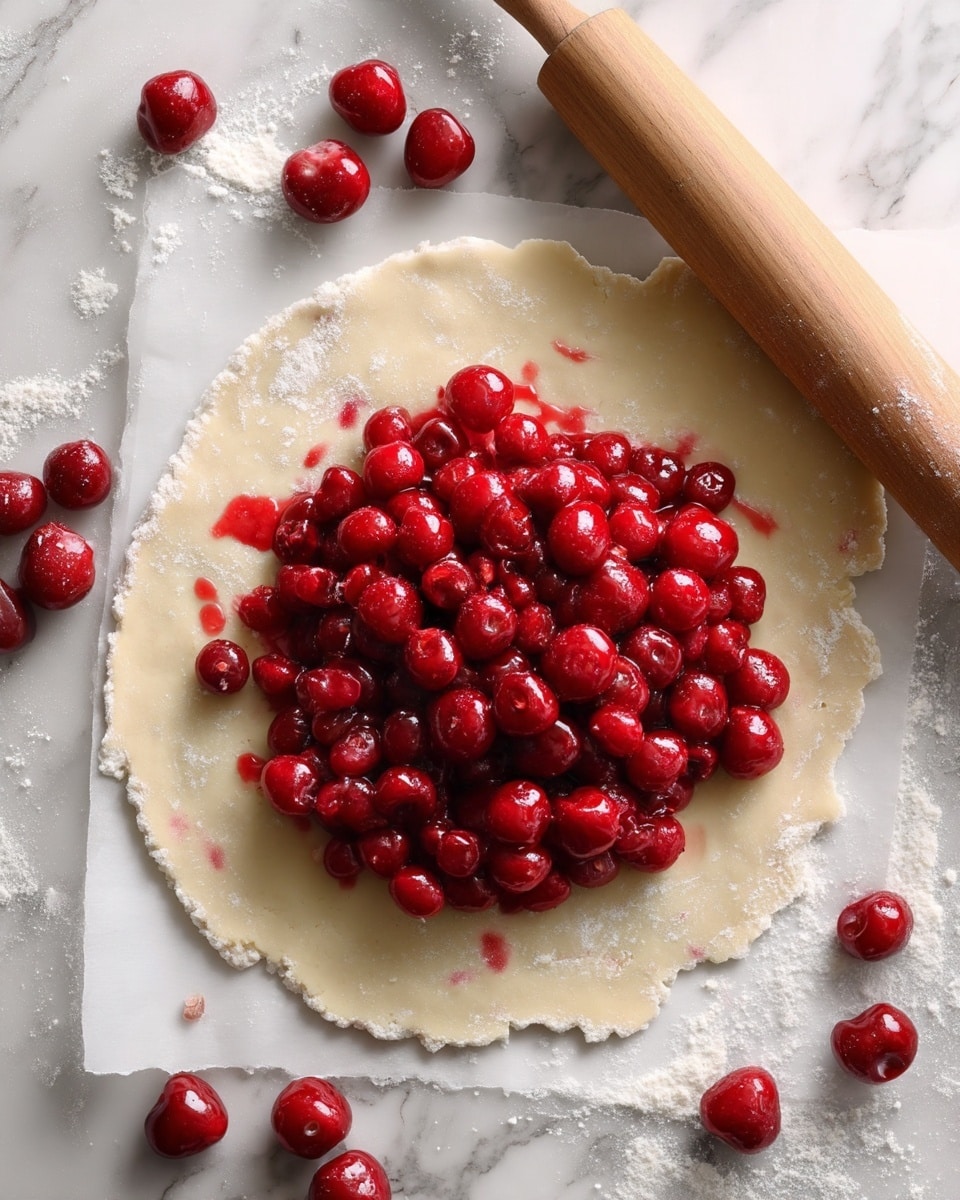
Rustic and beautiful: I love that this galette doesn’t require a perfect shape or fancy pie dish. Its uneven, folded edges give it a charming homemade appearance.
Flaky, buttery crust: I use cold butter to create a tender, crisp pastry that complements the juicy cherries.
Perfect sweet-tart balance: I enjoy the natural tartness of sour cherries combined with just enough sugar to bring out their fruity flavor.
Simple ingredients: I can prepare this dessert with everyday baking staples and fresh or frozen sour cherries.
Make-ahead convenience: I love that the crust recipe makes enough dough for two galettes, allowing me to freeze half for another dessert.
Delicious warm or at room temperature: I can serve this galette freshly baked or enjoy leftovers later.
Great for gatherings: I find this dessert ideal for summer dinners, weekend baking, and casual celebrations.
Ingredients
(Note: All ingredient amounts are listed in the recipe card below.)
Crust — this makes enough for 2 galettes, so stick one in the freezer!
4 cups sifted all-purpose flour
1 tablespoon sugar
1 teaspoon salt
1 large egg lightly beaten
1 teaspoon white vinegar
1/2 cup ice cold water
1 1/2 cups cold unsalted butter cut into pieces (3 sticks or 24 tablespoons)
raw sugar for sprinkling
for brushing: 1 egg + a few drops of water beaten together
Filling
2 pounds sour cherries, pitted fresh or thawed
1/3 cup sugar
3 tablespoons cornstarch
1/4 teaspoon salt
1 teaspoon vanilla extract
2 tablespoons butter cut into pieces
vanilla ice cream for serving
Directions
Step 1: Prepare the Dry Ingredients
I start by adding the sifted all-purpose flour, sugar, and salt to a food processor. I pulse the ingredients a few times until they are evenly combined. This helps distribute the sugar and salt throughout the flour before I add the butter.
Step 2: Mix the Wet Ingredients
In a small bowl, I whisk together the lightly beaten egg, white vinegar, and ice-cold water. I make sure the water is very cold because keeping the ingredients chilled helps create a flaky pastry.
Step 3: Incorporate the Butter
I add the cold, cubed unsalted butter to the flour mixture in the food processor. I pulse until the mixture resembles coarse crumbs with small pieces of butter remaining. I avoid overprocessing because those little butter pieces help produce a tender, flaky crust during baking.
Step 4: Form and Chill the Dough
I drizzle the egg, vinegar, and water mixture over the flour and butter mixture, then pulse until the dough begins to come together.
I remove the dough from the food processor and gently gather it with my hands. Since this recipe makes enough crust for two galettes, I divide the dough into two equal portions. I wrap each portion tightly in plastic wrap and refrigerate the dough for 30 minutes. I save one portion for the current galette and freeze the other for another baking day.
Step 5: Preheat the Oven
After the dough has chilled for 30 minutes, I preheat my oven to 400°F (200°C). I also line a large baking sheet with parchment paper to prevent sticking and make cleanup easier.
Step 6: Prepare the Sour Cherry Filling
I place the pitted sour cherries in a large mixing bowl. I add the sugar, cornstarch, and salt, then gently toss everything together until the cherries are evenly coated.
Next, I drizzle in the vanilla extract and toss again. I love how the vanilla enhances the cherries’ natural flavor without overpowering their tartness. The cornstarch helps thicken the juices as the galette bakes.
Step 7: Roll Out the Crust
I remove one portion of chilled dough from the refrigerator and place it on a lightly floured surface. Using a rolling pin, I roll the dough into a rough circle or oval about 1/4 inch thick.
I don’t worry about making the edges perfectly even because the rustic shape is part of what makes a galette so appealing. Once rolled out, I carefully transfer the dough to my parchment-lined baking sheet.
Step 8: Add the Cherry Filling
I spoon the prepared sour cherry mixture into the center of the rolled-out dough, spreading it evenly while leaving a border of at least 2 inches around the edges.
I scatter the small pieces of butter over the cherries. As the galette bakes, the butter melts into the filling, adding richness and helping create a glossy finish.
Step 9: Fold and Finish the Crust
I gently fold the outer edges of the dough over the cherries, overlapping sections as needed to create a rustic border. I leave the center open so the colorful cherry filling remains visible.
I brush the exposed pastry with the beaten egg and water mixture, then sprinkle raw sugar over the crust. I love this finishing step because it gives the pastry a beautiful golden color and a slightly crunchy texture.
Step 10: Bake the Galette
I place the baking sheet in the preheated oven and bake for approximately 40 to 45 minutes, or until the crust is golden brown and the cherry filling is bubbling.
I keep an eye on the galette toward the end of baking to make sure the edges don’t become too dark. If necessary, I loosely cover the edges with foil while the center finishes baking.
Step 11: Cool and Serve
I remove the galette from the oven and let it cool slightly before slicing. This resting time allows the cherry filling to thicken and makes the slices easier to serve.
I love serving each warm slice with a scoop of vanilla ice cream. The cold, creamy ice cream melts slightly over the buttery crust and tangy cherries, creating a dessert that feels both comforting and special.
Servings and Timing
Servings
4
Total time
1 hr 30 min
Preparation Time: Approximately 15 minutes
Dough Chilling Time: 30 minutes
Baking Time: 40–45 minutes
Total Time: Approximately 1 hour and 30 minutes
Yield: 1 galette serving 4 people, with enough crust dough for a second galette
I find this recipe easy to fit into an afternoon baking session. I often prepare the dough ahead of time so I can assemble and bake the galette whenever I’m ready.
Variations
1. Mixed Berry Galette
I sometimes replace part of the sour cherries with raspberries, blueberries, or blackberries. I love how the different berries add extra sweetness, color, and texture while maintaining the dessert’s rustic appearance.
2. Sweet Cherry Galette
When sour cherries aren’t available, I use sweet cherries instead. Since sweet cherries contain more natural sugar, I reduce the added sugar slightly to keep the filling from becoming overly sweet.
3. Almond Sour Cherry Galette
I like adding a little almond extract to the filling or sprinkling sliced almonds over the crust before baking. The nutty almond flavor pairs beautifully with cherries and makes the galette taste especially rich.
4. Lemon Sour Cherry Galette
For a brighter flavor, I add freshly grated lemon zest to the cherry filling. I enjoy how the citrus notes enhance the tartness of the cherries and give the dessert a refreshing finish.
5. Cinnamon Cherry Galette
I sometimes sprinkle a small amount of ground cinnamon into the filling. This adds a warm, comforting flavor that I particularly enjoy during cooler months.
6. Mini Sour Cherry Galettes
Instead of making one large galette, I divide the dough and filling into smaller portions to create individual desserts. I adjust the baking time and watch for golden pastry and bubbling filling. I find these mini galettes especially convenient for parties and family gatherings.
7. Peach and Sour Cherry Galette
I occasionally combine sliced peaches with sour cherries for a summer-inspired variation. The natural sweetness of the peaches balances the tart cherries, creating a juicy and colorful filling.
Storage/Reheating
Refrigerating
I allow the galette to cool completely before storing it. I cover it tightly with plastic wrap or transfer individual slices to an airtight container.
I keep the galette in the refrigerator for up to 4 days. I find that the filling stays flavorful, although the crust gradually softens as it absorbs moisture from the cherries.
Freezing
I prefer freezing the extra portion of unbaked crust dough because it gives me a convenient head start on my next galette. I wrap the dough tightly in plastic wrap and place it in a freezer-safe bag. I store it in the freezer for up to 3 months.
I can also freeze the fully baked galette after it has cooled completely. I wrap it securely and freeze it for up to 2 months for the best texture and flavor.
Reheating in the Oven
I find that reheating the galette in the oven gives the best results because it helps restore the crispness of the pastry.
I preheat my oven to 350°F (175°C), place the galette or individual slices on a baking sheet, and warm them for approximately 10 to 15 minutes, or until heated through. I allow extra time for larger portions.
Reheating in the Microwave
When I’m short on time, I microwave an individual slice for approximately 20 to 30 seconds, checking whether it is warm enough before adding more time.
Although this method is convenient, I notice that the crust becomes softer than it does when reheated in the oven.
Making Ahead
I often prepare the dough a day or two before baking and keep it wrapped in the refrigerator. When I’m ready, I roll it out, prepare the filling, and assemble the galette.
I prefer mixing the cherries with the sugar and cornstarch shortly before baking to prevent the filling from becoming excessively juicy while it sits.
FAQs
1. Can I use frozen sour cherries instead of fresh cherries?
Yes, I can use frozen sour cherries when fresh ones aren’t in season. I thaw them first and drain away excess liquid before mixing them with the sugar, cornstarch, salt, and vanilla. I find that removing extra moisture helps prevent a soggy crust while keeping the filling juicy and flavorful.
2. What is the difference between a galette and a traditional pie?
I think of a galette as a simpler, free-form version of a pie. Instead of placing the dough inside a pie dish, I roll it out on a flat surface, add the filling to the center, and fold the edges inward. I love that a galette doesn’t require a perfectly shaped crust, making it easier and quicker to assemble than a traditional pie.
3. How do I keep the bottom of my galette from becoming soggy?
I make sure the cherries aren’t carrying too much extra liquid before adding them to the dough. I also use the cornstarch called for in the recipe because it thickens the cherry juices during baking. I bake the galette until the filling bubbles and the crust is thoroughly golden, which helps produce a crisp bottom.
4. Can I make the galette dough without a food processor?
Yes, I can prepare the dough by hand using a pastry cutter or two forks. I combine the flour, sugar, and salt in a large bowl, then cut in the cold butter until the mixture resembles coarse crumbs. I gradually add the egg, vinegar, and water mixture and gently bring the dough together. I work quickly to keep the butter cold and avoid overworking the pastry.
5. Why do I need to chill the dough before baking?
I chill the dough because it helps keep the butter firm and allows the gluten in the flour to relax. This makes the dough easier to roll and helps the crust maintain its flaky texture during baking. I find that skipping the chilling step can result in pastry that’s more difficult to handle and less tender.
6. Can I use sweet cherries instead of sour cherries?
Yes, I can substitute sweet cherries if sour cherries aren’t available. I usually reduce the sugar because sweet cherries are naturally less tart. I also taste the fruit before adjusting the sweetness so the filling maintains a balanced flavor. I find that sweet cherries produce a milder dessert, while sour cherries create a more pronounced fruity tang.
7. How do I know when my sour cherry galette is fully baked?
I look for a deep golden-brown crust and cherry juices bubbling in the center. I also check that the pastry edges appear crisp rather than pale or doughy. I generally bake the galette for 40 to 45 minutes at 400°F, but I rely on its appearance because oven temperatures can vary slightly.
8. Can I prepare the sour cherry galette ahead of time?
Yes, I often prepare the crust dough in advance and refrigerate it until I’m ready to bake. I can also bake the entire galette earlier in the day and reheat it before serving. I find that this makes the recipe especially convenient when I’m preparing dessert for guests or a family dinner.
9. What can I serve with sour cherry galette besides vanilla ice cream?
Although vanilla ice cream is my favorite pairing, I also enjoy serving the galette with freshly whipped cream, crème fraîche, or a light dusting of powdered sugar. For a richer dessert, I sometimes add a spoonful of mascarpone. I find that creamy toppings balance the tart cherry filling beautifully.
10. Why is my galette filling too runny?
I usually find that a runny filling results from excess cherry juice, insufficient thickening, or not allowing the galette to cool before slicing. I make sure to use the full amount of cornstarch and bake until the filling is visibly bubbling. After removing the galette from the oven, I let it rest so the juices have time to thicken. I find that this makes the dessert much easier to slice and serve.
Conclusion
This Sour Cherry Galette is one of those desserts I love making whenever I want something simple, comforting, and full of homemade flavor. The combination of tart, juicy cherries, buttery pastry, and a golden, sugar-sprinkled crust creates a beautiful balance of textures and flavors.
This Sour Cherry Galette is a beautiful rustic dessert featuring a flaky, buttery homemade pastry crust wrapped around a sweet and tangy sour cherry filling. Made with fresh or frozen sour cherries, sugar, vanilla, and cornstarch, this free-form tart delivers a delicious balance of juicy fruit, delicate sweetness, and golden, crisp pastry. Unlike traditional cherry pie, this easy galette requires no special pie dish or complicated shaping techniques. The folded pastry edges create a charming homemade appearance, while a sprinkle of raw sugar adds a lightly crunchy finish. Perfect for summer gatherings, family dinners, weekend baking, and special occasions, this delicious Sour Cherry Galette tastes wonderful served warm with vanilla ice cream or freshly whipped cream.
Author:Amy
Prep Time:15 minutes
Cook Time:45 minutes
Total Time:1 hour
Yield:1 galette (4 servings), plus extra dough for a second galette
Category:Dessert
Method:Baking
Cuisine:French
Diet:Vegetarian
Ingredients
For the Homemade Galette Crust (Makes Enough for 2 Galettes)
4 cups sifted all-purpose flour
1 tablespoon granulated sugar
1 teaspoon salt
1 large egg, lightly beaten
1 teaspoon white vinegar
½ cup ice-cold water
1½ cups cold unsalted butter, cut into small pieces (3 sticks or 24 tablespoons)
Raw sugar, for sprinkling
1 egg beaten with a few drops of water, for brushing the crust
For the Sour Cherry Filling
2 pounds sour cherries, pitted, fresh or thawed
⅓ cup granulated sugar
3 tablespoons cornstarch
¼ teaspoon salt
1 teaspoon vanilla extract
2 tablespoons butter, cut into small pieces
For Serving
Vanilla ice cream, optional
Instructions
Step 1: Combine the Dry Ingredients for the Crust. Place the sifted all-purpose flour, granulated sugar, and salt into the bowl of a food processor. Pulse the ingredients several times until they are evenly combined. This helps distribute the sugar and salt throughout the flour and creates a uniform base for the pastry dough. Make sure the food processor is large enough to accommodate the ingredients without overcrowding. Keep the butter refrigerated until ready to use because cold butter is essential for producing a flaky, tender galette crust.
Step 2: Prepare the Cold Liquid Mixture. In a small mixing bowl, combine the lightly beaten egg, white vinegar, and ice-cold water. Whisk gently until the ingredients are evenly blended. Keep the mixture cold while preparing the remaining dough ingredients. The cold water helps prevent the butter from softening too quickly, while the vinegar is included in the pastry mixture to help create a tender crust. Set the liquid mixture aside until ready to incorporate it into the flour and butter.
Step 3: Incorporate the Cold Butter. Add the cold unsalted butter pieces to the flour mixture in the food processor. Pulse in short bursts until the mixture resembles coarse crumbs with small, visible pieces of butter remaining. Avoid processing until the mixture becomes completely smooth or paste-like. The small pieces of cold butter create pockets of steam during baking, helping the pastry develop a light, flaky texture. If the butter begins to soften while working, briefly chill the mixture before continuing.
Step 4: Form and Chill the Galette Dough. Slowly drizzle the prepared egg, vinegar, and ice-water mixture over the flour and butter mixture. Pulse gently until the dough begins to come together into moist, crumbly pieces. Transfer the dough to a lightly floured work surface and gently gather it together with your hands without excessive kneading. Divide the dough into two equal portions because this recipe produces enough pastry for two galettes. Shape each portion into a disk and wrap tightly in plastic wrap. Refrigerate for at least 30 minutes to firm the butter and make the dough easier to roll. Reserve one portion for the Sour Cherry Galette and freeze the second portion for another baking day if desired.
Step 5: Preheat the Oven and Prepare the Baking Sheet. After the dough has chilled for approximately 30 minutes, preheat the oven to 400°F (200°C). Line a large baking sheet with parchment paper to prevent the galette from sticking and to make cleanup easier. Arrange the baking sheet near your work surface so the rolled pastry can be transferred easily. Make sure the oven is fully preheated before baking to help the crust develop a golden, flaky texture.
Step 6: Prepare the Sour Cherry Filling. Place the pitted sour cherries in a large mixing bowl. If using frozen cherries, thaw them first and drain away excess liquid to prevent the filling from becoming overly watery. Add the granulated sugar, cornstarch, and salt. Gently toss the cherries until they are evenly coated with the dry ingredients. Add the vanilla extract and toss again until thoroughly combined. The sugar balances the natural tartness of the cherries, while the cornstarch helps thicken their juices during baking. Prepare the filling shortly before assembling the galette to minimize excess juice collecting in the bowl.
Step 7: Roll Out the Chilled Pastry Dough. Remove one portion of chilled dough from the refrigerator and place it on a lightly floured work surface. Using a rolling pin, gently roll the dough into a rough circle or oval approximately ¼ inch thick. Rotate the dough occasionally and lightly flour the surface as needed to prevent sticking. Avoid overworking the pastry because handling it excessively can soften the butter and affect the finished texture. Do not worry about making a perfectly round shape because the uneven edges contribute to the rustic appearance of a traditional galette. Carefully transfer the rolled dough onto the prepared parchment-lined baking sheet.
Step 8: Add the Sour Cherry Filling. Spoon the prepared sour cherry mixture into the center of the rolled pastry, spreading it into an even layer while leaving a border of at least 2 inches around the edges. Try to distribute the cherries evenly so the galette bakes consistently. Avoid adding excessive loose liquid from the mixing bowl because too much moisture may soften the bottom crust. Scatter the two tablespoons of butter pieces evenly over the cherries. As the galette bakes, the butter melts into the filling, adding richness and helping create a glossy, flavorful fruit center.
Step 9: Fold the Pastry Edges and Add the Finishing Touches. Carefully lift the outer edges of the pastry and fold them inward over the cherry filling, overlapping sections as needed to create a rustic border. Leave the center open so the colorful sour cherries remain visible. Gently press overlapping folds to help them hold their shape during baking. In a small bowl, beat one egg with a few drops of water to prepare an egg wash. Using a pastry brush, lightly coat the exposed pastry edges with the egg wash. Sprinkle raw sugar over the brushed crust to create a beautiful golden finish and a delicate crunch after baking.
Step 10: Bake the Sour Cherry Galette. Place the assembled galette in the preheated oven and bake at 400°F (200°C) for approximately 40–45 minutes. The galette is ready when the pastry becomes deeply golden brown and the sour cherry filling is visibly bubbling in the center. The bubbling indicates that the cherry juices have heated sufficiently for the cornstarch to thicken the filling. Monitor the pastry during the final minutes of baking to prevent excessive browning. If the edges begin to darken too quickly, loosely cover them with aluminum foil while allowing the center to finish baking. Remove the galette from the oven once the crust is crisp and golden and the filling is bubbling.
Step 11: Cool the Galette Before Slicing. Transfer the baking sheet to a heat-resistant surface or cooling rack and allow the galette to rest for several minutes before cutting. This resting period allows the hot cherry filling to thicken and settle, making the dessert easier to slice and serve. Avoid cutting immediately after baking because the filling may still be very hot and runny. For cleaner slices, allow the galette to cool longer until the fruit juices have thickened sufficiently.
Step 12: Slice, Serve, and Enjoy. Carefully transfer the Sour Cherry Galette to a serving platter or leave it on the parchment-lined baking sheet for a rustic presentation. Cut into approximately four generous servings. Serve slightly warm or at room temperature. For a classic dessert pairing, top each slice with a scoop of vanilla ice cream and allow it to melt gently over the warm cherries and buttery crust. Freshly whipped cream, crème fraîche, mascarpone, or a light dusting of powdered sugar also make delicious accompaniments. Enjoy the combination of tart cherries, sweet fruit juices, crisp pastry edges, and tender, flaky homemade crust.
Notes
Crust recipe makes two galettes: The pastry ingredients produce enough dough for two galettes. Use one portion for this recipe and refrigerate or freeze the second portion for another dessert.
Keep the butter cold: Cold butter is essential for creating a tender, flaky pastry. Avoid allowing the butter to soften excessively while mixing or rolling the dough.
Use ice-cold water: The recipe calls for ½ cup ice-cold water to help keep the pastry ingredients chilled and prevent the butter from melting during preparation.
Do not overprocess the pastry: Pulse the flour and butter until the mixture resembles coarse crumbs with small butter pieces remaining. Overprocessing can reduce the flaky texture of the finished crust.
Use white vinegar in the dough: The recipe includes 1 teaspoon of white vinegar in the pastry mixture. It contributes to the dough preparation without creating a noticeable vinegar flavor.
Chill the dough before rolling: Refrigerate the prepared pastry for at least 30 minutes. Chilling helps firm the butter and allows the dough to relax, making it easier to roll and shape.
Divide the dough evenly: Separate the pastry into two equal portions before chilling. Shape each portion into a disk and wrap tightly to prevent drying.
Freeze extra pastry dough: Wrap the unused dough portion tightly in plastic wrap and place it in a freezer-safe bag. Freeze for up to 3 months for convenient future baking.
Make the dough ahead: Prepare the pastry one or two days before baking and store it tightly wrapped in the refrigerator until ready to assemble the galette.
Making pastry without a food processor: Combine the flour, sugar, and salt in a mixing bowl. Use a pastry cutter or two forks to cut in the cold butter until coarse crumbs form. Gradually add the egg, vinegar, and water mixture, then gently bring the dough together.
Avoid overworking the dough: Handle the pastry gently when gathering and rolling it. Excessive kneading can make the crust tougher and less flaky.
Rustic shaping: A galette does not need a perfectly round or evenly shaped crust. Its slightly irregular edges create a charming homemade appearance.
Roll to the correct thickness: Roll the chilled dough into a rough circle or oval approximately ¼ inch thick, maintaining a reasonably even thickness for consistent baking.
Use fresh or frozen sour cherries: Both fresh and frozen sour cherries work well. Fresh cherries should be pitted, while frozen cherries should be thawed and drained before use.
Drain frozen cherries: Remove excess liquid from thawed cherries before mixing the filling. This helps prevent an overly watery filling and reduces the risk of a soggy pastry bottom.
Choose sour cherries for balanced flavor: Sour cherries provide a pronounced tartness that balances the sugar and buttery crust, creating a classic sweet-and-tangy dessert.
Sweet cherry substitution: Sweet cherries can replace sour cherries when necessary. Reduce the added sugar slightly because sweet cherries contain more natural sweetness.
Use cornstarch for thickening: The recipe calls for 3 tablespoons of cornstarch to thicken the cherry juices during baking. Proper thickening helps the filling hold together when sliced.
Mix the filling shortly before baking: Toss the cherries with sugar and cornstarch just before assembling the galette to prevent excessive juice from collecting in the bowl.
Leave a pastry border: Keep at least 2 inches of uncovered dough around the cherry filling so the edges can be folded over to create the rustic galette shape.
Do not overfill the crust: Spread the cherries evenly in the center and avoid adding excessive loose juice. Overfilling may cause the filling to leak or make the bottom pastry soggy.
Add butter over the filling: Scatter 2 tablespoons of butter pieces over the cherries before folding the pastry. The butter melts during baking and adds richness to the fruit filling.
Fold the edges gently: Lift the pastry border over the cherries and overlap the folds as needed. Leave the center exposed for the traditional galette appearance.
Use egg wash: Brush the exposed pastry with one beaten egg mixed with a few drops of water. The egg wash helps the crust develop an attractive golden color.
Sprinkle with raw sugar: Add raw sugar to the egg-washed pastry edges before baking for extra sweetness and a lightly crunchy finish.
Baking temperature: Bake the galette at 400°F (200°C) for approximately 40–45 minutes, or until the crust is golden brown and the cherry filling is bubbling.
Checking doneness: Look for deeply golden pastry edges and bubbling cherry juices in the center. The crust should appear crisp rather than pale or doughy.
Preventing excessive browning: If the pastry edges become too dark before the filling is ready, loosely cover them with aluminum foil during the final part of baking.
Preventing a soggy crust: Drain excess moisture from the cherries, use the full amount of cornstarch, and bake until the filling bubbles and the pastry is thoroughly golden.
Preventing runny filling: Make sure the cherries are not overly watery, use the specified cornstarch, bake until the juices bubble, and allow the galette to cool before slicing.
Cooling before serving: Let the galette rest after baking so the cherry juices can thicken and the filling becomes easier to portion.
Mixed berry variation: Replace part of the sour cherries with raspberries, blueberries, or blackberries for a colorful fruit filling with varied sweetness and texture.
Almond sour cherry variation: Add a little almond extract to the cherry filling or sprinkle sliced almonds over the crust before baking for a delicate nutty flavor.
Lemon sour cherry variation: Add freshly grated lemon zest to the filling for a bright citrus flavor that complements the tart cherries.
Cinnamon cherry variation: Sprinkle a small amount of ground cinnamon into the cherry filling for a warm, comforting flavor.
Mini sour cherry galettes: Divide the pastry and filling into smaller portions to create individual galettes. Reduce the baking time as needed and monitor for golden pastry and bubbling filling.
Peach and sour cherry variation: Combine sliced peaches with sour cherries for a summery fruit filling that balances tart and sweet flavors.
Refrigerator storage: Allow the baked galette to cool completely, then cover tightly or transfer slices to an airtight container. Refrigerate for up to 4 days.
Crust texture during storage: The pastry may gradually soften in the refrigerator as it absorbs moisture from the cherry filling. Reheating in the oven can help restore some crispness.
Freezing baked galette: Cool the galette completely, wrap it securely, and freeze for up to 2 months for the best flavor and texture.
Oven reheating: Preheat the oven to 350°F (175°C), place the galette or individual slices on a baking sheet, and warm for approximately 10–15 minutes or until heated through. Larger portions may require additional time.
Microwave reheating: Microwave individual slices for approximately 20–30 seconds, checking for warmth before adding more time. The microwave is convenient but may soften the pastry.
Serving temperature: Serve the galette warm or at room temperature. Warm galette pairs especially well with cold vanilla ice cream.
Vanilla ice cream pairing: Add a generous scoop of vanilla ice cream to each warm slice for a delicious contrast between creamy sweetness and tart cherries.
Alternative toppings: Serve with freshly whipped cream, crème fraîche, mascarpone, or a light dusting of powdered sugar for additional richness and flavor.
Perfect occasions: This rustic Sour Cherry Galette is ideal for summer dinners, weekend baking, casual celebrations, family gatherings, and homemade dessert tables.