Rich and creamy texture: I love how the smooth cheesecake filling melts in my mouth while the Oreo crust adds a delicious chocolate crunch.
Beautiful presentation: The vibrant red filling and fluffy white cream cheese topping create a stunning contrast that makes this dessert perfect for celebrations.
Perfect chocolate flavor: I use cocoa powder to give the cheesecake a subtle chocolate taste without overpowering the classic cream cheese flavor.
Easy Oreo crust: I appreciate that the crust requires only two ingredients and comes together in minutes.
Great make-ahead dessert: I can prepare this cheesecake the day before serving, which makes entertaining much easier.
Bakery-style results: I enjoy creating an impressive cheesecake at home without needing complicated decorating techniques.
Ideal for special occasions: I love serving this dessert for Valentine’s Day, Christmas, birthdays, and dinner parties.
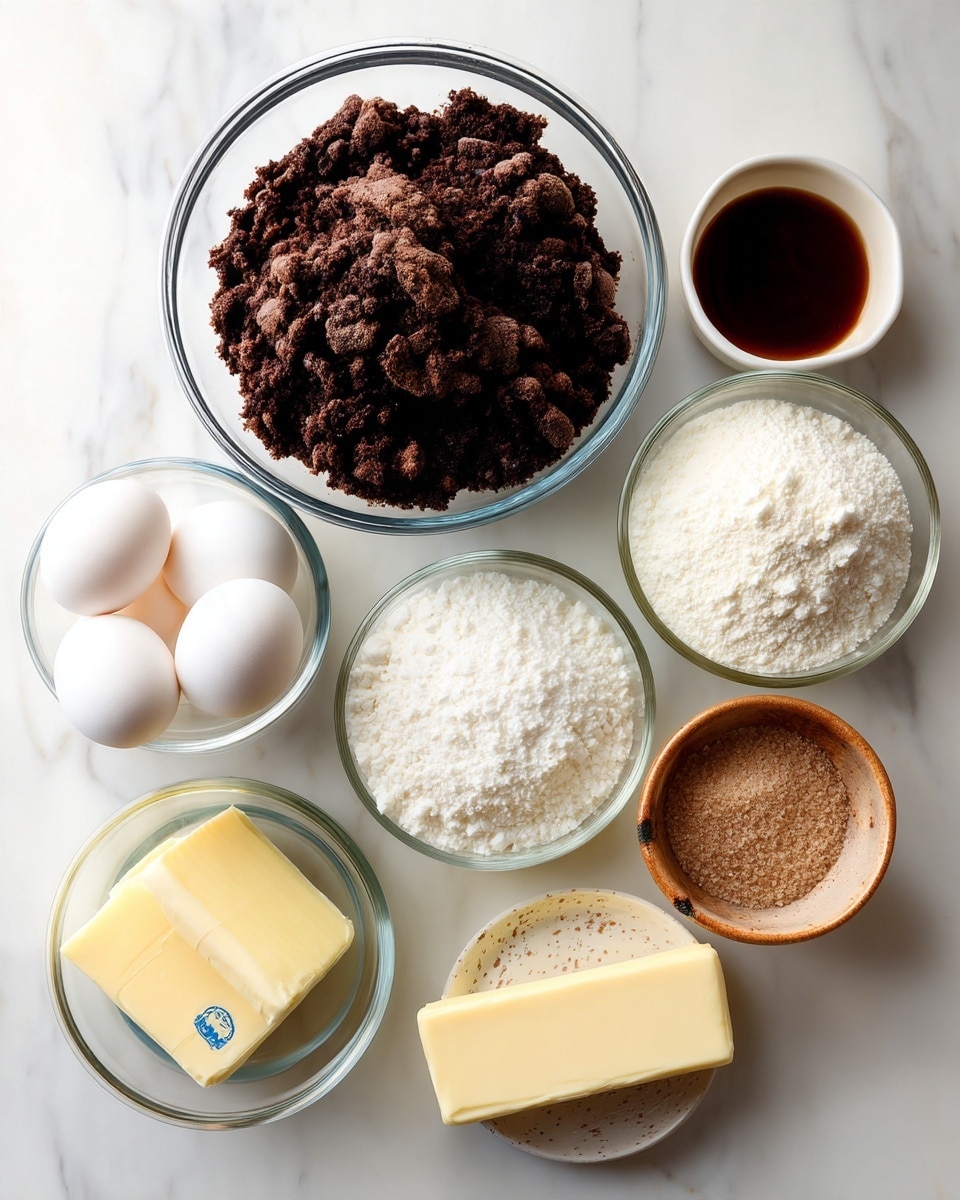
Ingredients
(Note: All ingredient amounts are listed in the recipe card below.)
Oreo Crust
2 cups oreo cookie crumbs
4 tablespoons butter unsalted – melted
Cheesecake Filling
24 ounces cream cheese softened to room temperature
1 cup granulated sugar
3 tablespoons cocoa powder
¼ cup milk
2 teaspoons white vinegar
⅓ cup sour cream
2 teaspoons vanilla extract
3 large eggs
1 egg yolk
Red Food Dye
Cream Cheese Topping
4 ounces cream cheese
⅓ cup granulated sugar
½ teaspoon vanilla extract
⅛ teaspoon salt
1 cup heavy cream
Directions
Step 1: Prepare the Oven and Pan
I start by preheating my oven to 350°F (175°C). While the oven heats, I prepare a springform pan by lining the bottom and sides with parchment paper. I like using parchment paper because it makes removing the finished cheesecake much easier and helps keep the edges looking neat.
Step 2: Make the Oreo Crust
In a medium mixing bowl, I combine the Oreo cookie crumbs and melted unsalted butter. I use a fork to mix everything until the crumbs are evenly coated and have a slightly crumbly, moist texture.
I transfer the mixture to my prepared springform pan and press it firmly into an even layer across the bottom, extending it slightly up the sides. I make sure the crust is compact so it holds together when sliced.
Once the crust is ready, I place the pan in the freezer while I prepare the cheesecake filling.
Step 3: Beat the Cream Cheese
In a large mixing bowl, I beat the softened cream cheese until completely smooth and free of lumps. I always make sure my cream cheese has reached room temperature before mixing because cold cream cheese can leave small lumps in the batter.
I add the granulated sugar and continue mixing until the mixture is smooth and creamy.
Step 4: Add the Red Velvet Flavorings
Next, I add the milk, white vinegar, vanilla extract, sour cream, and cocoa powder to the cream cheese mixture.
I blend everything until the ingredients are thoroughly incorporated. I occasionally stop to scrape down the sides and bottom of the bowl to ensure the filling has a consistent texture.
The cocoa powder gives the cheesecake its delicate chocolate flavor, while the vinegar and sour cream add the subtle tanginess I associate with traditional red velvet desserts.
Step 5: Incorporate the Eggs and Red Food Dye
I add the eggs one at a time, mixing gently after each addition. I avoid overmixing because too much air in the batter can cause the cheesecake to rise excessively and crack while cooling.
When I add the final egg yolk, I also add the red food dye. I use enough coloring to create a beautiful, deep red shade.
Because the cocoa powder naturally makes the batter slightly brown, I adjust the food coloring until I achieve the vibrant red velvet appearance I want.
Step 6: Fill the Crust
I remove the prepared Oreo crust from the freezer and carefully pour the red velvet cheesecake batter over it.
I gently shake or jiggle the pan to help the filling settle into an even layer. This also helps release some of the larger air bubbles trapped in the mixture.
Step 7: Bake the Cheesecake
I place the cheesecake in my preheated oven and bake it for approximately 60 minutes.
When the baking time is complete, I check that the outer edges look set while the center still has a slight jiggle. I don’t wait for the entire cheesecake to become firm because it will continue setting as it cools.
I turn off the oven and leave the cheesecake inside for another hour. This gradual cooling period helps the filling finish setting and reduces the risk of cracks caused by sudden temperature changes.
Step 8: Chill the Cheesecake
After the cheesecake has rested in the warm oven, I carefully remove it and allow it to cool further before transferring it to the refrigerator.
I refrigerate the cheesecake for at least 6 hours, although I prefer leaving it overnight. The extended chilling time helps the filling develop a firm, creamy texture that slices beautifully.
Step 9: Prepare the Cream Cheese Topping
When I’m ready to serve the cheesecake, I prepare the topping.
In a mixing bowl, I combine the cream cheese and granulated sugar, beating them together until smooth.
I add the vanilla extract and salt, then mix again until everything is incorporated.
In a separate bowl, I whip the heavy cream until stiff peaks form. I gently fold the whipped cream into the sweetened cream cheese mixture until it becomes light, fluffy, and completely smooth.
I take care not to deflate the whipped cream because I want the topping to maintain its airy texture.
Step 10: Decorate and Serve
I transfer the cream cheese topping to a piping bag fitted with a large star tip.
I pipe 6–8 decorative swirls around the top of the cheesecake, spacing them evenly for an elegant finish.
Finally, I carefully remove the cheesecake from the springform pan, slice it with a sharp knife, and serve.
For especially clean slices, I like dipping my knife in warm water and wiping it dry between cuts.
Servings and Timing
Servings
10 slices
Prep Time
20 minutes
Cook Time
1 hour
Oven Resting Time
1 hour
Chilling Time
At least 6 hours
Total Elapsed Time Approximately 8 hours 20 minutes
I usually prepare this cheesecake a day ahead because overnight chilling gives me the best texture and makes serving much more convenient. Although the hands-on preparation takes only about 20 minutes, I always plan for the baking, gradual cooling, and refrigeration time.
Variations
1. Chocolate Ganache Red Velvet Oreo Cheesecake
When I want an even richer dessert, I add a thin layer of chocolate ganache over the chilled cheesecake before piping on the cream cheese topping. I love how the glossy chocolate layer enhances the cocoa flavor and creates an extra indulgent finish.
2. Mini Red Velvet Oreo Cheesecakes
For parties, I sometimes prepare individual cheesecakes in a muffin pan lined with cupcake liners. I divide the Oreo crust and cheesecake filling among the liners and adjust the baking time to suit the smaller portions. I find these mini cheesecakes especially convenient for dessert tables and gatherings.
3. Extra Oreo Cheesecake
When I’m craving more cookies-and-cream flavor, I fold some roughly chopped Oreo cookies into the cheesecake batter before baking. I enjoy the little pockets of chocolate cookie throughout the creamy red velvet filling.
4. White Chocolate Red Velvet Cheesecake
I occasionally add melted, cooled white chocolate to the cheesecake filling for extra sweetness and a smoother, richer flavor. I particularly like this variation when preparing the dessert for Valentine’s Day.
5. Red Velvet Cheesecake with Chocolate Drizzle
For a simple decorating variation, I drizzle melted chocolate over the cream cheese swirls just before serving. I love the contrast between the dark chocolate and the bright white topping.
6. Strawberry Red Velvet Oreo Cheesecake
When fresh strawberries are available, I arrange a few sliced strawberries on top of the finished cheesecake. I find that their fresh, slightly tart flavor balances the richness of the cream cheese filling beautifully.
Storage/Reheating
Refrigerating
I store leftover Red Velvet Oreo Cheesecake in an airtight container in the refrigerator for up to 4–5 days.
I prefer keeping the cheesecake covered because cream cheese desserts can absorb odors from other foods in the refrigerator.
If I’ve already decorated the cheesecake with whipped cream topping, I make sure the container is tall enough to protect the swirls from being flattened.
Freezing
When I want to save cheesecake for later, I freeze individual slices.
I first place the slices on a parchment-lined tray and freeze them until firm. Then I wrap each slice tightly in plastic wrap and place it in a freezer-safe container.
I find that the cheesecake maintains its best quality for about 2 months in the freezer. Whenever possible, I freeze slices before adding the cream cheese topping because freshly prepared topping gives me the nicest appearance and texture.
Thawing
To thaw frozen cheesecake, I transfer the wrapped slices to the refrigerator and let them defrost overnight.
I avoid thawing cheesecake at room temperature for extended periods because the dairy-based filling needs to remain properly chilled.
Reheating
I never reheat this cheesecake because it is meant to be enjoyed cold.
For the creamiest serving texture, I sometimes let a refrigerated slice sit at room temperature for about 10–15 minutes before eating, returning any leftovers to the refrigerator promptly.
FAQs
1. Can I make Red Velvet Oreo Cheesecake ahead of time?
Yes, I actually prefer making this cheesecake one day before serving. I find that refrigerating it overnight allows the filling to set completely and makes slicing much easier. I usually prepare the cream cheese topping shortly before serving so the decorations look fresh and fluffy.
2. Why did my red velvet cheesecake crack?
I find that cheesecake can crack when the batter is overmixed, the oven temperature is too high, or the cheesecake cools too quickly. I avoid these problems by mixing the eggs gently, baking at the recommended temperature, and leaving the cheesecake in the turned-off oven for an additional hour. Even if a small crack appears, I can easily cover it with the cream cheese topping.
3. Can I use regular Oreos for the crust?
Absolutely. I use regular Oreo cookies, including their cream filling, when making the cookie crumbs. I crush them finely so they combine evenly with the melted butter and create a firm crust. I don’t need to remove the filling before crushing the cookies.
4. How do I know when my cheesecake is fully baked?
I look for edges that appear set and a center that still jiggles slightly when I gently move the pan. I avoid baking until the center becomes completely firm because that can lead to an overbaked, dry cheesecake. The filling continues to set during the hour in the warm oven and the subsequent refrigeration period.
5. Can I make this cheesecake without red food dye?
Yes, I can leave out the red food dye without significantly changing the flavor or texture. The cheesecake will have a light chocolate-brown appearance rather than the traditional red velvet color. I still get the delicious combination of cocoa, cream cheese, and Oreo crust.
6. Why is my cheesecake filling lumpy?
I usually notice lumps when the cream cheese is too cold before mixing. To prevent this, I allow the cream cheese to soften to room temperature and beat it until smooth before adding the other ingredients. I also scrape the bowl regularly to ensure everything blends evenly.
7. Can I use low-fat cream cheese instead of full-fat cream cheese?
I recommend full-fat cream cheese because it produces the rich, creamy texture I want in this dessert. Although I can use some reduced-fat cream cheese, I find that the filling may be softer and less luxurious. For special occasions, I prefer sticking with the full-fat version.
8. What does white vinegar do in red velvet cheesecake?
I use white vinegar to contribute the subtle tangy flavor associated with red velvet desserts. It also complements the sour cream and cream cheese, helping balance the sweetness of the sugar. I find that the small amount blends naturally into the filling without creating a noticeable vinegar taste.
9. Can I freeze Red Velvet Oreo Cheesecake with the topping?
Yes, I can freeze the cheesecake with the cream cheese topping, although the whipped topping may lose some of its original lightness after thawing. For the best presentation, I prefer freezing the cheesecake without the topping and adding freshly prepared cream cheese swirls after it has thawed completely in the refrigerator.
10. How do I get perfectly clean cheesecake slices?
I use a long, sharp knife and dip the blade into warm water before making each cut. I wipe the knife clean and dry between slices to prevent crumbs and filling from smearing across the cheesecake. I also make sure the cheesecake has chilled for at least 6 hours because a properly set filling is much easier to slice neatly.
Conclusion
Red Velvet Oreo Cheesecake is a dessert I love making whenever I want to combine beautiful presentation with rich, irresistible flavor. The crunchy Oreo crust, smooth red velvet cheesecake filling, and fluffy cream cheese topping create a wonderful combination of textures and tastes.
This Red Velvet Oreo Cheesecake is a rich, creamy, and indulgent dessert inspired by the famous Cheesecake Factory version. It features a crunchy chocolate Oreo cookie crust, a smooth and velvety red velvet cheesecake filling with a delicate cocoa flavor, and a light, fluffy cream cheese whipped topping. The combination of chocolate, tangy cream cheese, and sweetness creates an irresistible dessert that’s perfect for birthdays, Valentine’s Day, Christmas, holidays, and special celebrations. With its beautiful deep red filling and elegant white cream cheese swirls, this homemade cheesecake is as impressive as it is delicious.
Author:Amy
Prep Time:20 minutes
Cook Time:1 hour
Total Time:1 hour 20 minutes
Yield:10 slices
Category:Dessert
Method:Baking
Cuisine:American
Diet:Vegetarian
Ingredients
Oreo Crust
2 cups Oreo cookie crumbs
4 tablespoons unsalted butter, melted
Cheesecake Filling
24 ounces cream cheese, softened to room temperature
1 cup granulated sugar
3 tablespoons cocoa powder
¼ cup milk
2 teaspoons white vinegar
⅓ cup sour cream
2 teaspoons vanilla extract
3 large eggs
1 egg yolk
Red food dye, as needed
Cream Cheese Topping
4 ounces cream cheese
⅓ cup granulated sugar
½ teaspoon vanilla extract
⅛ teaspoon salt
1 cup heavy cream
Instructions
Step 1: Preheat the Oven and Prepare the Pan. Preheat the oven to 350°F (175°C). Prepare a springform pan by lining the bottom and sides with parchment paper. Make sure the parchment fits properly to help prevent sticking and make removing the finished cheesecake easier. Set the prepared pan aside while making the crust.
Step 2: Make the Oreo Cookie Crust. Place the Oreo cookie crumbs in a medium mixing bowl and add the melted unsalted butter. Stir thoroughly with a fork until all the crumbs are evenly coated and the mixture resembles moist, crumbly sand. Transfer the mixture into the prepared springform pan. Using the bottom of a measuring cup or the back of a spoon, press the crumbs firmly into an even layer across the bottom of the pan, extending them slightly up the sides. Make sure the crust is tightly packed so it holds together when sliced. Place the prepared crust in the freezer while making the cheesecake filling.
Step 3: Beat the Cream Cheese and Sugar. In a large mixing bowl, add the softened cream cheese. Using an electric hand mixer or stand mixer, beat until completely smooth, creamy, and free of lumps. Add the granulated sugar and continue mixing until fully incorporated. Scrape down the sides and bottom of the bowl as needed to ensure an evenly blended mixture. Using room-temperature cream cheese is important for achieving a silky cheesecake filling.
Step 4: Add the Red Velvet Flavorings. Add the milk, white vinegar, sour cream, vanilla extract, and cocoa powder to the cream cheese mixture. Mix until all the ingredients are thoroughly combined and the batter becomes smooth and uniform. Stop occasionally to scrape down the bowl. The cocoa powder provides a subtle chocolate flavor, while the vinegar and sour cream add the gentle tanginess associated with traditional red velvet desserts.
Step 5: Incorporate the Eggs and Red Food Coloring. Add the three large eggs one at a time, mixing gently after each addition until just incorporated. Avoid beating excessively because incorporating too much air can cause the cheesecake to rise too quickly and crack while cooling. Add the final egg yolk along with enough red food dye to achieve a rich, vibrant red velvet color. Mix gently until the color is evenly distributed throughout the batter. Adjust the coloring gradually, keeping in mind that the cocoa powder naturally gives the mixture a slightly brown undertone.
Step 6: Fill the Prepared Oreo Crust. Remove the chilled Oreo crust from the freezer. Carefully pour the red velvet cheesecake filling over the crust, spreading it evenly with a spatula if necessary. Gently shake or jiggle the springform pan to level the surface and release larger trapped air bubbles. Make sure the filling is evenly distributed before placing the cheesecake in the oven.
Step 7: Bake the Red Velvet Cheesecake. Place the cheesecake in the preheated oven and bake for approximately 60 minutes at 350°F (175°C). The cheesecake is ready when the outer edges appear set while the center still has a slight jiggle when the pan is gently moved. Avoid baking until the entire center becomes completely firm, as this can result in an overbaked, dry cheesecake. Once the baking time is complete, turn off the oven and leave the cheesecake inside for an additional hour. This gradual cooling period allows the filling to finish setting and helps reduce the risk of cracks caused by sudden temperature changes.
Step 8: Cool and Refrigerate the Cheesecake. After the cheesecake has rested in the turned-off oven for one hour, carefully remove it and place it on a cooling rack. Allow it to cool further before transferring it to the refrigerator. Refrigerate for at least 6 hours, preferably overnight, until the filling is completely chilled and firm. This extended chilling time is essential for developing the smooth, creamy texture and ensuring the cheesecake can be sliced neatly without losing its shape.
Step 9: Prepare the Cream Cheese Whipped Topping. When ready to decorate and serve, place the cream cheese and granulated sugar in a mixing bowl. Beat until smooth and creamy. Add the vanilla extract and salt, then mix again until fully incorporated. In a separate chilled mixing bowl, whip the heavy cream until stiff peaks form. Using a spatula, gently fold the whipped cream into the sweetened cream cheese mixture in batches until the topping becomes light, fluffy, and smooth. Avoid vigorous mixing because it can deflate the whipped cream and reduce the airy texture of the topping.
Step 10: Decorate and Serve the Cheesecake. Transfer the prepared cream cheese topping into a piping bag fitted with a large star tip. Pipe approximately 6–8 decorative swirls around the top of the chilled cheesecake, spacing them evenly for an elegant presentation. Carefully release and remove the sides of the springform pan, then transfer the cheesecake to a serving plate or cake stand. Use a long, sharp knife to cut the cheesecake into approximately 10 slices. For clean, professional-looking slices, dip the knife into warm water and wipe it dry between each cut. Serve chilled and enjoy the combination of crunchy Oreo crust, creamy red velvet filling, and fluffy cream cheese topping.
Notes
Use room-temperature cream cheese: Allow the cream cheese to soften completely before mixing. Cold cream cheese can create lumps that are difficult to remove and may prevent the filling from becoming smooth and creamy.
Choose full-fat cream cheese: Full-fat cream cheese provides the richest flavor and firmest, creamiest texture. Reduced-fat cream cheese may produce a softer filling.
Oreo cookie crust: Use regular Oreo cookies, including their cream filling, when preparing the crumbs. Crush them finely so they combine evenly with the melted butter and create a compact crust.
Press the crust firmly: Use the bottom of a measuring cup or a flat-bottomed glass to press the Oreo mixture firmly into the springform pan. A tightly packed crust holds together better when the cheesecake is sliced.
Chill the crust: Place the prepared Oreo crust in the freezer while making the cheesecake filling. This helps firm the butter and keeps the crust compact.
Do not overmix the eggs: Add the eggs one at a time and mix gently until just incorporated. Excessive mixing introduces air into the batter, which can contribute to cracking during baking and cooling.
Adjust the red food coloring: Add enough red food dye to achieve the desired deep red velvet appearance. The cocoa powder naturally darkens the filling, so gradually adjust the coloring until the desired shade is reached.
Food coloring is optional: The red food dye can be omitted without significantly affecting the cheesecake’s flavor or texture. The filling will have a light chocolate-brown color instead of the traditional red velvet appearance.
Importance of cocoa powder: Cocoa powder provides the subtle chocolate flavor associated with red velvet desserts without overpowering the cream cheese filling.
Purpose of white vinegar: White vinegar contributes a gentle tanginess that complements the sour cream and cream cheese. The small amount blends into the filling without creating a strong vinegar flavor.
Baking temperature: Bake the cheesecake at 350°F (175°C) for approximately 60 minutes. Oven temperatures can vary, so check the appearance and movement of the filling rather than relying only on the timer.
Checking cheesecake doneness: The outer edges should look set while the center still jiggles slightly when the pan is gently moved. The filling continues to firm during gradual cooling and refrigeration.
Preventing cheesecake cracks: Avoid overmixing, excessive baking, and sudden temperature changes. Leaving the cheesecake in the turned-off oven for an additional hour helps it cool gradually and reduces the likelihood of cracks.
Oven resting time: After baking, turn off the oven and leave the cheesecake inside for one hour. This additional resting period helps the filling finish setting while cooling slowly.
Chilling time: Refrigerate the cheesecake for at least 6 hours before serving. Overnight refrigeration is recommended for the firmest texture and cleanest slices.
Make-ahead preparation: Prepare the cheesecake one day before serving and refrigerate overnight. Make the cream cheese whipped topping closer to serving time for the freshest appearance and fluffiest texture.
Whipping the heavy cream: Whip the heavy cream until stiff peaks form before gently folding it into the sweetened cream cheese mixture. Avoid overwhipping or vigorous folding to preserve the light, airy consistency.
Decorating tips: Use a piping bag fitted with a large star tip to create 6–8 decorative cream cheese swirls around the top of the cheesecake. Keep the cheesecake well chilled while decorating.
Chocolate ganache variation: Spread a thin layer of chocolate ganache over the chilled cheesecake before adding the cream cheese topping for an extra-rich chocolate flavor.
Mini cheesecake variation: Divide the Oreo crust and red velvet cheesecake filling among muffin cups lined with cupcake liners. Adjust the baking time for the smaller portions and begin checking for doneness earlier.
Extra Oreo variation: Fold roughly chopped Oreo cookies into the cheesecake batter before baking for additional cookies-and-cream flavor and texture.
White chocolate variation: Add melted and cooled white chocolate to the cheesecake filling for extra sweetness and a smoother, richer flavor.
Chocolate drizzle variation: Drizzle melted chocolate over the finished cream cheese swirls just before serving for an elegant decorative finish.
Strawberry variation: Decorate the cheesecake with fresh sliced strawberries for a fruity contrast that balances the richness of the cream cheese filling.
Refrigerator storage: Store leftover cheesecake in an airtight container in the refrigerator for up to 4–5 days. Keep it covered to prevent the cream cheese filling from absorbing refrigerator odors.
Protecting decorations: If the cheesecake has already been decorated, use a tall airtight container to prevent the whipped cream cheese swirls from being flattened.
Freezer storage: Freeze individual cheesecake slices on a parchment-lined tray until firm. Wrap each slice tightly in plastic wrap and transfer to a freezer-safe container. Freeze for up to 2 months for the best quality.
Freezing with topping: The cheesecake can be frozen with the cream cheese topping, but the whipped topping may lose some of its lightness after thawing. For the best presentation, freeze without the topping and decorate after thawing.
Thawing: Transfer frozen cheesecake slices to the refrigerator and allow them to thaw overnight. Avoid leaving cheesecake at room temperature for extended periods because of its dairy-based filling.
Serving temperature: Serve the cheesecake chilled. For a slightly softer, creamier texture, allow individual slices to sit at room temperature for approximately 10–15 minutes before eating.
Reheating: Do not reheat this cheesecake. It is intended to be enjoyed cold.
Clean slicing: Use a long, sharp knife dipped in warm water and wiped dry between cuts. Make sure the cheesecake has chilled for at least 6 hours before slicing.
Serving suggestions: Serve with fresh strawberries, chocolate drizzle, additional Oreo crumbs, or a cup of coffee. The rich cheesecake filling and chocolate cookie crust make this dessert especially suitable for celebrations and special occasions.