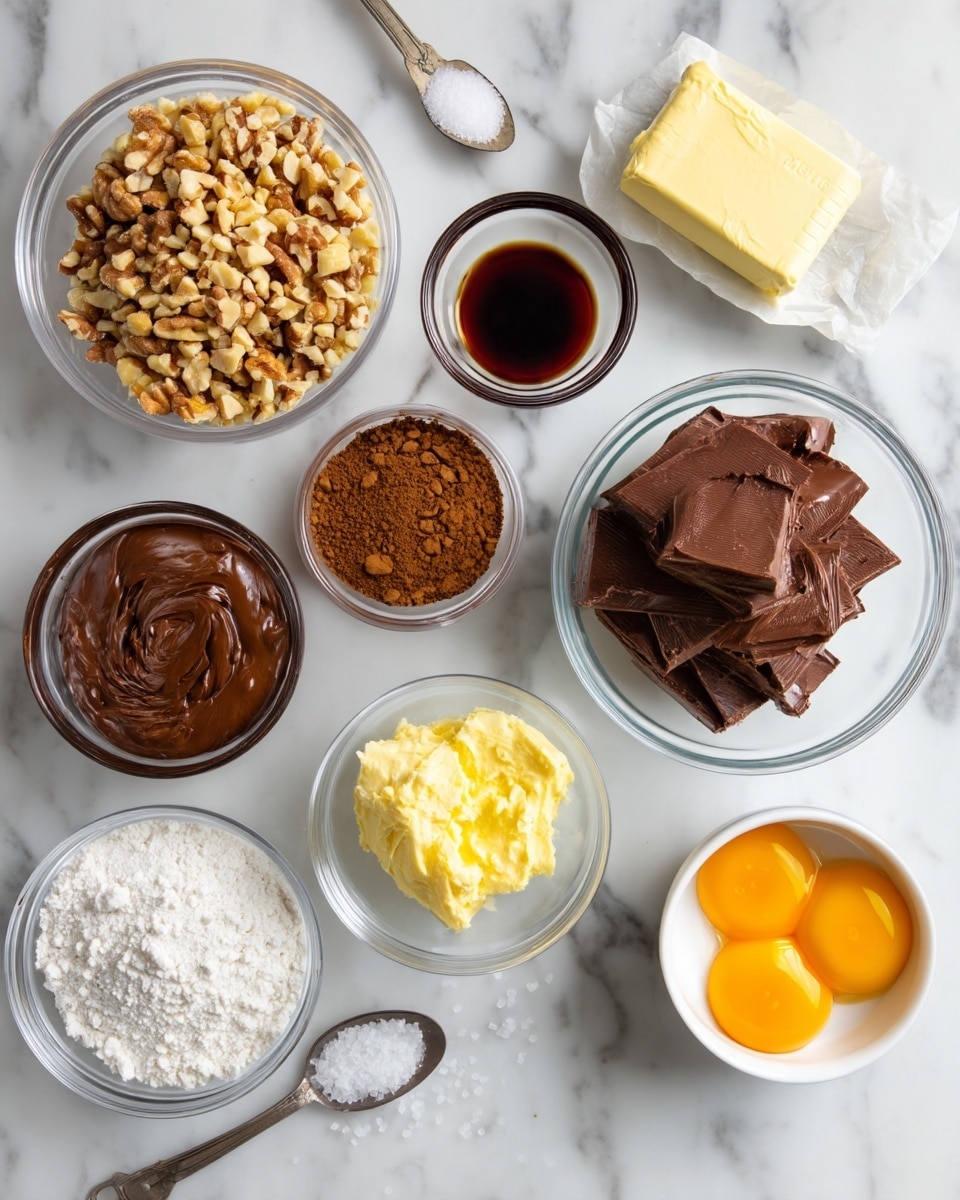
Why You’ll Love Nutella Cookies – Soft, Chewy, and Filled with Chocolate Hazelnut Goodness Recipe
Rich chocolate-hazelnut flavor: I love how the cocoa powder, Nutella, and chopped hazelnuts come together to create an indulgent chocolate flavor with a delicious nutty finish.
Soft and chewy texture: The cookies bake up tender in the center, while the hazelnut coating adds a satisfying crunch.
Beautiful presentation: I find that the Nutella-filled thumbprint centers make these cookies look elegant without requiring complicated decorating techniques.
Simple pantry ingredients: I can prepare these cookies with familiar baking staples and a few tablespoons of Nutella.
Perfect for special occasions: I enjoy making these cookies for Christmas cookie trays, birthday celebrations, parties, and homemade gifts.
Easy to prepare ahead: The dough can chill in the refrigerator for up to two days, making it convenient to prepare in advance.
A delicious homemade treat: I think these cookies taste especially wonderful with a cup of coffee, tea, or cold milk.
Ingredients
(Note: All ingredient amounts are listed in the recipe card below.)
½ cup butter – softened
½ cup granulated sugar
2 egg yolks
3 tablespoons Nutella
1 teaspoon vanilla extract
1 cup all-purpose flour
½ teaspoon salt
¼ cup cocoa powder
2 egg whites
1 cup hazelnuts finely chopped
Filling:
– ½ cup Nutella
Directions
Step 1: Cream the Butter and Sugar
I start by placing the softened butter and granulated sugar in a medium mixing bowl. Using an electric mixer, I beat them together until the mixture becomes smooth, creamy, and slightly fluffy. This helps create the soft, tender texture I want in my cookies.
Step 2: Add the Wet Ingredients
Next, I mix in the egg yolks, Nutella, and vanilla extract. I continue beating until everything is thoroughly combined and the mixture looks smooth and chocolatey. I make sure to scrape down the sides of the bowl so all the ingredients are evenly incorporated.
Step 3: Incorporate the Dry Ingredients
I gradually add the all-purpose flour, cocoa powder, and salt to the wet mixture. I mix gently until a soft chocolate cookie dough forms. I avoid overmixing because I want the finished cookies to remain tender rather than dense or tough.
Step 4: Chill the Cookie Dough
Once the dough is ready, I cover the bowl and refrigerate it for at least 1 hour. If I’m preparing ahead, I can leave the dough in the refrigerator for up to 2 days. Chilling makes the dough easier to shape and helps the cookies hold their form during baking.
Step 5: Prepare the Oven and Baking Sheet
When I’m ready to bake, I preheat my oven to 350°F (175°C). I line a baking sheet with parchment paper to prevent sticking and make cleanup easier.
Step 6: Prepare the Egg Whites and Hazelnuts
I place the egg whites in a small bowl and whisk them with a fork for about 1 minute. Then I put the finely chopped hazelnuts in a separate shallow bowl. I like to keep both bowls close to my work area so coating the cookies is quick and easy.
Step 7: Shape the Cookie Dough
I scoop small portions of chilled cookie dough and roll them between my palms to create smooth, 1-inch balls. I try to keep the portions uniform so the cookies bake evenly.
Step 8: Coat the Cookies
I dip each cookie dough ball into the whisked egg whites, then roll it in the chopped hazelnuts until the outside is evenly coated. I arrange the coated balls on the prepared baking sheet, leaving about 1 inch of space between them.
Step 9: Create the Thumbprint Centers
Using my thumb or the back of a small measuring spoon, I gently press an indentation into the center of each dough ball. I make the indentation deep enough to hold the Nutella filling without pressing completely through the cookie.
Step 10: Bake the Cookies
I place the baking sheet in the preheated oven and bake the cookies for approximately 10 minutes. Once baked, I remove them from the oven and carefully transfer them to a wire cooling rack. I let them cool before adding the filling so the Nutella stays neatly in the centers.
Step 11: Warm the Nutella Filling
I place the remaining Nutella in a microwave-safe bowl and heat it for about 30 seconds to soften. I stir until it becomes smooth and easy to spoon into the cookies.
Step 12: Fill and Set the Cookies
Finally, I spoon the softened Nutella into each cookie indentation. I take my time to fill the centers neatly, creating a beautiful chocolate-hazelnut finish. I allow the filling to set before serving.
Servings and Timing
I find this recipe ideal for a small batch of homemade cookies, especially when I want something special without making too many.
Servings: 16 cookies
Prep Time: 10 minutes
Cook Time: 10 minutes
Chill Time: 1 hour
Total Time: 1 hour 20 minutes
The total time does not include any additional cooling or filling-setting time. When I prepare the dough ahead of time, I find that the final baking and assembly process goes very quickly.
Variations
Dark Chocolate Nutella Cookies
When I want a deeper chocolate flavor, I like using dark cocoa powder instead of regular cocoa powder. This gives the cookies a more intense chocolate taste and a darker appearance that pairs beautifully with the sweet Nutella filling.
Almond-Coated Nutella Cookies
Sometimes I replace the finely chopped hazelnuts with finely chopped almonds. I enjoy the slightly different nutty flavor and the delicate crunch that almonds bring to the cookies.
Peanut Butter Chocolate Cookies
For a different flavor combination, I occasionally replace the Nutella filling with creamy peanut butter. I love how the slightly salty peanut butter balances the sweetness of the chocolate cookie base.
White Chocolate-Filled Cookies
When I want a sweeter variation, I fill the cookie centers with melted white chocolate instead of Nutella. The contrast between the dark chocolate cookies and creamy white centers makes them especially attractive on a dessert platter.
Espresso Chocolate Cookies
I sometimes add a small amount of instant espresso powder to the cookie dough. I find that coffee enhances the cocoa flavor without making the cookies taste strongly of coffee.
Festive Nutella Cookies
During the holidays, I like decorating the filled cookies with a light drizzle of melted chocolate or a sprinkle of festive decorations. It is an easy way to make them look extra special for celebrations.
Storage/Reheating
Room Temperature Storage
I store completely cooled Nutella Cookies in an airtight container at room temperature for up to 3 days. I keep them in a cool, dry place away from direct sunlight and excessive heat to help preserve their texture and prevent the filling from becoming too soft.
Refrigerator Storage
If I want to keep the cookies longer, I place them in an airtight container in the refrigerator for up to 1 week. I like to separate the layers with parchment paper so the Nutella centers do not stick together.
Before serving refrigerated cookies, I usually let them sit at room temperature for about 15–20 minutes. This allows the cookie texture and Nutella filling to soften slightly.
Freezing Nutella Cookies
For longer storage, I freeze the baked cookies in a single layer until firm, then transfer them to a freezer-safe container with parchment paper between the layers. I keep them frozen for up to 2 months for the best quality.
When I’m ready to enjoy them, I thaw the cookies in the refrigerator or at room temperature. I prefer freezing the cookies without the Nutella filling and adding it after thawing for a fresher appearance.
Freezing the Cookie Dough
I can also freeze the unbaked cookie dough balls before coating them in egg whites and hazelnuts. I arrange the dough balls on a baking sheet, freeze until firm, and transfer them to a freezer-safe bag or container.
I keep the dough frozen for up to 2 months. When I want fresh cookies, I thaw the dough in the refrigerator, then coat, shape, and bake according to the recipe.
Reheating
I generally prefer serving Nutella Cookies at room temperature because their soft texture and creamy filling are best enjoyed without reheating.
If I want a slightly warm cookie, I microwave an individual cookie for about 5–8 seconds. I use short intervals because the Nutella filling can become very hot and runny if overheated.
FAQs
1. Can I Make Nutella Cookies Ahead of Time?
Yes, I often prepare the cookie dough in advance when I have a busy baking schedule. I cover the dough tightly and refrigerate it for up to 2 days before shaping and baking. This makes the recipe especially convenient for holidays and parties.
2. Why Do I Need to Chill the Cookie Dough?
I chill the dough because it helps firm up the butter and makes the dough easier to handle. Chilling also reduces excessive spreading during baking, allowing the cookies to maintain their rounded shape and thumbprint centers.
3. Can I Make These Cookies Without Hazelnuts?
Yes, I can omit the hazelnut coating if I prefer a nut-free exterior. The cookies will still have a rich chocolate flavor and creamy Nutella center. However, I keep in mind that Nutella itself contains hazelnuts, so removing the coating does not make the recipe suitable for someone with a hazelnut allergy.
4. How Do I Keep the Thumbprint Indentations from Disappearing?
I make sure the dough is properly chilled before shaping the cookies. I also press a clear, deep indentation into each dough ball before baking. If the centers puff up slightly during baking, I gently press them again with the back of a small spoon while the cookies are still warm.
5. Can I Use a Different Chocolate Hazelnut Spread?
Yes, I can substitute another chocolate hazelnut spread for Nutella. I prefer choosing one with a smooth, creamy consistency so it mixes easily into the dough and creates a soft, attractive filling.
6. How Do I Know When the Cookies Are Done Baking?
I look for cookies that appear set around the edges while remaining slightly soft in the center. Since chocolate cookie dough is dark, I do not rely on color alone. I usually remove them after about 10 minutes and let them finish firming up as they cool.
7. Can I Make These Nutella Cookies Gluten-Free?
I can experiment with a gluten-free all-purpose flour blend designed for a 1:1 replacement. I prefer using a blend formulated for cookies and baked goods. Since gluten-free flours absorb moisture differently, I keep in mind that the dough texture and final results may vary.
8. Why Are My Nutella Cookies Dry or Crumbly?
When my cookies turn out dry, I usually check whether I measured too much flour or baked them too long. I prefer spooning flour into the measuring cup and leveling it rather than packing it down. I also avoid overbaking because the cookies continue to firm up while cooling.
9. Can I Add Chocolate Chips to the Dough?
Yes, I sometimes fold a small handful of mini chocolate chips into the dough for extra chocolate flavor. I like using mini chips because they distribute more evenly and do not interfere as much with shaping the thumbprint centers.
10. What Is the Best Way to Fill Nutella Cookies Neatly?
I find that gently warming the Nutella makes filling the cookies much easier. I can use a small spoon to portion the filling into each indentation, but I especially like using a piping bag with a small opening for a cleaner, more consistent finish. I let the filling settle and set before arranging the cookies on a serving platter.
Conclusion
Nutella Cookies are a wonderful combination of rich chocolate flavor, creamy hazelnut filling, and a satisfying crunchy coating. I love how this recipe transforms simple ingredients into beautiful thumbprint cookies that look impressive but are surprisingly easy to prepare. The soft chocolate centers, finely chopped hazelnuts, and smooth Nutella filling make every bite deliciously indulgent.
These Nutella Cookies are rich, soft, and chewy chocolate thumbprint cookies coated in finely chopped hazelnuts and filled with smooth, creamy Nutella. Each cookie features a tender chocolate center, a slightly crisp and nutty exterior, and a delicious chocolate-hazelnut filling. Made with simple baking ingredients, these homemade cookies are perfect for Christmas cookie trays, holiday gatherings, birthdays, dessert platters, and homemade gifts. Their beautiful thumbprint centers and irresistible combination of cocoa, hazelnuts, and Nutella make them an elegant treat that tastes wonderful with coffee, tea, or cold milk.
Author:Amy
Prep Time:10 minutes
Cook Time:10 minutes
Total Time:20 minutes
Yield:16 cookies
Category:Cookies
Method:Baking
Cuisine:American
Diet:Vegetarian
Ingredients
½ cup butter, softened
½ cup granulated sugar
2 egg yolks
3 tablespoons Nutella
1 teaspoon vanilla extract
1 cup all-purpose flour
½ teaspoon salt
¼ cup cocoa powder
2 egg whites
1 cup hazelnuts, finely chopped
For the Nutella Filling
½ cup Nutella
Instructions
Step 1: Cream the Butter and Sugar. Place the softened butter and granulated sugar in a medium mixing bowl. Using an electric hand mixer or stand mixer, beat the ingredients together until the mixture becomes smooth, creamy, and slightly fluffy. Scrape down the sides of the bowl as needed to ensure the butter and sugar are evenly combined. This creaming process helps create the soft, tender texture of the finished cookies.
Step 2: Add the Egg Yolks, Nutella, and Vanilla. Add the egg yolks, three tablespoons of Nutella, and vanilla extract to the creamed butter mixture. Beat until everything is thoroughly incorporated and the mixture becomes smooth, rich, and chocolatey. Stop occasionally to scrape down the sides and bottom of the bowl so all ingredients are evenly distributed throughout the dough.
Step 3: Incorporate the Dry Ingredients. Gradually add the all-purpose flour, cocoa powder, and salt to the wet ingredients. Mix gently on low speed or use a spatula to fold everything together until a soft chocolate cookie dough forms. Make sure no dry pockets of flour or cocoa powder remain. Avoid overmixing because excessive mixing can make the cookies dense or tough instead of soft and tender.
Step 4: Chill the Chocolate Cookie Dough. Cover the mixing bowl tightly with plastic wrap or a suitable lid and place it in the refrigerator for at least 1 hour. Chilling firms the butter, makes the dough easier to handle, and helps the cookies maintain their rounded shape during baking. For make-ahead preparation, the dough can remain covered in the refrigerator for up to 2 days before shaping and baking.
Step 5: Preheat the Oven and Prepare the Baking Sheet. When ready to bake, preheat the oven to 350°F (175°C). Line a large baking sheet with parchment paper to prevent sticking and make cleanup easier. Arrange the baking sheet and coating ingredients near your workspace so the cookies can be shaped and coated efficiently.
Step 6: Prepare the Egg Whites and Chopped Hazelnuts. Place the egg whites in a small bowl and whisk them lightly with a fork for approximately 1 minute until loosened and slightly frothy. Pour the finely chopped hazelnuts into a separate shallow bowl. Keep both bowls nearby because each cookie dough ball will be dipped into the egg whites and then rolled in the chopped hazelnuts before baking.
Step 7: Shape the Cookie Dough into Balls. Remove the chilled chocolate cookie dough from the refrigerator. Scoop small, evenly sized portions of dough and roll them gently between your palms to form smooth balls approximately 1 inch in diameter. Try to keep the balls uniform in size so they bake evenly. If the dough becomes too soft while shaping, return it to the refrigerator briefly until firm enough to handle.
Step 8: Coat the Cookies with Egg Whites and Hazelnuts. Dip each chocolate cookie dough ball into the lightly whisked egg whites, allowing any excess to drip off. Immediately roll the dough ball in the finely chopped hazelnuts until the outside is evenly coated. Place the coated balls on the prepared parchment-lined baking sheet, leaving approximately 1 inch of space between each cookie to allow for slight spreading during baking.
Step 9: Create the Thumbprint Indentations. Using your thumb or the rounded back of a small measuring spoon, gently press an indentation into the center of each coated cookie dough ball. Make the indentation deep and wide enough to hold the Nutella filling, but avoid pressing completely through the bottom of the cookie. Work carefully to maintain the rounded shape and keep the hazelnut coating attached to the exterior.
Step 10: Bake the Nutella Thumbprint Cookies. Transfer the prepared baking sheet to the preheated oven and bake at 350°F (175°C) for approximately 10 minutes. The cookies should appear set around the edges while remaining slightly soft in the center. Because the chocolate dough is dark, avoid relying on color alone to determine doneness. Remove the baking sheet from the oven and allow the cookies to firm up briefly before carefully transferring them to a wire cooling rack. If the thumbprint centers have puffed up slightly during baking, gently press them again with the back of a small spoon while the cookies are still warm. Allow the cookies to cool before adding the filling.
Step 11: Warm the Nutella Filling. Place the remaining half cup of Nutella in a microwave-safe bowl. Microwave for approximately 30 seconds, just until the spread becomes softer and easier to spoon or pipe. Stir thoroughly until smooth and creamy. Avoid overheating because the Nutella should remain thick enough to stay neatly inside the cookie indentations.
Step 12: Fill the Cookies and Allow the Centers to Set. Using a small spoon or piping bag, carefully fill each cooled thumbprint indentation with the softened Nutella. Distribute the filling evenly, creating smooth, attractive chocolate-hazelnut centers. Allow the Nutella filling to settle and set before arranging the cookies on a serving platter or transferring them to an airtight storage container. Serve at room temperature and enjoy the combination of soft chocolate cookies, crunchy hazelnut coating, and creamy Nutella filling.
Notes
Use softened butter: Allow the butter to soften at room temperature before mixing. Softened butter creams more easily with sugar and helps create a tender cookie texture. Avoid using completely melted butter because it can make the dough too soft.
Choose creamy Nutella: Use smooth Nutella or another creamy chocolate-hazelnut spread for the cookie dough and filling. A smooth consistency makes mixing and filling easier.
Measure flour carefully: Spoon the flour into the measuring cup and level it without packing. Adding too much flour can make the cookies dry, dense, or crumbly.
Do not overmix the dough: Once the flour, cocoa powder, and salt are added, mix only until combined. Excessive mixing can develop gluten and make the finished cookies tough.
Chill the dough thoroughly: Refrigerate the cookie dough for at least 1 hour before shaping. Chilling helps firm the butter, makes rolling easier, and reduces excessive spreading during baking.
Make-ahead dough: The prepared cookie dough can be covered tightly and refrigerated for up to 2 days before shaping and baking, making this recipe convenient for holidays and busy schedules.
Uniform cookie size: Roll the chilled dough into approximately 1-inch balls. Keeping the cookies similar in size ensures more consistent baking.
Prepare the egg whites correctly: Lightly whisk the egg whites with a fork for about 1 minute before dipping the cookie dough balls. The egg whites help the finely chopped hazelnuts adhere to the outside.
Finely chop the hazelnuts: Use finely chopped hazelnuts for an even coating and pleasant crunch. Large pieces may not stick as easily to the dough.
Hazelnut coating: Dip each dough ball into the whisked egg whites before rolling it in the chopped hazelnuts. Coat evenly for a beautiful nutty exterior.
Make deep thumbprint centers: Press a clear indentation into each dough ball before baking. The center should be deep enough to hold the Nutella filling without breaking through the bottom.
Restore the indentations if necessary: If the thumbprint centers puff up during baking, gently press them again with the back of a small spoon while the cookies are still warm.
Baking temperature: Bake at 350°F (175°C) for approximately 10 minutes. Oven temperatures may vary, so monitor the cookies carefully.
Checking doneness: Look for edges that appear set while the centers remain slightly soft. Chocolate cookies are naturally dark, so texture is a better indicator than color.
Avoid overbaking: Remove the cookies once the edges are set. They continue to firm up as they cool, and excessive baking can make them dry or crumbly.
Cool before filling: Allow the baked cookies to cool before adding Nutella. Filling cookies while they are too hot can make the spread overly runny.
Warm Nutella gently: Microwave the Nutella filling for approximately 30 seconds and stir until smooth. Warm only until it becomes easy to spoon or pipe.
Neat filling technique: Use a small spoon or piping bag with a narrow opening to fill the thumbprint centers neatly and evenly.
Allow the filling to set: Let the Nutella settle before stacking, storing, or serving the cookies to help preserve their appearance.
Dark chocolate variation: Replace regular cocoa powder with dark cocoa powder for a deeper chocolate flavor and darker cookie appearance.
Almond-coated variation: Replace the chopped hazelnuts with finely chopped almonds for a different nutty flavor and delicate crunch.
Peanut butter filling variation: Replace the Nutella filling with creamy peanut butter for a sweet and slightly salty chocolate-peanut butter combination.
White chocolate filling variation: Fill the cookie centers with melted white chocolate instead of Nutella for a beautiful contrast between dark chocolate cookies and creamy white centers.
Espresso chocolate variation: Add a small amount of instant espresso powder to the dough to enhance the chocolate flavor without making the cookies taste strongly of coffee.
Festive holiday variation: Decorate the filled cookies with melted chocolate drizzle or festive sprinkles for Christmas cookie trays and special celebrations.
Extra chocolate chips: Fold a small handful of mini chocolate chips into the cookie dough for additional chocolate flavor. Mini chips distribute more evenly and interfere less with shaping.
Alternative chocolate-hazelnut spread: Another smooth chocolate-hazelnut spread can replace Nutella in both the dough and filling.
Nut allergy consideration: Omitting the chopped hazelnut coating does not make these cookies nut-free because Nutella itself contains hazelnuts. Use appropriate nut-free substitutions if preparing cookies for someone with a nut allergy, and verify all ingredient labels.
Gluten-free variation: Experiment with a gluten-free all-purpose flour blend formulated for a 1:1 replacement. Results may vary because gluten-free flours absorb moisture differently.
Room-temperature storage: Store completely cooled cookies in an airtight container at room temperature for up to 3 days. Keep them in a cool, dry place away from direct sunlight and excessive heat.
Refrigerator storage: Store cookies in an airtight container in the refrigerator for up to 1 week. Separate layers with parchment paper to prevent the Nutella centers from sticking together.
Serving refrigerated cookies: Allow chilled cookies to sit at room temperature for approximately 15–20 minutes before serving so the cookie texture and Nutella filling soften slightly.
Freezer storage: Freeze baked cookies in a single layer until firm, then transfer them to a freezer-safe container with parchment paper between layers. Freeze for up to 2 months for the best quality.
Freezing without filling: For the freshest appearance, freeze the baked cookies before adding Nutella and fill the centers after thawing.
Freezing cookie dough: Freeze unbaked cookie dough balls before coating them in egg whites and hazelnuts. Once firm, transfer them to a freezer-safe bag or container and freeze for up to 2 months.
Baking frozen dough: Thaw frozen cookie dough balls in the refrigerator before coating them with egg whites and hazelnuts, creating thumbprint centers, and baking according to the recipe.
Thawing baked cookies: Thaw frozen cookies in the refrigerator or at room temperature before serving. Add fresh Nutella filling after thawing if the cookies were frozen unfilled.
Reheating: These cookies are best enjoyed at room temperature. If a slightly warm cookie is preferred, microwave an individual cookie for approximately 5–8 seconds, taking care not to overheat the Nutella filling.
Serving suggestions: Serve Nutella Cookies with coffee, tea, cold milk, or hot chocolate. They also make beautiful additions to holiday cookie boxes, dessert platters, and homemade gift packages.